3DS: The 12 tips, tricks, pitfalls and pro-hints you NEED to know from day one
A crash course in quickly making friends with your 3DS, based on our two-weeks' experience
8. Dirty business
Sparkly and shiny like unicorn hooves it may be, but those glimmering, incandescent properties make the 3DS a total fingerprint magnet. It’s also quite partial to dust, and we’ve found that those non-specific little ‘bits’ that always stick to the screen of any handheld are way more obvious.
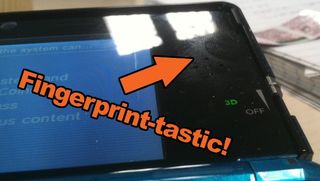
Basically, have an anti-static cloth with you at all times and be ready to polish and preen a lot. It’s a more high-maintenance handheld than you’re used to, but it’s so pretty when it’s cleaned up that the extra work is well worth it.
9. Navigation short-cuts
Simple one this, but it’ll save you a whole crapload of time in the long-run. When you quit out of a game or program, you’ll get the option of keeping it running in the background, just like on an iPhone. A menu will pop up on the bottom screen with touch screen controls to sort all that out, but it’s far quicker and simpler just to use the face button short-cuts.
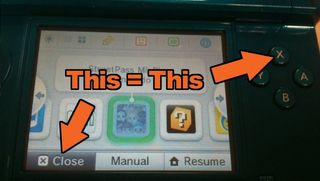
X requests a close down, A confirms it. Simple as that. Get that little combo in your muscle memory and navigation will immediately become a lot less faff. Also, if you bring up the built-in manual, L and R act as a fast Page Down/Page up control.
10. You can completely customise the dashboard
Sick of scrolling past the health and safety information every time you want to get to something that’s actually fun? No problem. The layout of the 3DS’ dashboard is completely customisable. The interface for doing this works just the same as it does on an iPhone. Just hold the stylus down on the icon you want to move until it ‘pops’ up, then drag it to where you want it.
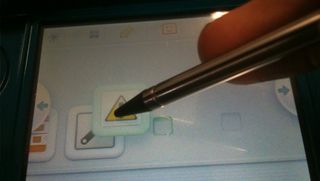
One point of note though. The 3DS doesn’t automatically rearrange icons to fill gaps in the same way that the iPhone does. If you leave a space, you’ll need to manually drag the other icons along to fill it. A bit of an annoyance, but fortunately there are multiple levels of zoom on the dashboard, so pull right out to make the process quicker.
11. Power management
Basically, you don’t need to worry too much about power, despite the scare stories of a 3 – 5 hour battery life. The charge cradle means that powering up your 3DS is as easy as putting it down on a table, so keep that plugged in at all times and just make it your 3DS’ standard resting position when you’re not using it. You won’t even notice you’re charging it.
Sign up to the GamesRadar+ Newsletter
Weekly digests, tales from the communities you love, and more
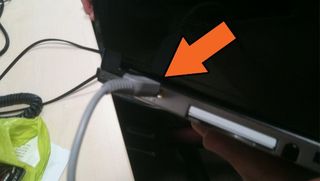
Above: Charging dock too bulky for in-transit use? Then screw it!
When you’re out and about, just be sensible about usage. Treat your 3DS the same way you would a smart phone, and prioritise the functionality you really need. If you just want to play some games on a train, turn the WiFi off using the switch on the right-hand side. You can lower the screen brightness with the icon in the top-left of the touch screen, and also activate a blanket power-saving mode. Though you will need to put up with lowered screen contrast if you use that.
And don’t forget, if you want to charge on the move, you can always plug the power cable directly into the back of the 3DS without using the cradle. It’ll save space in your bag, making on-train charging a lot more feasible.
12. Porting over your downloaded DSi content
With SD card functionality, the 3DS can run a whole bunch of different media. If you have an SD card from a DSi, it’ll happily read all your old photos, but you should be aware that at the moment it won’t recognise any downloaded games. There’s no known solution at the moment, but we assume the issue will be fixed with a firmware update or through the 3DS Shop when it launches. We can’t imagine Nintendo deserting all the games and demos you downloaded through your last-gen DS, and we’ll get you posted as soon as we hear about the fix.


See Mario, Link, Samus and more running around in the real world
March 25th, 2011


