Alien Isolation ID tags location guide
Follow our illustrated guide to track down all 50 ID tags in Alien Isolation and unlock The Taken Achievement or Trophy
- Mission 2 - Welcome to Sevastopol
- Mission 3 - Encounters
- Mission 4 - Seegson Communications
- Mission 5 - The Quarantine
- Mission 6 - Outbreak
- Mission 7 - Seegson Synthetics
- Mission 8 - Haven
- Mission 10 - The Trap
- Mission 11 - Hazard Containment
- Mission 12 - A Synthetic Solution
- Mission 13 - Consultation
- Mission 14 - The Descent
- Mission 15 - The Message
- Mission 16 - Transmission
- Mission 17 - Desolation
- Mission 18 - Tomorrow, Together
As you round up Alien Isolation ID tags during your journey, it becomes very clear that there are many crew members who are missing and unaccounted for. By picking up these strewn tags, you can figure out who they all were by piecing together your personnel log, so they will at least be remembered in your report. Overall there are 50 ID tags to discover, and you'll need every one of them to unlock The Taken Achievement or Trophy. While some are in plain sight, others are well hidden off the beaten track, but you can ensure you complete your collection by following our guide.
If you're looking for more collectibles, then we also have a guide for where to find all of the Alien Isolation archive logs.
Mission 2 - Welcome to Sevastopol
Z.Watson
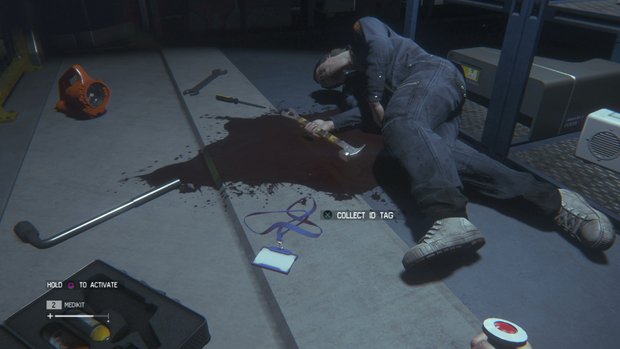
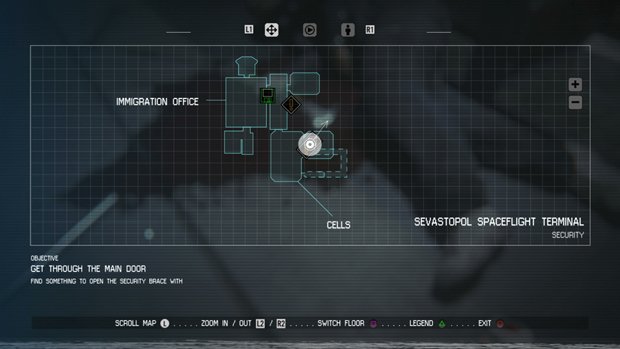
Sevastopol Spaceflight Terminal Security: After climbing through the vent in the Cells, grab the ID by the body.
A.Fielding
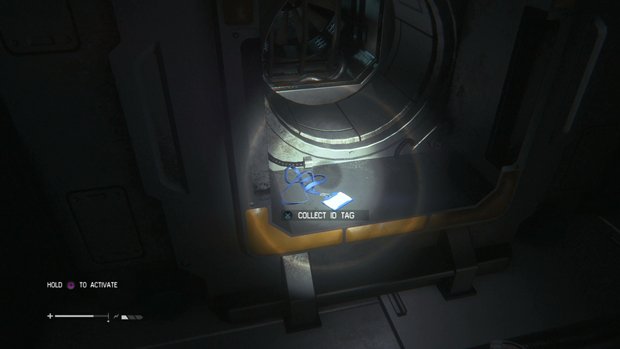
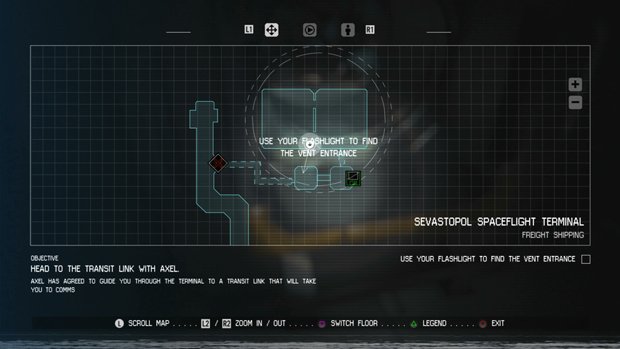
Sevastopol Spaceflight Terminal Freight Shipping: After you first equip your flashlight to look for the vent entrance with Axel, go through the first doorway on your left then look in the vent on the left hand side.
Mission 3 - Encounters
A.Hutchison
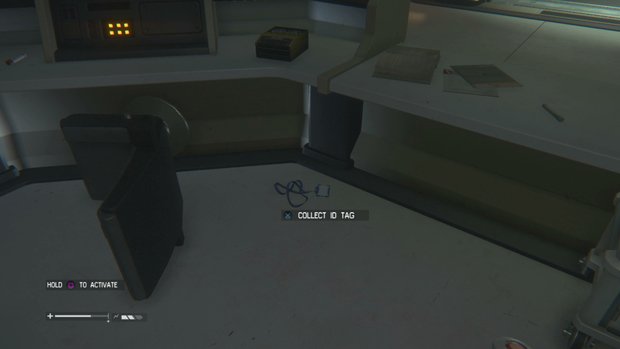
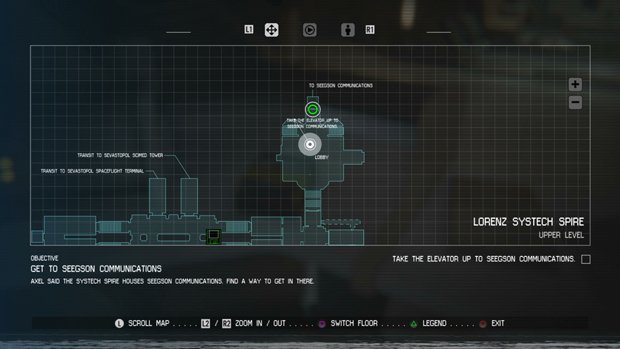
Lorenz Systech Spire Upper Level: In the Lobby with the elevator up to Seegson Communications, look behind the counter in the centre of the area.
C.Ward
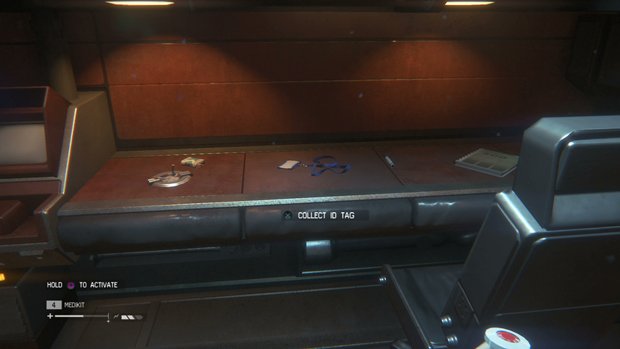
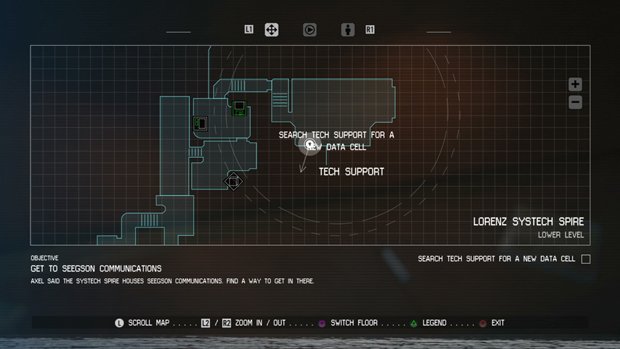
Lorenz Systech Spire Lower Level: While searching Tech Support for a new data cell, after you get the keycard from Facility Control and open the door up the stairs, check the desk on the right of the room you enter.
J.Williams
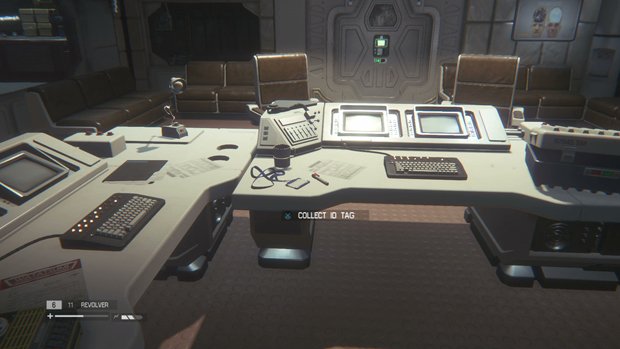
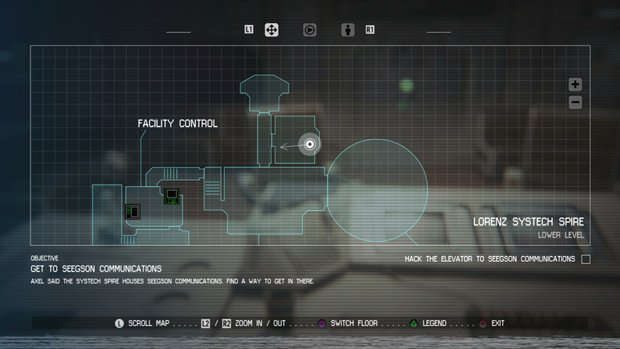
Lorenz Systech Spire Lower Level: After collecting the Level 1 Security Access Tuner, return to Tech Support and unlock the room down the side corridor then check on the desk inside.
Mission 4 - Seegson Communications
T.Curwen
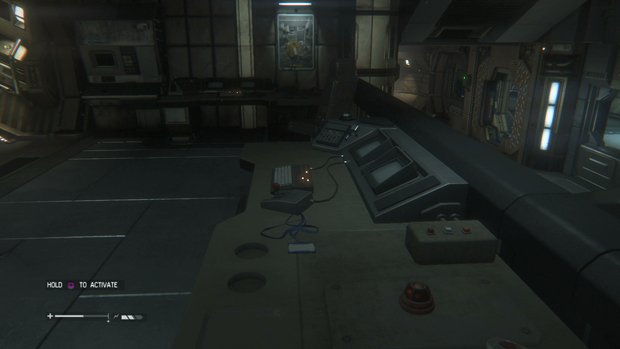
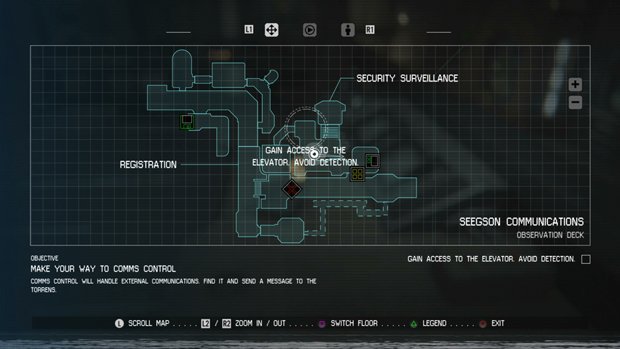
Seegson Communications Observation Deck: After emerging from the vents and being told to Gain Access To The Elevator, enter the doorway by the body then go up the stairs on your left and look on the bench at the top.
D.Turner
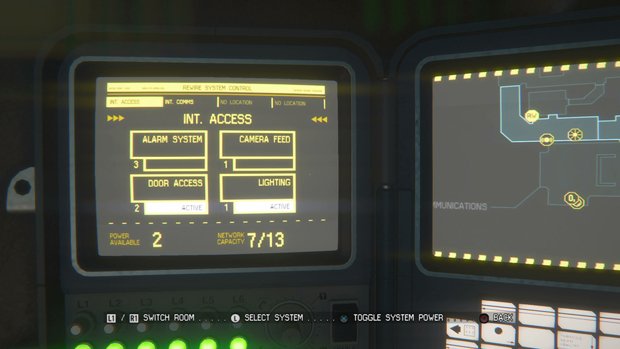
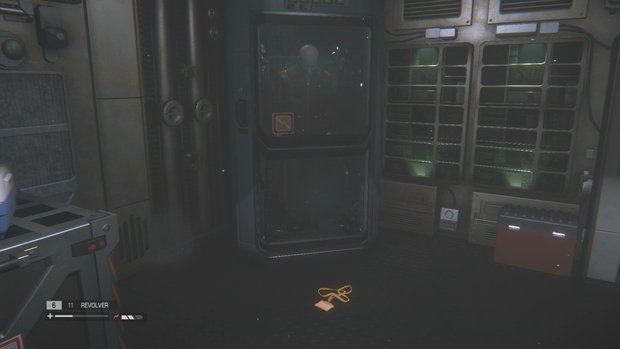
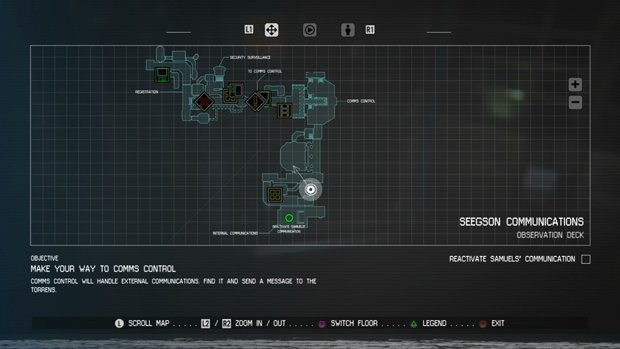
Seegson Communications Observation Deck: Once you cut through Comms Control to search for alternative external communications, head into the smaller room off the following corridor with a downed Working Joe in it and use the rewire panel to unlock the Int. Access door, then go to the end of the next corridor and enter the now open room.
P.Brophy
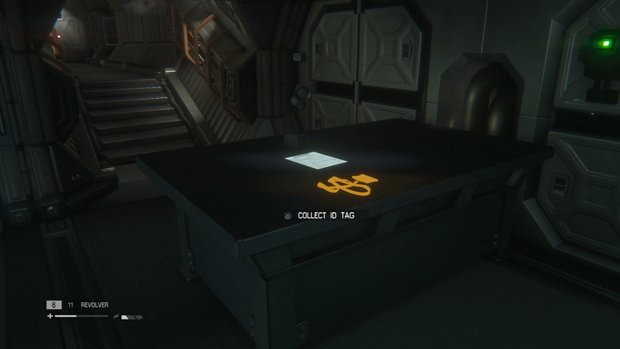
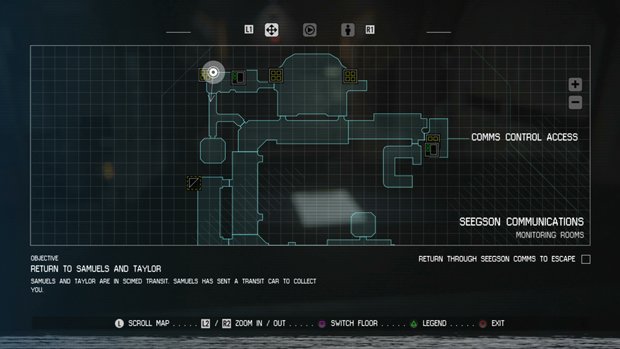
Seegson Communications Monitoring Rooms: When you return to the Monitoring Rooms, head through the room filled with computers on the right of the corridor then look on the bench in the attached room.
T.Armer
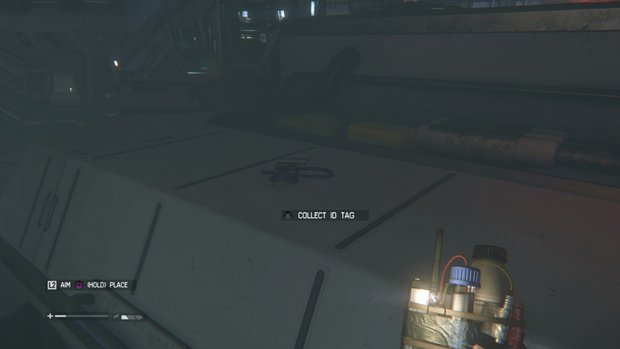
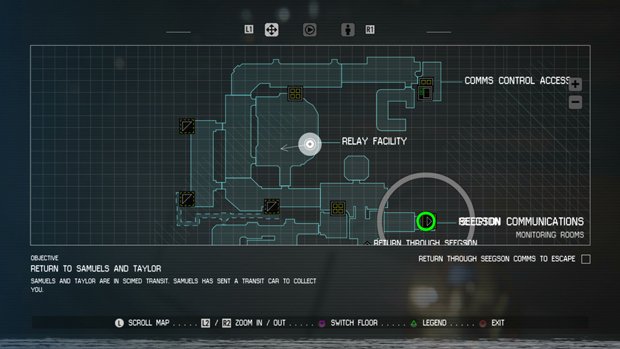
Seegson Communications Monitoring Rooms: Moving on from the previous ID tag, head into the Relay Facility and check the bench at the side.
Mission 5 - The Quarantine
E.Koorlander
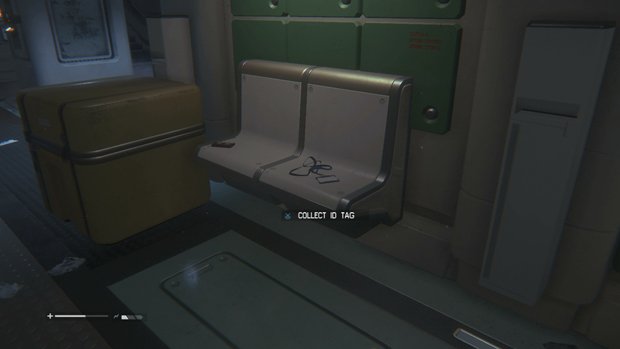
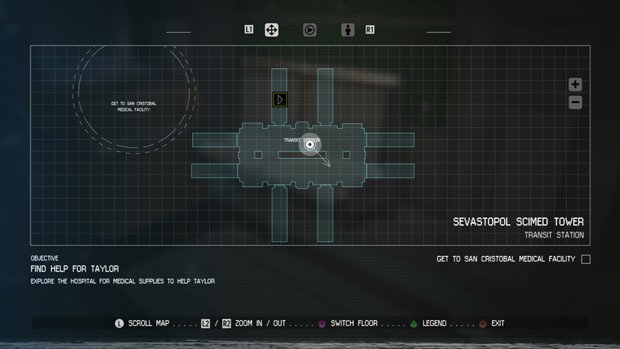
Sevastopol Scimed Tower Transit Station: As soon as you exit the transit at the start of the mission, turn left and look on the seating.
F.Whitechapel
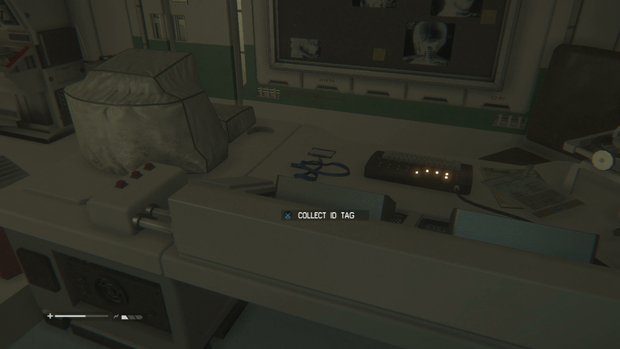
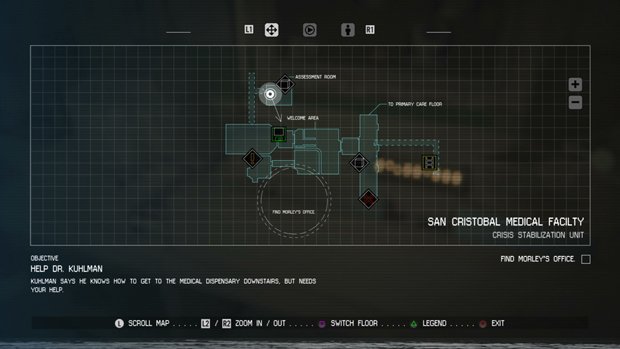
San Cristobal Medical Facility Crisis Stabilization Unit: After speaking to the doctor, turn around and crawl through the vent to enter an Assessment Room then look on the desk to your right.
C.Burrows
T.Miller
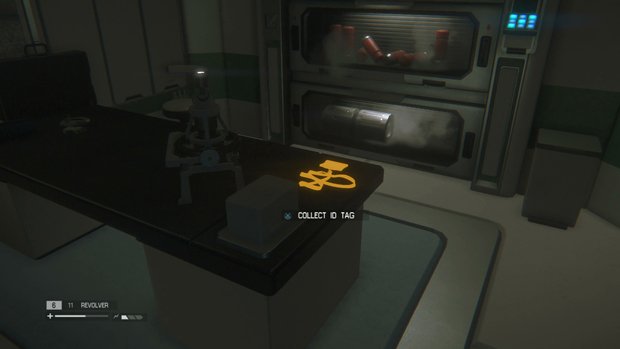
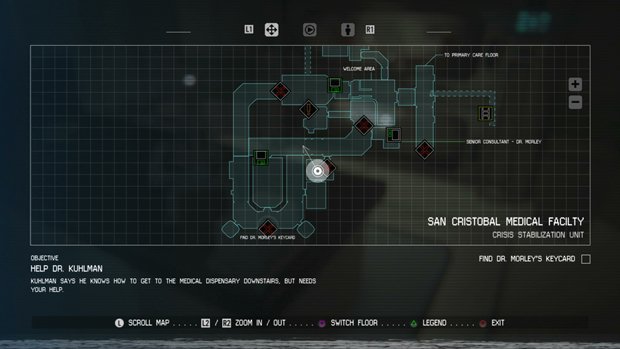
San Cristobal Medical Facility Crisis Stabilization Unit: After entering the Nurse Station with keycode 1702, go through to the next room and check on the desk.
L.Tart
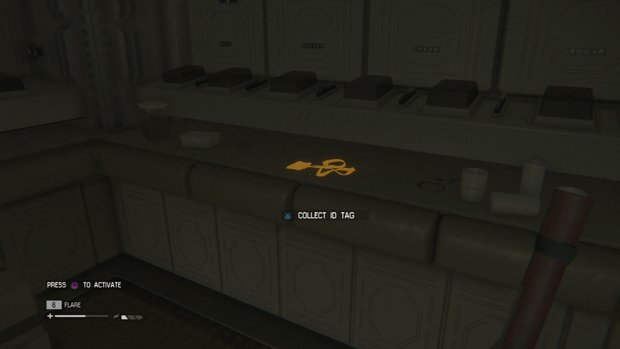
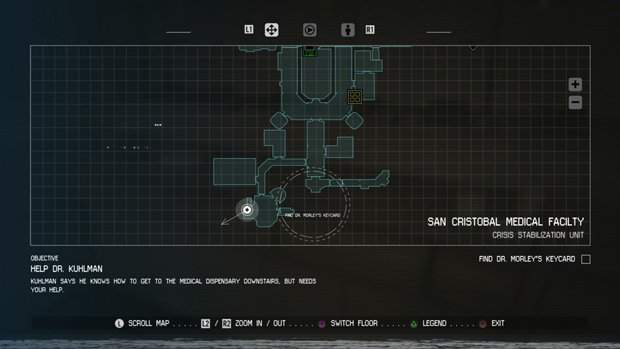
San Cristobal Medical Facility Crisis Stabilization Unit: Use keycode 1702 to unlock the door south of the day room, then follow the corridor around to the Staff Quarters and look on the side.
A.Lynch
Mission 6 - Outbreak
C.McCormack
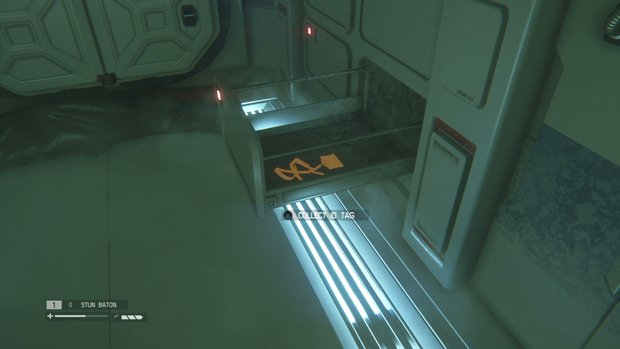
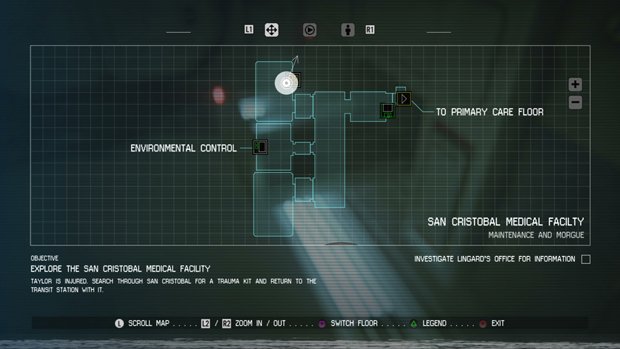
San Cristobal Medical Facility Maintenance and Morgue: After restoring the coolant and entering the now open mortuary room, use the rewire panel to open the vent and a drawer will open to reveal this tag.
A.Sawers
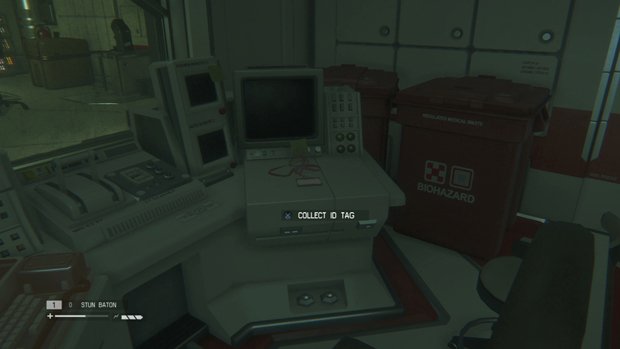
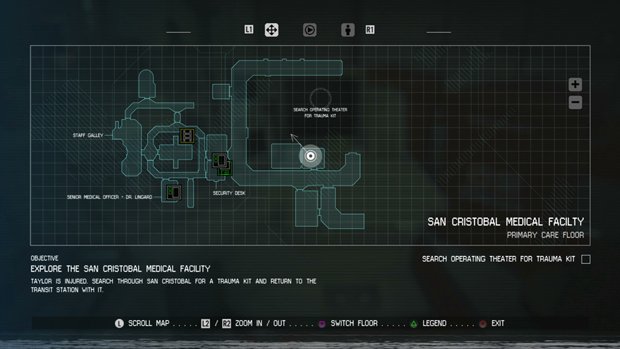
San Cristobal Medical Facility Primary Care Floor: Once you use the keycard to advance through the Facility Administration, follow the corridor around to the right then look in the room on your left by a wheelchair.
K.Neville
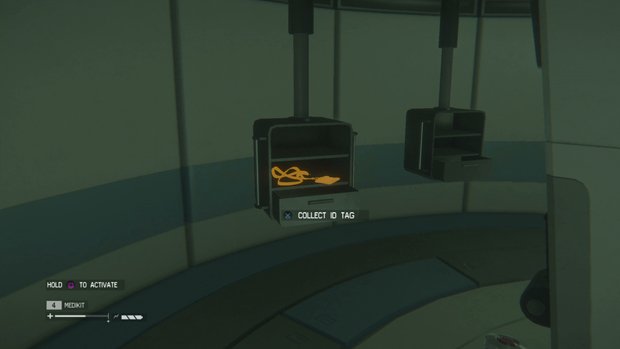
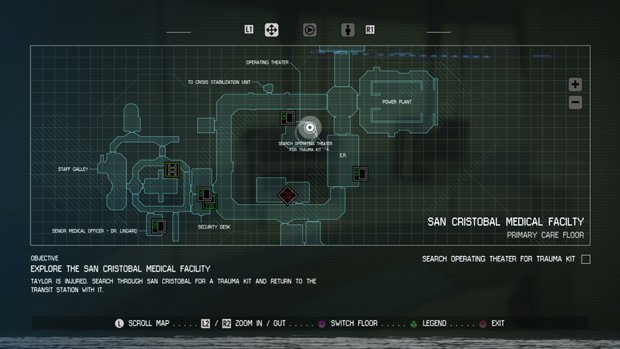
San Cristobal Medical Facility Primary Care Floor: Once you reach the Operating Theatre, check the hanging units at the head of the bed.
Mission 7 - Seegson Synthetics
O.Sans-Gomez
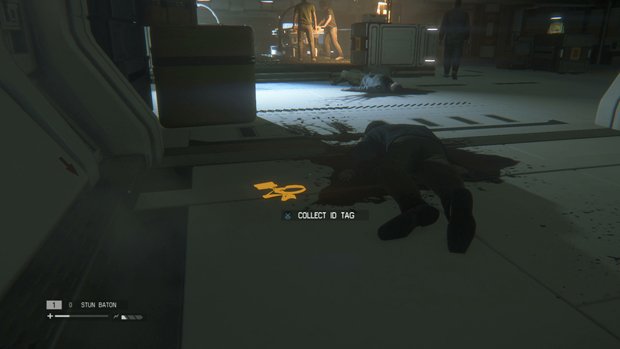
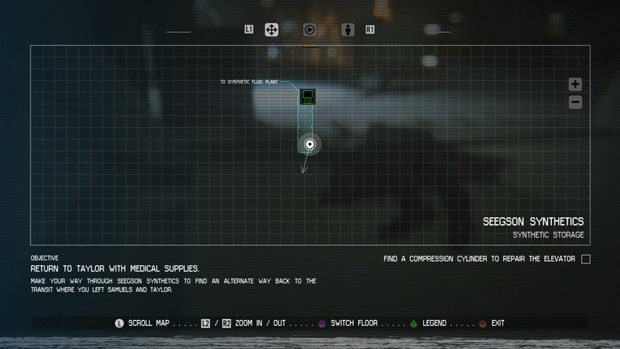
Seegson Synthetics Synthetic Storage: At the start of the mission, head through the vent then go to the end of the next corridor and look on the floor near the body.
N.Burnswick
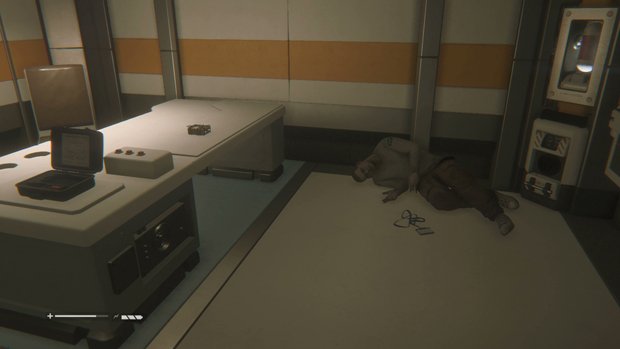
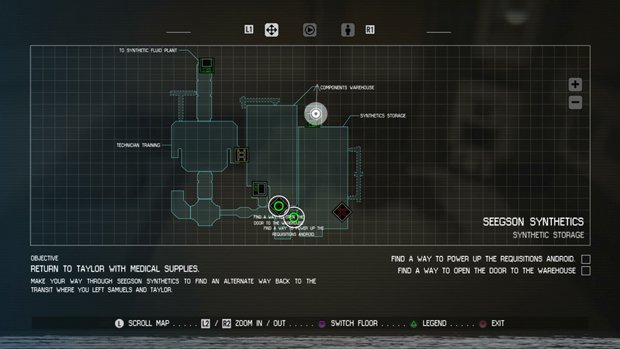
Seegson Synthetics Synthetic Storage: In the room off Synthetics Storage where you upgrade your hacking tool, check the floor by the body.
Mission 8 - Haven
K.Clarke
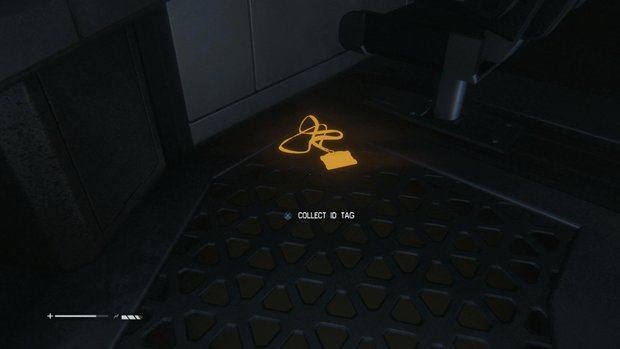
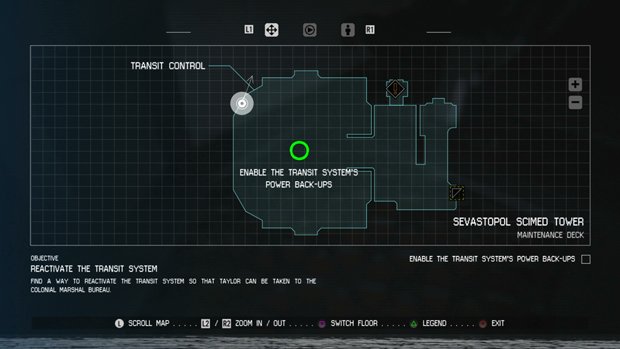
Sevastopol Scimed Tower Maintenance Deck: When trying to reactivate the transit system, look in the corner of the control room under a chair.
V.Nash
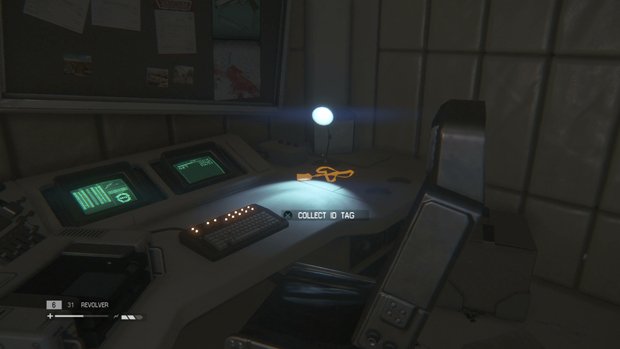
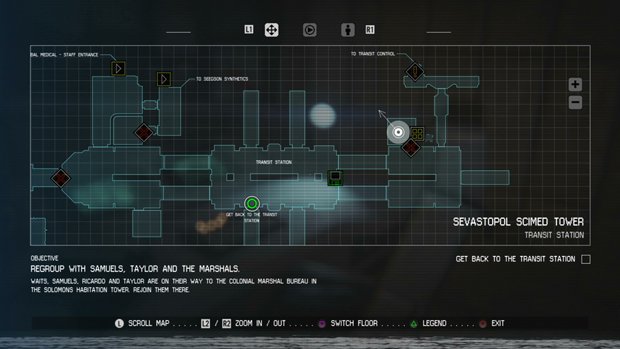
Sevastopol Scimed Tower Transit Station: After using the gas torch to cut through the panel, go down the ladder then check on the desk at the opposite side to the vent.
K.Lingard
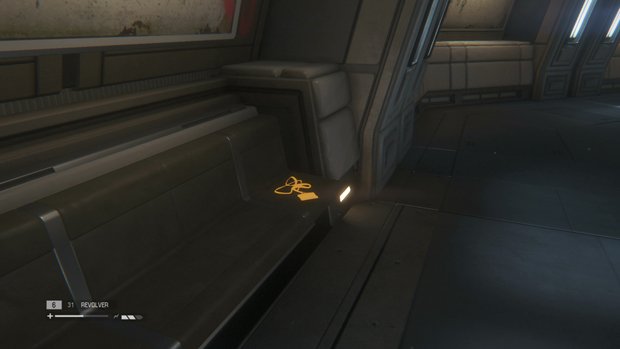
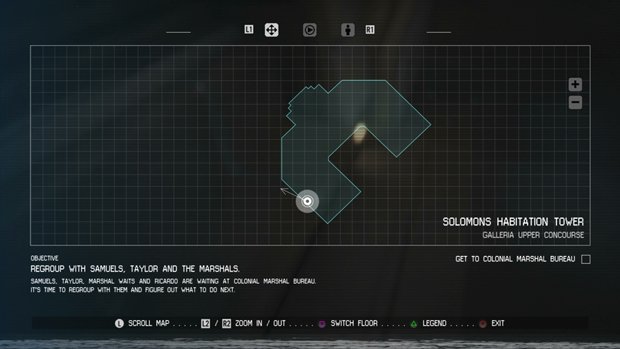
Solomans Habitation Tower Galleria Upper Concourse: When you take the transport at the end of the level and head towards the Colonial Marshal Bureau, turn left instead at the fork in the hallway then follow the left-hand wall to the upper concourse and check the bench at the side.
Mission 10 - The Trap
W.Woodbury
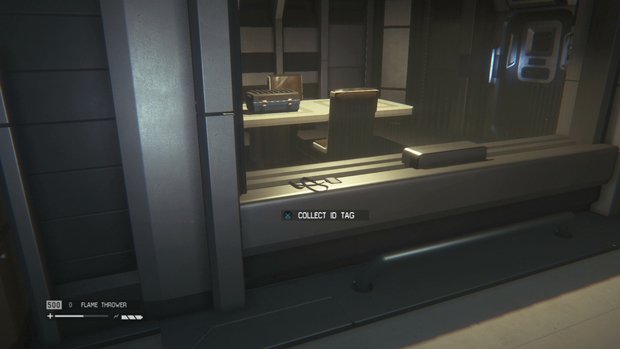
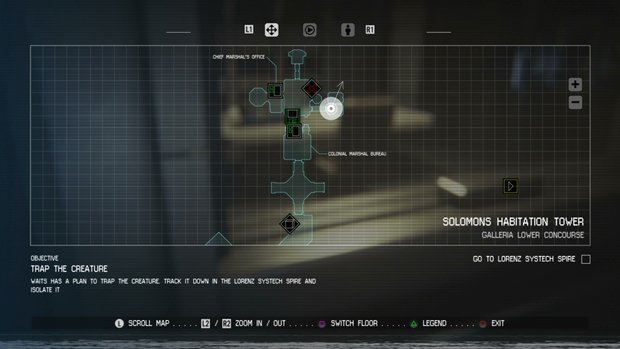
Solomons Habitation Tower Galleria Lower Concourse: At the east side of the opening area, head into the side room and look on the side by the window.
R.Tafler
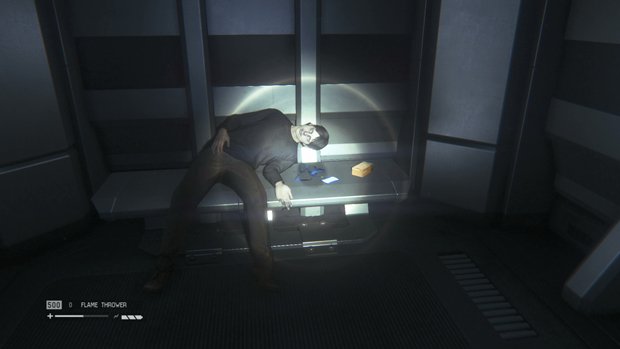
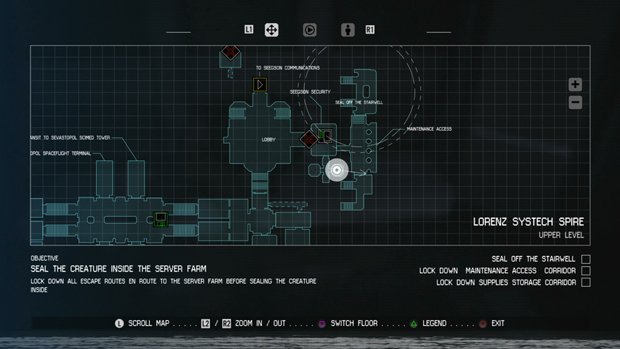
Lorenz Systech Spire Upper Level: BEFORE INITIATING THE FIRST LOCKDOWN head into Seegson Security, turn left then look on the bench inside the cell on your left.
C.Gascoyne
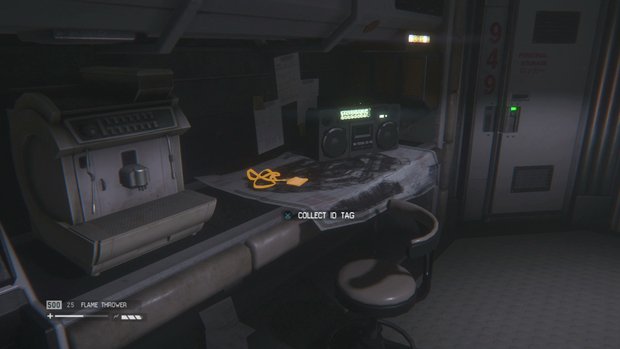
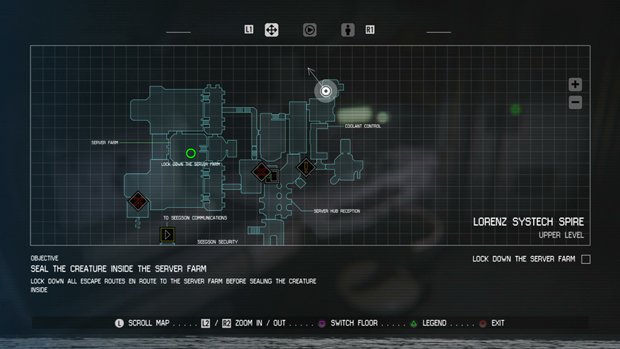
Lorenz Systech Spire Upper Level: After you go into the Server Farm, head into the side room to the north and check the bench on the side.
K.Lenton
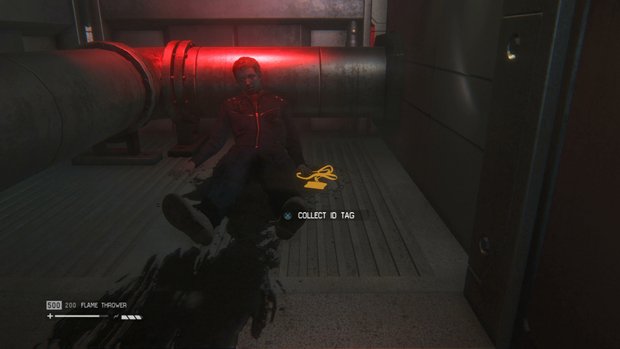
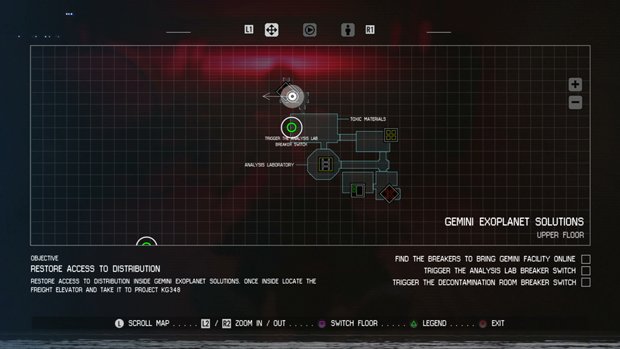
Gemini Exoplanet Solutions Upper Floor: From the Ore Processing area, take the ladder up then head left to the Analysis Lab breaker switch area - follow the blood stains into the vent to find a body.
P.Ryniak
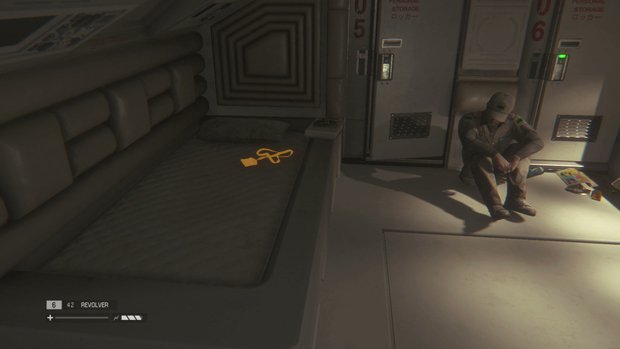
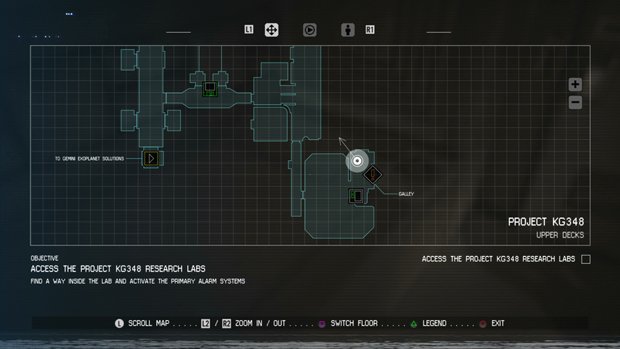
Project KG348 Upper Decks: At the opposite end of the corridor to the Research Labs access, head into the Decontamination Room then check on a bed in the side room with a man crouched in the corner.
Mission 11 - Hazard Containment
B.Hymers
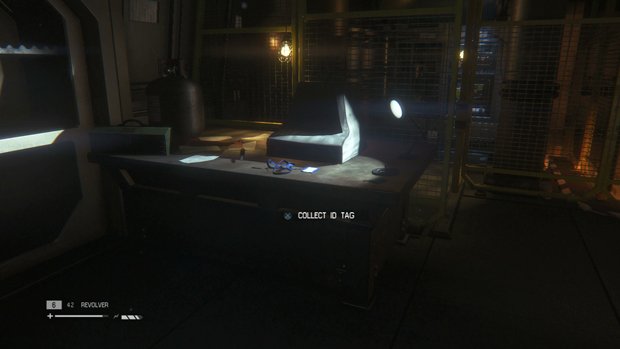
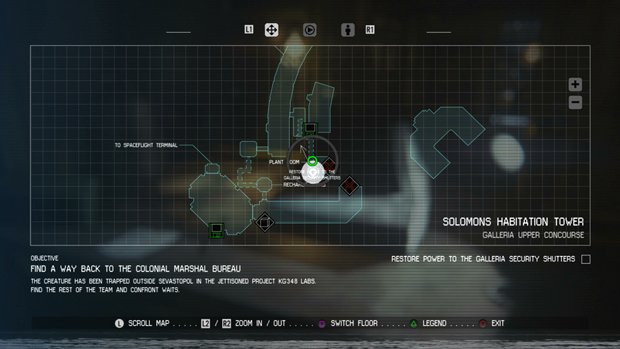
Solomons Habitation Tower Galleria Upper Concourse: After you go through the tunnel to reach the Plant Room, look on the nearby desk with a covered terminal.
G.Ramsey
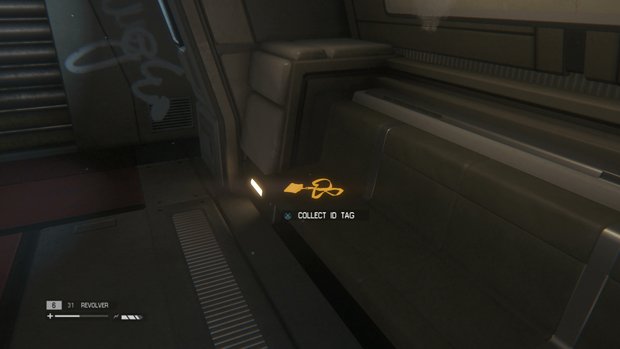
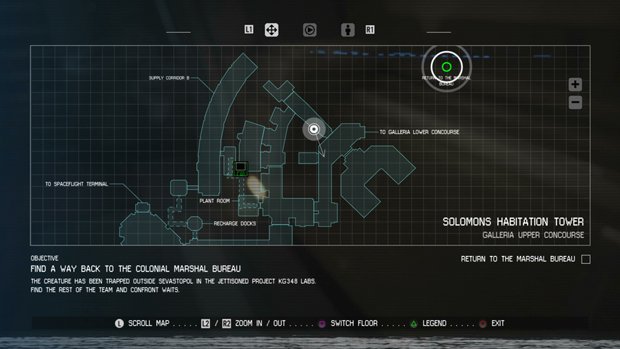
Solomons Habitation Tower Galleria Upper Concourse: Once you have to find an alternative route to the marshals, go up several sets of stairs then look on the bench to your right at the far end before you go out to the balcony.
Mission 12 - A Synthetic Solution
B.Bullock
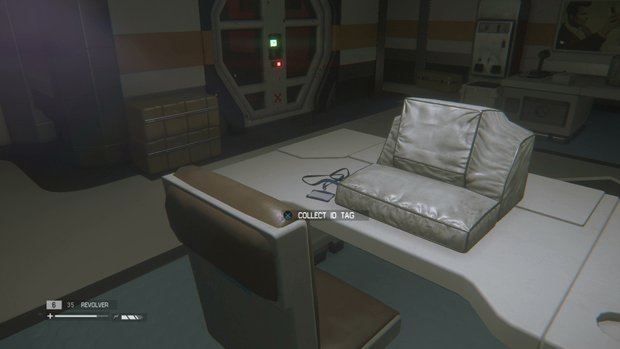
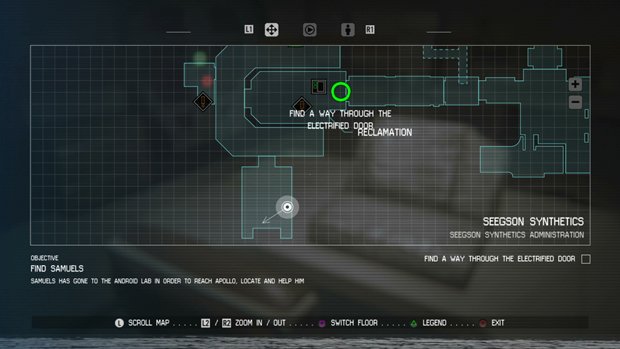
Seegson Synthetics Seegson Synthetics Administration: After climbing up to the next area and passing through Android Disposal, head to the end of the curved corridor and enter the side room with covered computers, then check on the desk at the back left.
J.Mitchell
E.Hampton
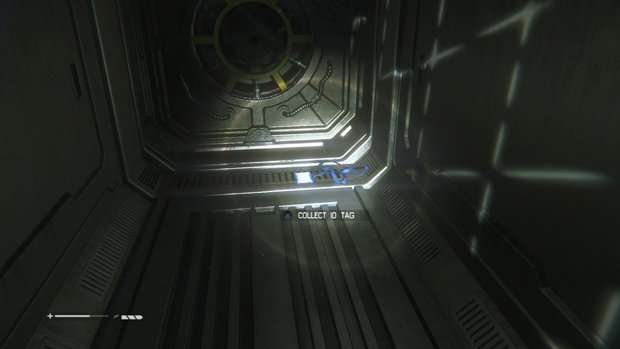
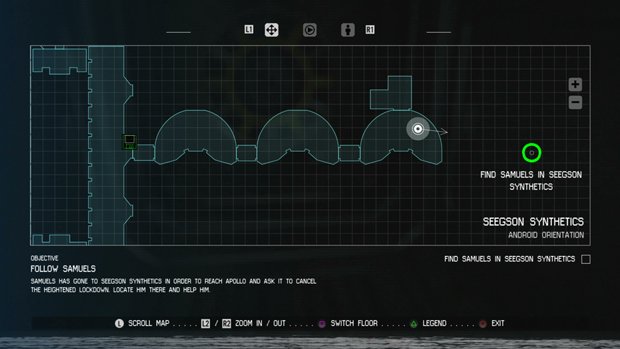
Seegson Synthetics Android Orientation: After climbing across the plant room and entering the next area through the door past the save point, head through the rooms full of androids and security cameras (creep to avoid detection) into the end office then open the floor hatch and follow the vent to the east end.
E.Guevara
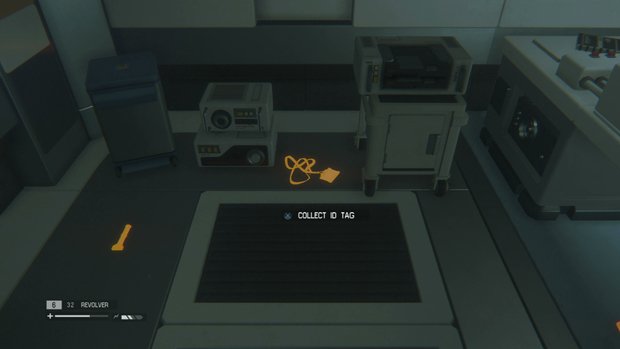
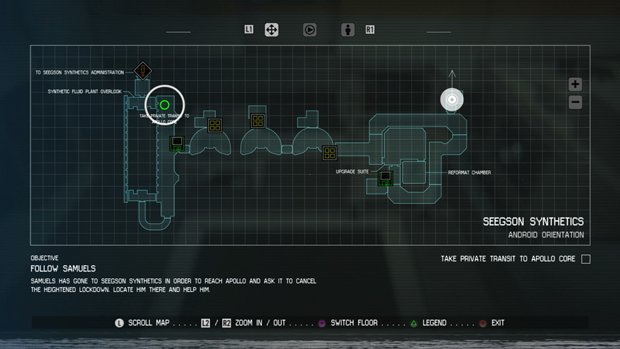
Seegson Synthetics Android Orientation: Once Samuels gets you access to the private transit, backtrack down the corridor and hack the access panel on the right to access a side office, then look on the floor straight ahead.
Mission 13 - Consultation
J.Shotliff
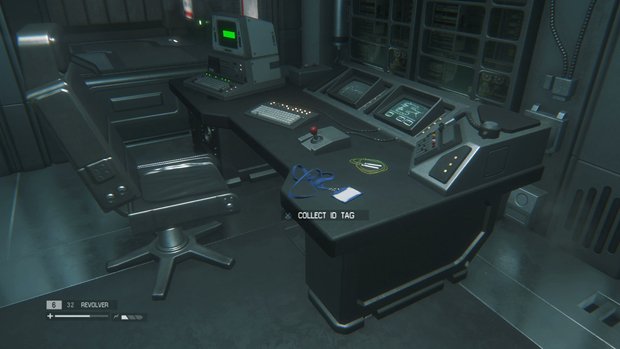
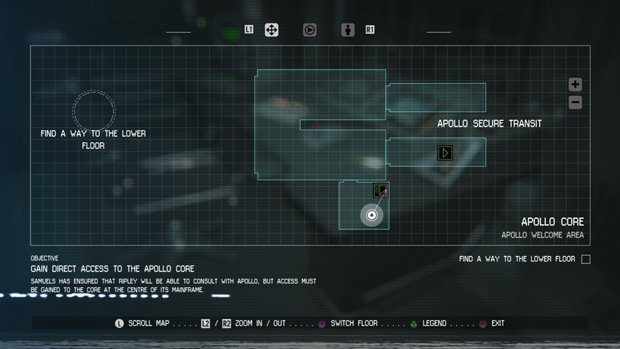
Apollo Core Apollo Welcome Area: At the start of the mission, exit the transport then enter the security room on the left and look on the desk.
K.Hussein
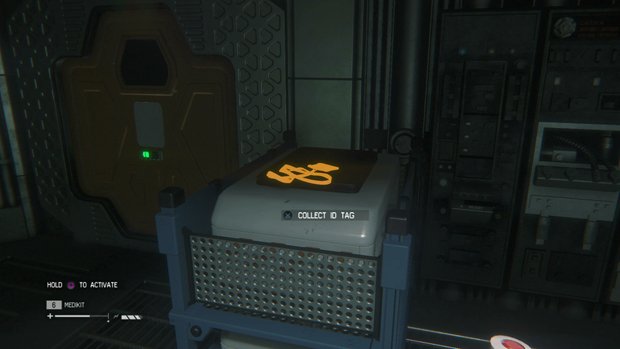
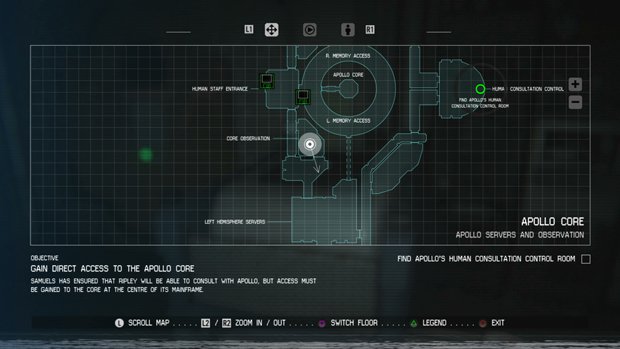
Apollo Core Apollo Servers And Observation: After passing through the conduit to the servers and collecting the gas mask, go through the door marked Left Hemisphere Servers then enter the room on the left and look on top of the crate.
G.Spedding
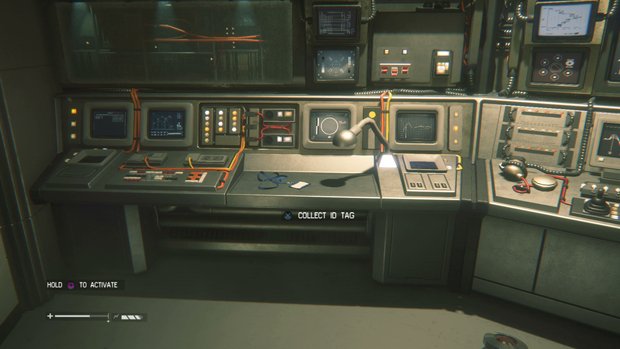
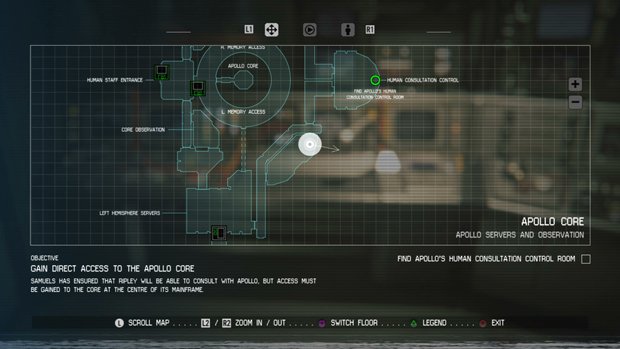
Apollo Core Apollo Servers And Observation: Take the east exit from the Left Hemisphere Servers then follow the corridor to the next room and look on a control unit to the side.
J.King
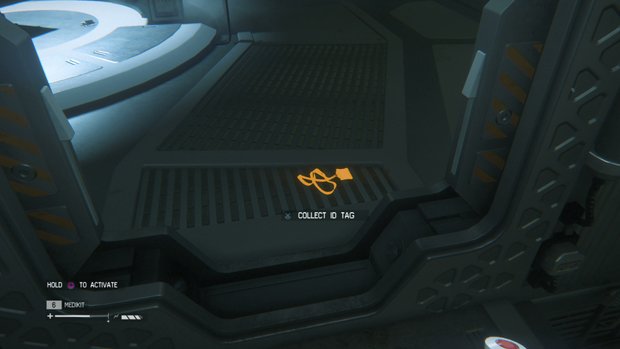
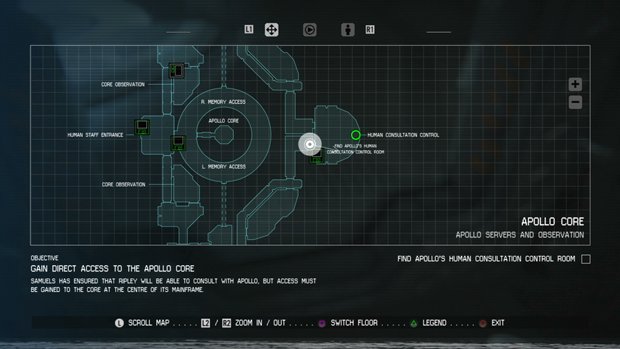
Apollo Core Apollo Servers And Observation: As you enter the Apollo Human Consultation Control Room, look on the floor by the doorway.
Mission 14 - The Descent
Chief Porter
P.Timlett
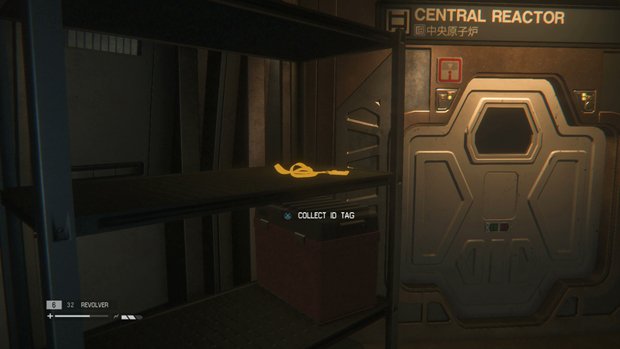
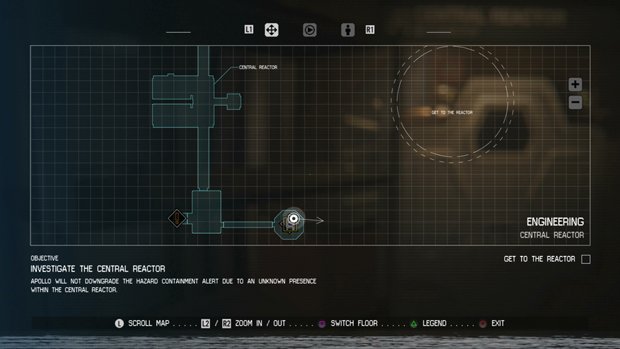
Engineering Central Reactor: After you recover your weapons at the base of a ladder, check on the shelves to the left hand side.
B.Ransome
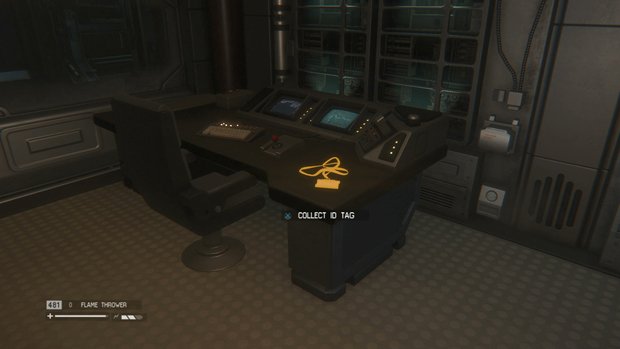
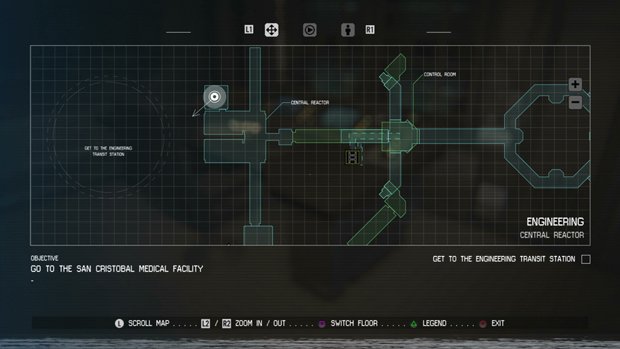
Engineering Central Reactor: On your way to the Engineering Transit Station after activating the purge, duck into the Central Reactor side room on the right and look on the desk.
Mission 15 - The Message
J.Jones
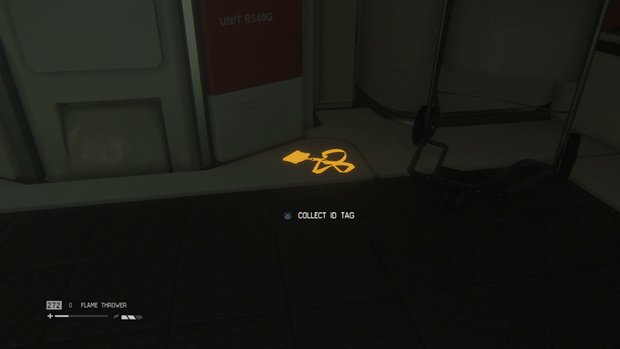
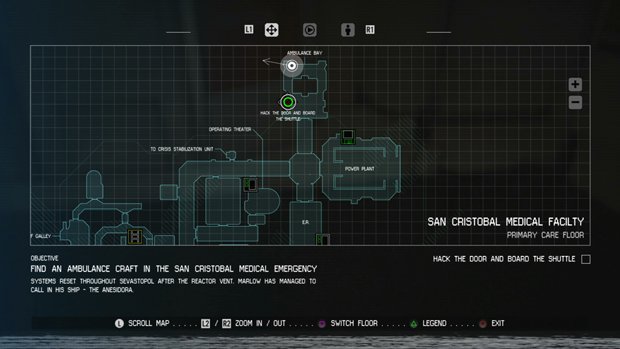
San Cristobal Medical Facility Primary Care Floor: In the area where you upgrade your Security Access Tuner so you can board an ambulance shuttle, look on the floor in the northwest corner.
Mission 16 - Transmission
Note that collecting the following tags requires backtracking across various areas of the game, and this mission is the best time to do it.
M.Perry
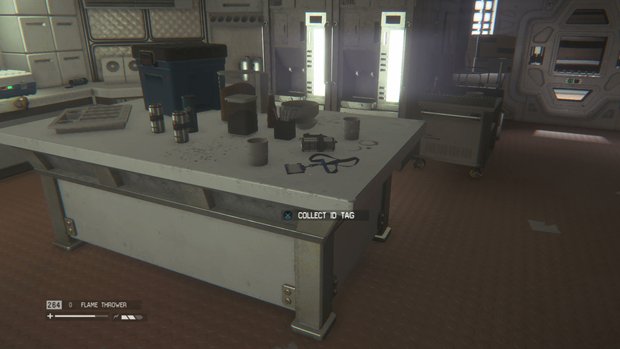
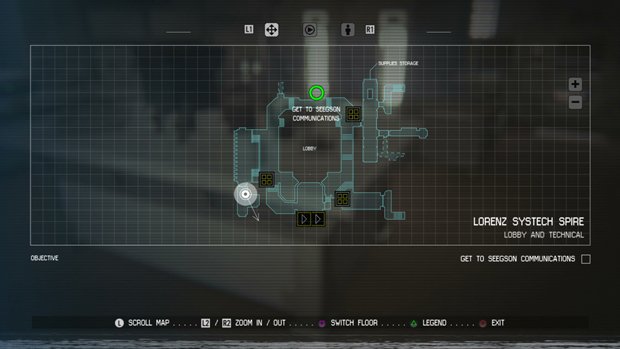
Lorenz Systech Spire Lobby And Technical: After opening the door with your Ion Torch, turn right and take the lift to Lorenz Systech Spire. Once there, turn right and go up the stairs then down into the seating area and hack the door. Inside, check on the table.
K.Bennett
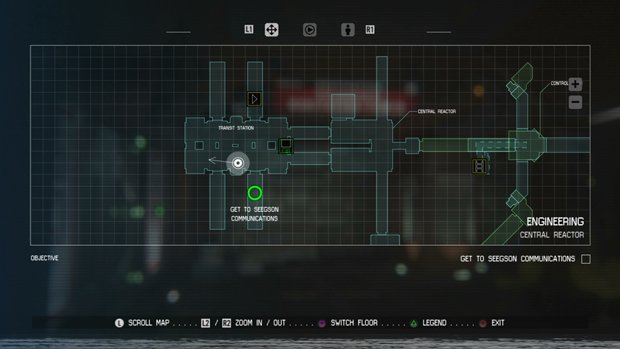
Travel to Solomons Habitation Tower - this can be accessed through Scimed Tower transit to Engineering Decks, then another transit to Solomons Habitation Tower.
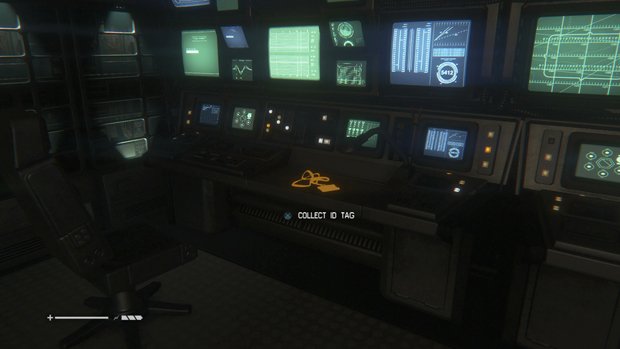
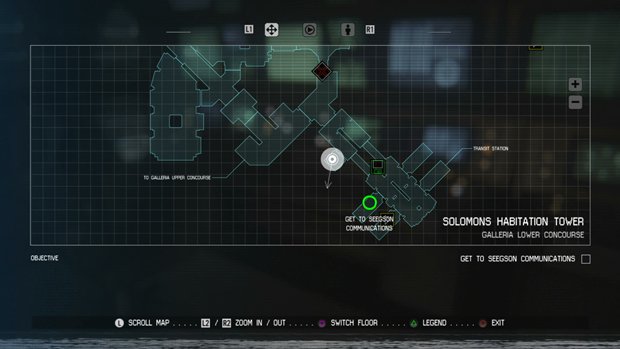
Solomons Habitation Tower Galleria Lower Concourse: When you arrive in Solomons Habitation Tower, turn left and head up the stairs past the save point, then use your Security Tuner to hack the locked door on the left. Once inside, look on the computer bank on the far side of the room.
Once you’ve finished all of your collectibles backtracking, it’s easiest to Load Mission Save for Mission 16 and continue from that point.
M.Radcliffe
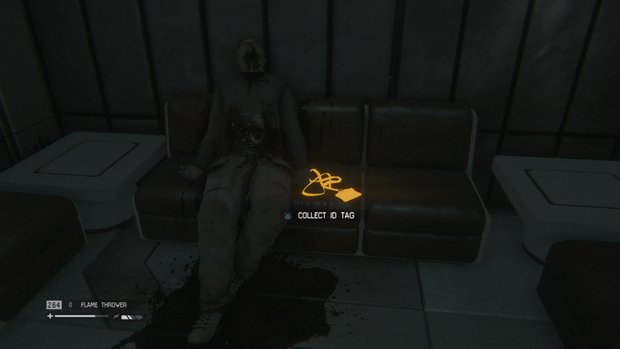
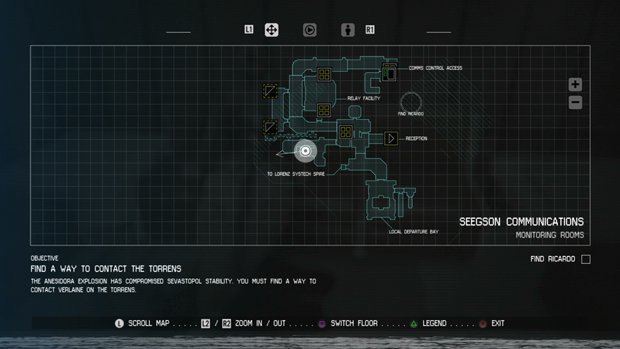
Seegson Communications Monitoring Rooms: When you reach the early corridor with a flaming android, use the Ion Torch to remove the panel on the left then crawl through the vents to the next room. Go left and up the short stairs then turn right and check on the seat next to the body.
O.Smith
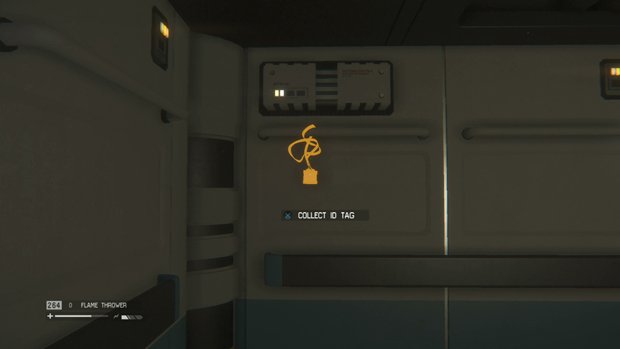
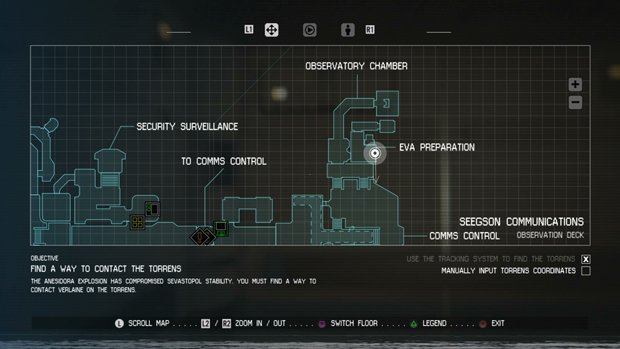
Seegson Communications Observation Deck: After you take the lift down to the EVA Preparation area, look straight ahead to see this tag hanging on the wall ahead.
Mission 17 - Desolation
E.Winters
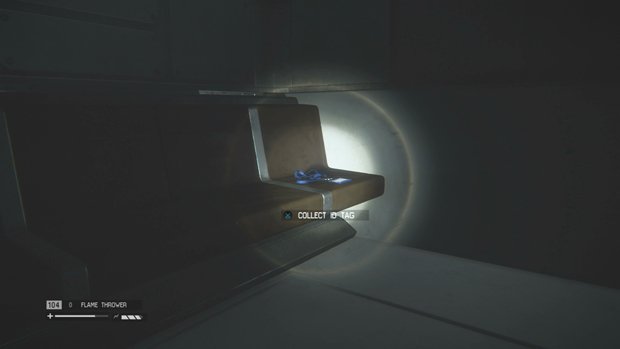
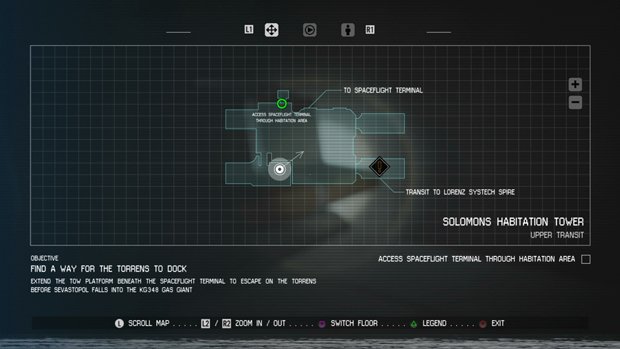
Solomons Habitation Tower Upper Transit: After using the transit to reach this second area of the mission, go straight ahead to the far side of the area and down the small stairs then look on the seating.
F.Sinclair
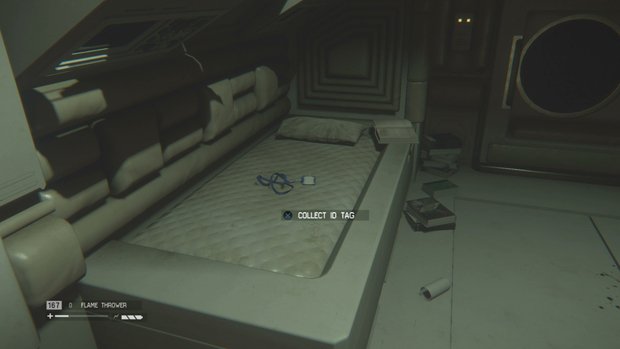
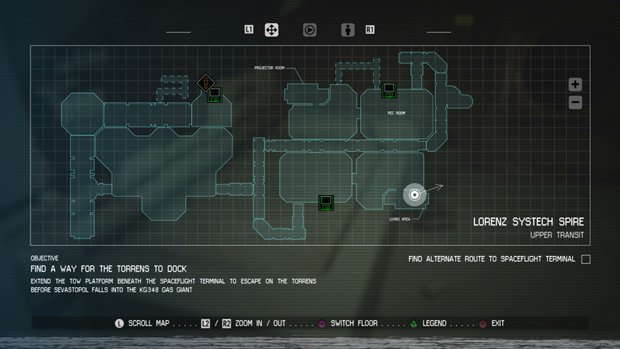
Lorenz Systech Spire Upper Transit: After restarting the generator and entering the Living Area south of the Rec Room, look on the bed in the side room before using the vent.
Mission 18 - Tomorrow, Together
R.Padjdlhauser
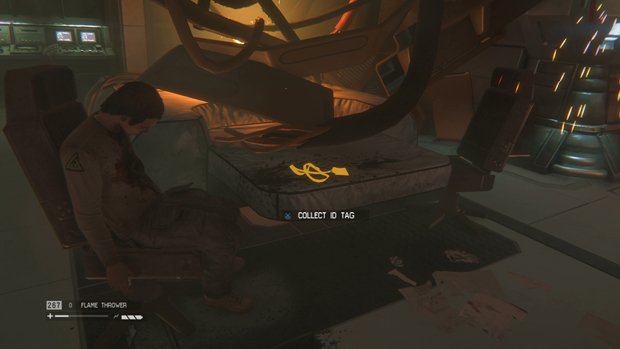
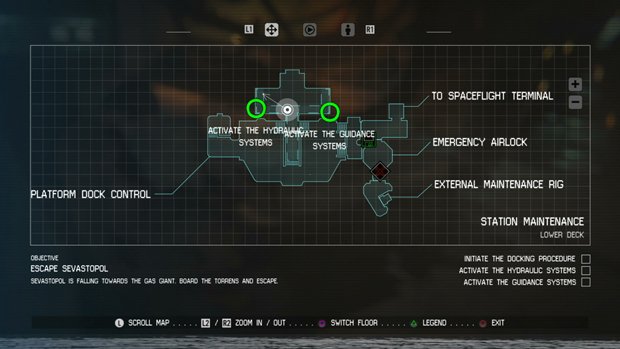
Station Maintenance Lower Deck: When you reach the Tow Platform Dock Control and are tasked with activating the systems, look between the two objective markers on your map to find this tag on a table next to a body.
S.Cooper
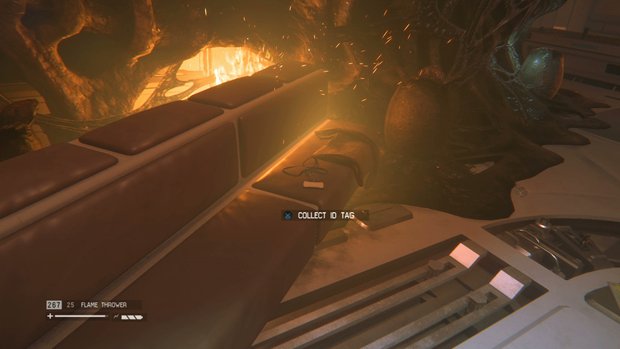
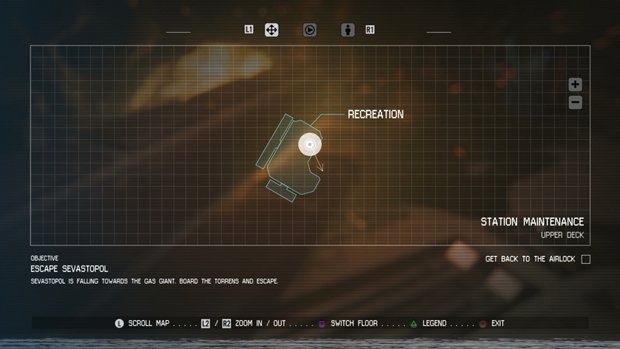
Station Maintenance Upper Deck: After being captured and freeing yourself from the wall, grab this final tag from the seating to your left.
Congratulations – you should now have found all of the Alien: Isolation ID tags!
Sign up to the GamesRadar+ Newsletter
Weekly digests, tales from the communities you love, and more

Iain originally joined Future in 2012 to write guides for CVG, PSM3, and Xbox World, before moving on to join GamesRadar in 2013 as Guides Editor. His words have also appeared in OPM, OXM, PC Gamer, GamesMaster, and SFX. He is better known to many as ‘Mr Trophy’, due to his slightly unhealthy obsession with amassing intangible PlayStation silverware, and he now has over 750 Platinum pots weighing down the shelves of his virtual award cabinet. He does not care for Xbox Achievements.
