Batman Arkham Asylum Riddler Guide
Our walkthrough to all 240 challenges! Every map, every trophy, every interview, every chronicle and more

This Batman Arkham Asylum Riddler Guide will help you solve all the riddles, as well as find the trophies, Joker's Teeth, Patient Interviews and all the rest. It's all here if you want to take on the real challenge - defeating Edward Nigma, aka The Riddler. If you want to 100% the game, and earn the trophies and achievements that go with that then you'll have to solve Arkham’s biggest mystery
Coming up this atman Arkham Asylum Riddler Guide has all the screens, video and instructions you need, pointing you to every one of Riddler's Challenges: maps, trophies, interviews, chronicles, teeth and riddle solutions. Get to work!
- Batman Arkham City Shot in the Dark side mission guide
- Batman: Arkham City Identity Theft side mission guide
- Batman Arkham City Watcher in the Wings side mission guide
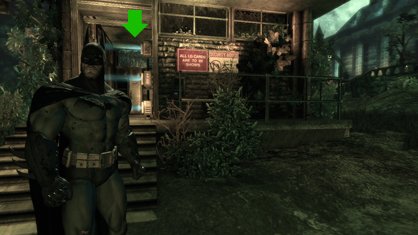
TOOL NEEDED: Cryptographic Sequencer
The Riddler's secrets map is in the ground floor guard room closest to the Arkham Mansion stairs and statue of Warden Sharp. You can't get in, however, until you've received the security-hacking sequencer.
ARKHAM EAST
ARKHAM EAST - RIDDLE SOLUTION #1
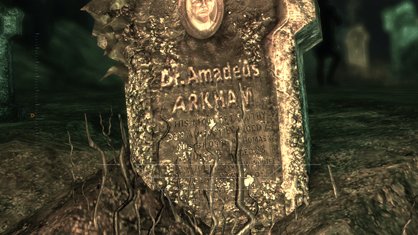
"The legacy of this island has been well and truly buried."
Head to the cemetery and look for the open, sunken grave. It's well-lit and the headstone is shaped like an "A" for the asylum's founder, Amadeus Arkham. Zoom in and scan the face of the tomb to solve the riddle.
ARKHAM EAST - RIDDLE SOLUTION #2

"Gotham's greatest family towers over the city."
This one's easy enough. Just find Wayne Tower on the horizon, zoom in and scan the giant "W".
ARKHAM EAST - RIDDLE SOLUTION #3
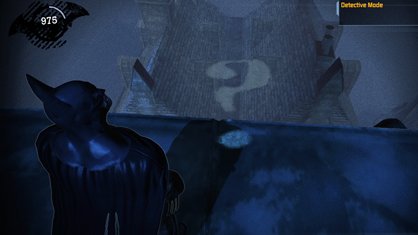
TOOL NEEDED: Detective Mode
"My challenges appear to those with the correct position in life."
This is a question mark alignment puzzle. Climb to the very top of Arkham Mansion's tallest tower and face south. The dot is on the floor at your feet, but the top half of the symbol is spread out upon the roofs below. Line them up and scan.
ARKHAM EAST - PATIENT INTERVIEW #1
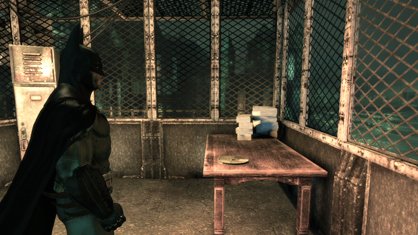
The tape is in the southern guard tower. On a desk. Impossible to miss once you're up there.
ARKHAM EAST - PATIENT INTERVIEW #2
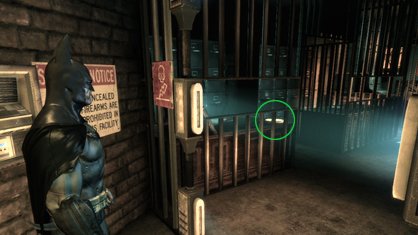
TOOL NEEDED: Cryptographic Sequencer
The two guard towers here are linked by catwalks. Where those two walks meet, there's an office. Once you can hack your way inside that office with the sequencer, you'll find both an interview and a trophy.
ARKHAM EAST - CHRONICLE #1
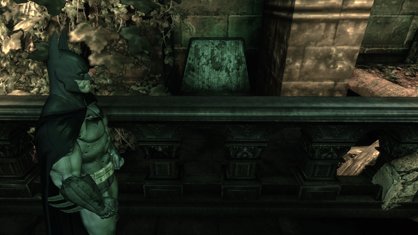
Left of the Arkham Mansion stairs is a locked-off courtyard. Grapple over the wall, drop down and check the right-hand wall - behind the railway - for a tablet.
ARKHAM EAST - CHRONICLE #2
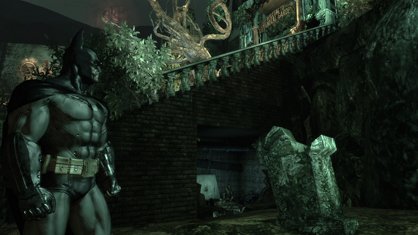
TOOL NEEDED: Explosive Gel
Face the Botanical Garden staircase from the graveyard. You should notice a patch of destructible wall on the side of those stairs. Use your gel or your Ultra Batclaw to get inside and find the tablet.
ARKHAM EAST - RIDDLER TROPHY #1
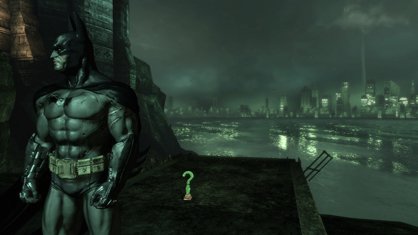
This one's sitting out in plain sight, on a little jetty overlooking Gotham harbour. It's near the southern view of the water, though, not the northern... very close to the Arkham Mansion stairs.
ARKHAM EAST - RIDDLER TROPHY #2
ARKHAM EAST - RIDDLER TROPHY #3
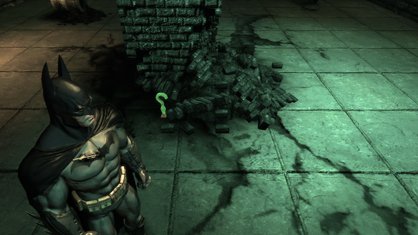
Left of the Arkham Mansion stairs is a locked-off courtyard. Grapple over the wall, run to the back and grapple onto the upper balcony. Behind the column here, facing the view of Gotham City, is a Riddler trophy.
ARKHAM EAST - RIDDLER TROPHY #4
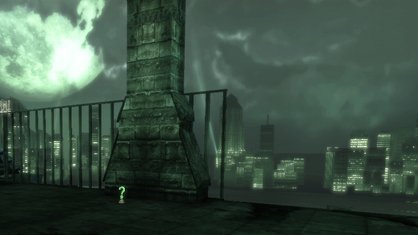
This one is above Trophy #2, on a flat section of Arkham Mansion's roof. If you look at your map, you can also see that it's the narrowest part of the roof, separating the northern and southern halves of the mansion.
ARKHAM EAST - RIDDLER TROPHY #5
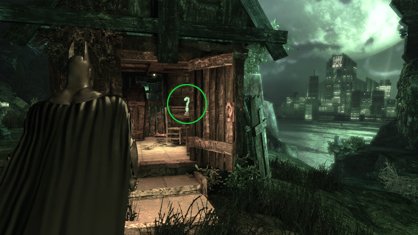
In the middle of the cemetery is a small wooden shack. The door is open and the trophy is right on the desk.
ARKHAM EAST - RIDDLER TROPHY #6
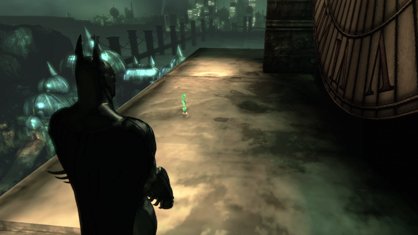
Grapple and climb your way to the top of the mansion's tallest tower. On the side with the clock face is the trophy.
ARKHAM EAST - RIDDLER TROPHY #7
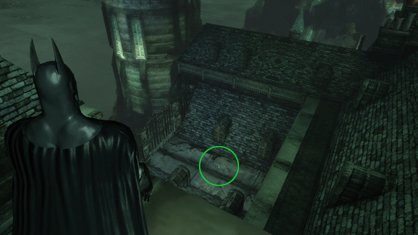
If you're on the tallest mansion tower, and look down towards the circular tower, you should spot a rectangular recess between the slopes of the roof. A trophy is there - just glide down and grab it.
ARKHAM EAST - RIDDLER TROPHY #8
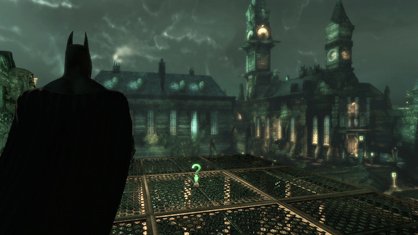
Located on top of the northwestern guard tower, the one closest to the Arkham North door.
ARKHAM EAST - RIDDLER TROPHY #9
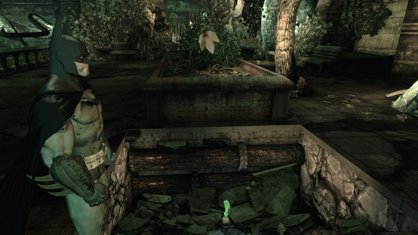
TOOL NEEDED: Explosive Gel
Left of the Arkham Mansion stairs is a flat courtyard. Smack dab in the centre of this courtyard is a destructible piece of flooring. Use your explosive gel and take the trophy underneath.
ARKHAM EAST - RIDDLER TROPHY #10
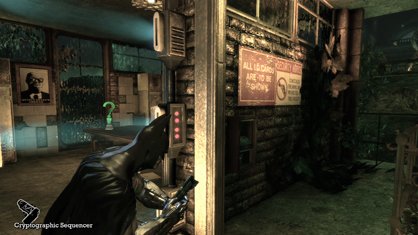
TOOL NEEDED: Cryptographic Sequencer
This one's in the ground floor guard room closest to the Arkham Mansion stairs and statue of Warden Sharp... the same location as the map. You just need to wait until you have the sequencer to gain access.
ARKHAM EAST - RIDDLER TROPHY #11
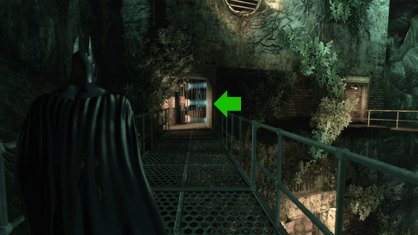
TOOL NEEDED: Cryptographic Sequencer
The two guard towers here are linked by catwalks. Where those two walks meet, there's an office. Once you can hack your way inside that office with the sequencer, you'll find both the trophy and an interview tape.
ARKHAM EAST - JOKER’S TEETH #1-2
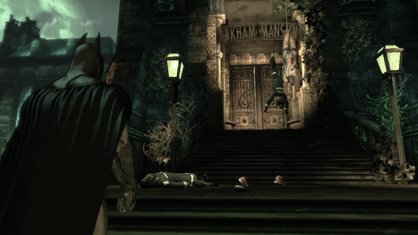
These are halfway up the stairs to Arkham Mansion's main entrance. They don't appear until the story directs you to the mansion, however, and you'll definitely want to get rid of the two snipers on the overhang above first.
ARKHAM EAST - JOKER’S TEETH #3-4
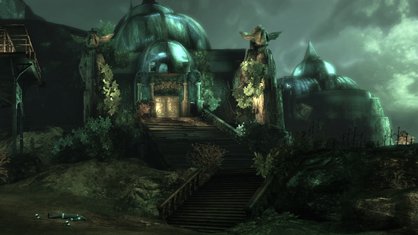
You'll find these two sets as you're making your way to the Botanical Gardens, looking for Harley's fingerprints. They're at the foot of the long stairs. Watch out for lunging lunatics!
ARKHAM EAST - JOKER’S TEETH #5-6
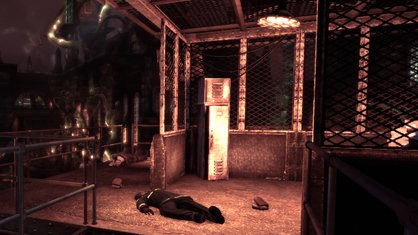
These two sets are in the more southern guard tower of Arkham East.
ARKHAM EAST - JOKER’S TEETH #7-8
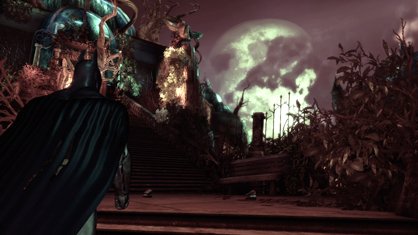
These two are on the stairs to the Botanical Gardens. They didn't appear for us until Poison Ivy had turned Arkham's sky red and we were on our way to stop her with the antidote.
ARKHAM EAST - JOKER’S TEETH #9-10
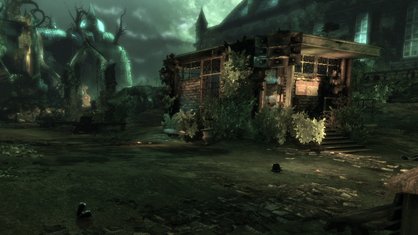
These two are near the door to Arkham West, close to a ground-level guard room. We didn't spot them until after finishing the game, so can't be sure when they first appear.
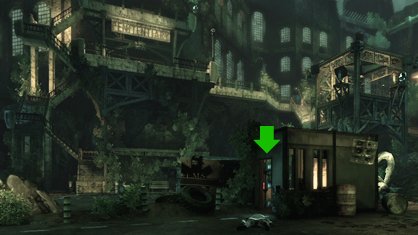
TOOL NEEDED: Cryptographic Sequencer
Once you have the ability to hack open security doors, look for a ground-level guard room halfway between the Medical Facility and the Penitentiary. Turn off the electricity and enter to find the secrets map.
ARKHAM WEST
ARKHAM WEST - RIDDLE SOLUTIONS VIDEO
ARKHAM WEST - RIDDLE SOLUTION #1
TOOL NEEDED: Ultra Batclaw
"Does Scarecrow's gas break down barriers as it drives you insane?"
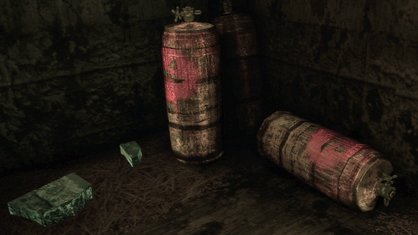
Above the door to Arkham East are two concrete rafters. Grapple to the second one and use detective mode to look for a destructible barrier in the rocky cliff face on your left. Pull it down and scan the gas canisters inside. The Jack o' Lantern faces should warn you that these belong to the Scarecrow.
ARKHAM WEST - RIDDLE SOLUTION #2
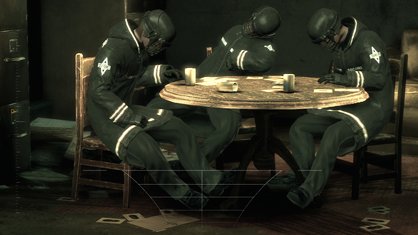
TOOL NEEDED: Cryptographic Sequencer with Range Booster Upgrade
"Zsasz is counting on you finding his work."
Climb the stairs to the left of the main Penitentiary door. On the balcony above, you'll find an electrified gate. Use your enhanced sequencer to hack the security from afar and - once inside - scan the card table and dead guards.
ARKHAM WEST - RIDDLE SOLUTION #3
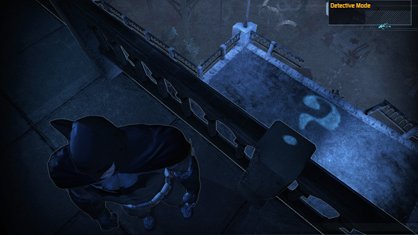
TOOL NEEDED: Detective Mode
"Do you see what I can see? No? Then maybe I am in a stronger position."
This is a question mark alignment puzzle. The top half is on the floor in front of the main Penitentiary door. The dot is on the railing of the balcony above, so grapple up there, look down and shift your view until the question mark is complete.
ARKHAM WEST - PATIENT INTERVIEW #1
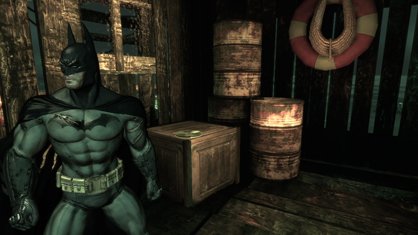
Head to the docks and enter the little wooden shack on the Penitentiary side. The tape is waiting inside.
ARKHAM WEST - CHRONICLE #1
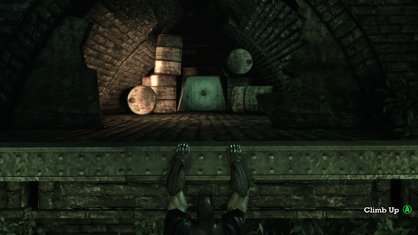
TOOL NEEDED: Explosive Gel
Underneath the Penitentiary balcony is a destructible arch. You can spot it best while standing amidst the ambulances. Grapple up, explode the wall and scan the chronicle symbol.
ARKHAM WEST - RIDDLER TROPHY #1
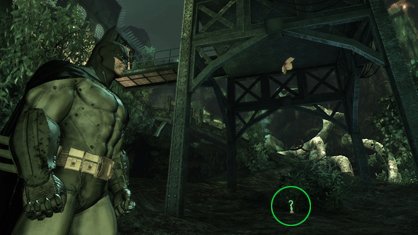
This one's about as easy as they come - just look underneath the guard tower. It's sitting right there on the ground, partially obscured by bushes.
ARKHAM WEST - RIDDLER TROPHY #2
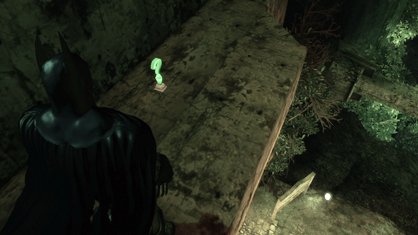
The trophy is on top of the Arkham North door. Just grapple up there and you're done.
ARKHAM WEST - RIDDLER TROPHY #3
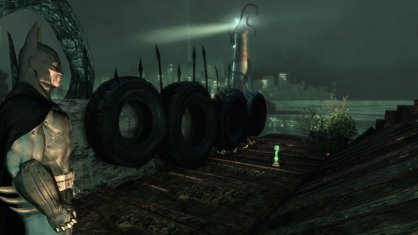
Check on top of the little wooden dock house next to Gotham Bay.
ARKHAM WEST - RIDDLER TROPHY #4
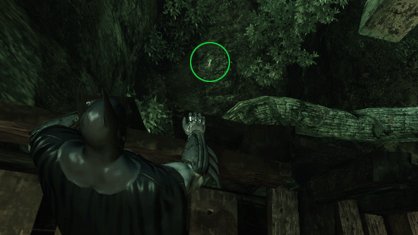
Head to the Arkham North door and turn right. There's a waterfall. Drop down into the waterfall basin and you'll find a trophy. You can also jump down from the brown wooden ramp leading away from the Visitor Centre.
ARKHAM WEST - RIDDLER TROPHY #5
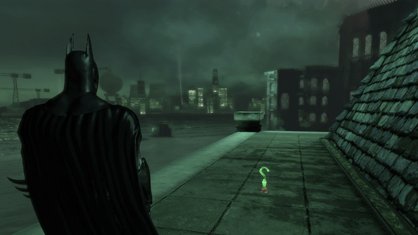
This trophy is on the Medical Facility's roof - the southwestern section closest to the water.
ARKHAM WEST - RIDDLER TROPHY #6
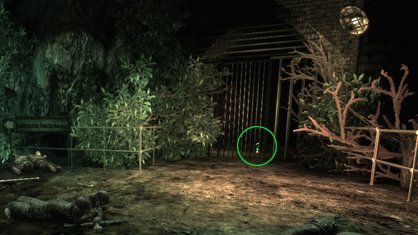
TOOL NEEDED: Explosive Gel
In the passage between Arkham East and Arkham West, you should see a trophy trapped behind bars. To get inside, you'll need to look above the bars, grapple to the ledge you see, detonate the destructible floor you find up there and drop down to claim your prize.
ARKHAM WEST - RIDDLER TROPHY #7
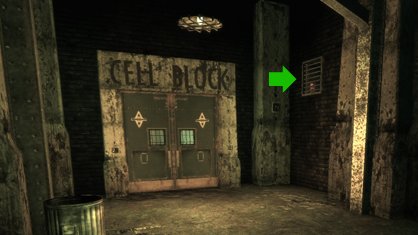
TOOL NEEDED: Batclaw
Go to the front entrance of the penitentiary - it should read "Cell Block" in big block letters above the door. To the right is a wall grate. Pull it off and climb inside to find the trophy.
ARKHAM WEST - RIDDLER TROPHY #8
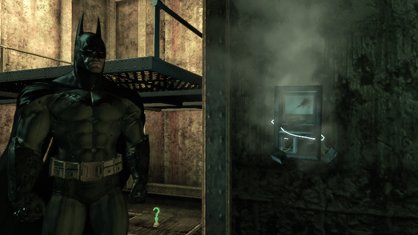
TOOL NEEDED: Cryptographic Sequencer
Find the large outdoor elevator in front of the Medical Facility. Use your sequencer to hack the nearby panel and lift this elevator. The trophy is underneath.
ARKHAM WEST - RIDDLER TROPHY #9
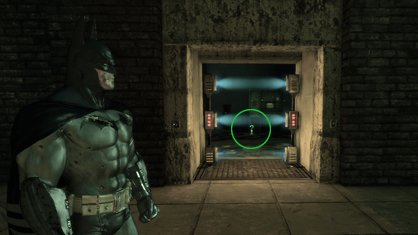
TOOL NEEDED: Cryptographic Sequencer with Range Amplifier
Climb the stairs to the left of the main Penitentiary door. On the balcony above, you'll find an electrified gate. Use your upgraded sequencer to hack the security from afar and walk in for both a trophy and a riddle solution.
ARKHAM WEST - RIDDLER TROPHY #10
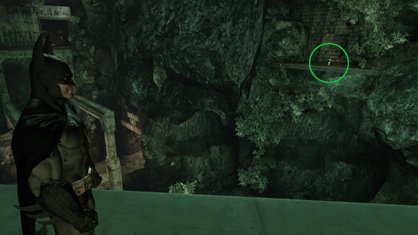
TOOL NEEDED: Line Launcher
Go to the northern end of the Medical Facility roof - the part closest to the Arkham East door - and look towards the rock cliff. You'll see a little brick alcove with a trophy awaiting you. Just zip across with the Line Launcher.
ARKHAM WEST - RIDDLER TROPHY #11
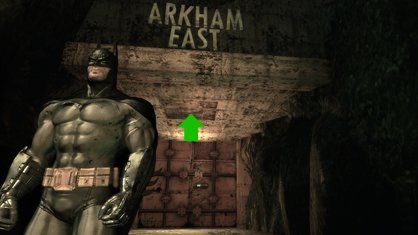
TOOL NEEDED: Ultra Batclaw
Stand in front of the door to Arkham East and look directly above you. The ceiling has a destructible panel. Use the Ultra Batclaw to pull it down and climb up for a trophy.
ARKHAM WEST - RIDDLER TROPHY #12
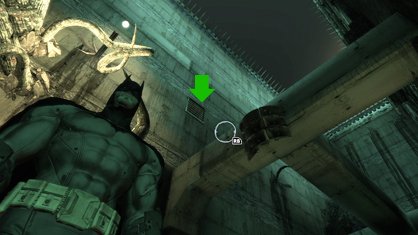
TOOL NEEDED: Ultra Batclaw
This one's in the passage connecting Arkham West and Arkham North. Halfway along are a couple of high concrete rafters. Grapple up to them and look for the wall grate. Pull it down with the Ultra Batclaw and nab your trophy.
ARKHAM WEST - RIDDLER TROPHY #13
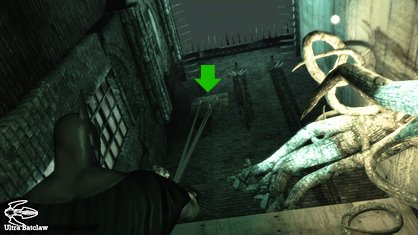
TOOL NEEDED: Ultra Batclaw
This trophy is also in the passage connecting Arkham West and Arkham North. Near the northern end, look up until you spot a destructible wall patch. It's almost as high as the roof spikes. Use the Ultra Batclaw to pull down those bricks and grapple up.
ARKHAM WEST - JOKER'S TEETH #1-3
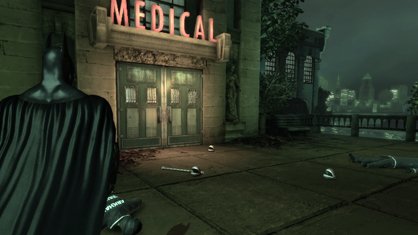
These three sets of chompers are located right outside the main door to the Medical Facility. You should pass them on your way to rescue Commissioner Gordon.
ARKHAM WEST - JOKER'S TEETH #4-6
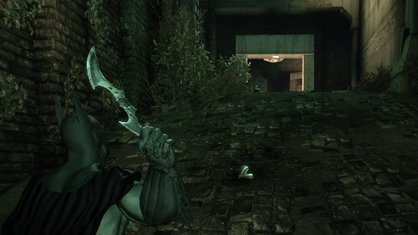
After you've defeated Bane, these three sets will appear in the tunnel connecting Arkham West to Arkham North.
ARKHAM WEST - JOKER'S TEETH #7-8
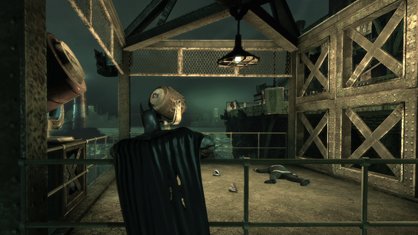
These are located inside the guard tower that sits in front of the Penitentiary. They may not appear until after you've completed Arkham Mansion's story scenes and are following Warden Sharp's DNA trail. If that's the case, watch out for the sniper that waits in the same place as the teeth.
ARKHAM WEST - JOKER'S TEETH #9-10
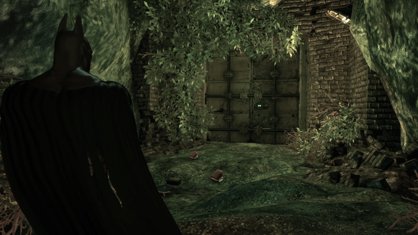
These last two sets are in the passage between Arkham West and Arkham East, right before the door to the East side. We didn't spot them until after finishing the game, so can't be sure when exactly they first appear.
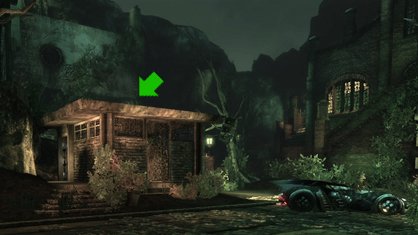
TOOL NEEDED: Explosive Gel
The eastern office building in this area has a destructible roof. Climb on top, use your explosive gel to blow it away and drop down for the Riddler's map.
ARKHAM NORTH
ARKHAM NORTH - RIDDLE SOLUTIONS VIDEO
ARKHAM NORTH - RIDDLE SOLUTION #1
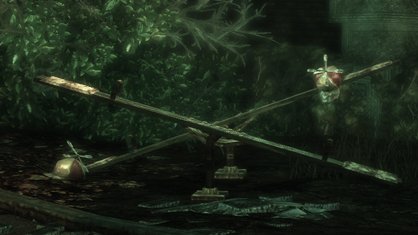
"Tweedledum and Tweedledee SAW it, can you SEE it?"
Head as far north on the map as you can, until you reach the main gates into Arkham Asylum. To your right will be a see-saw with beanie caps sitting at each end. Scan the whole thing to solve the riddle.
ARKHAM NORTH - RIDDLE SOLUTION #2
TOOL NEEDED: Cryptographic Sequencer
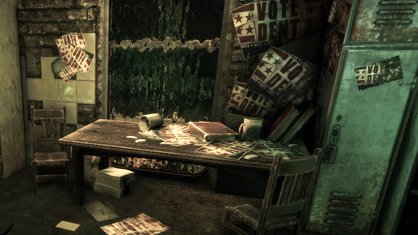
"Let's face it, there are two Dents on the wall."
Once you have the sequencer, go to the western ground floor guard house and blow the fuse. Enter and scan the "Vote Dent" posters on the wall and desk.
ARKHAM NORTH - RIDDLE SOLUTION #3
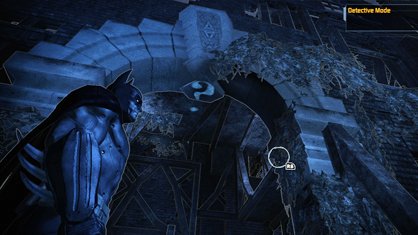
TOOL NEEDED: Detective Mode
"Now I see it, now you don't!"
This is a question mark alignment puzzle. Stand underneath the arched entrance to the dilapidated building and look up. The symbol should be clear.
ARKHAM NORTH - PATIENT INTERVIEW #1
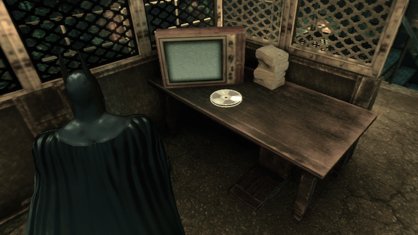
Two guard towers stand in this area. The western one holds an interview tape in its nest.
ARKHAM NORTH - PATIENT INTERVIEW #2
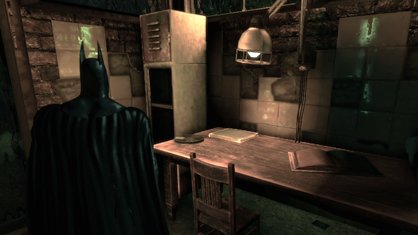
TOOL NEEDED: Cryptographic Sequencer
Once you have the sequencer, go to the western ground-floor guard house and blow the fuse. Enter to find the tape... it's the same room as the Harvey Dent riddle.
ARKHAM NORTH - CHRONICLE #1
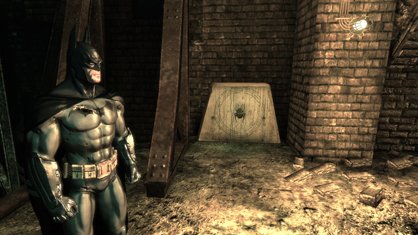
Find the crumbling building to the west of the main asylum gate. When going through the door, look up and right and you'll see an alcove. This is where the beetle symbol awaits.
ARKHAM NORTH - CHRONICLE #2
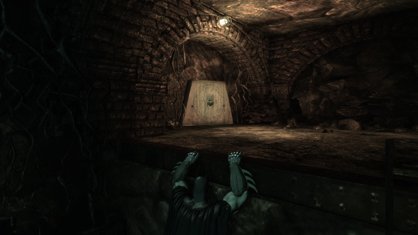
You'll see this symbol on your first trip to the Batcave. Pretty hard to miss.
ARKHAM NORTH - RIDDLER TROPHY #1
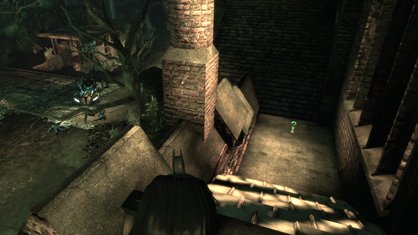
Grapple onto the roof of the building, in the section left of the Arkham West door. Once up there, cross the shingles on your left to find the trophy.
ARKHAM NORTH - RIDDLER TROPHY #2
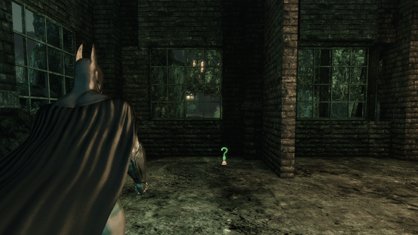
Find the crumbling building to the west of the main asylum gate. When going through its door, look to your left. The trophy is sitting on the floor in the corner.
ARKHAM NORTH - RIDDLER TROPHY #3
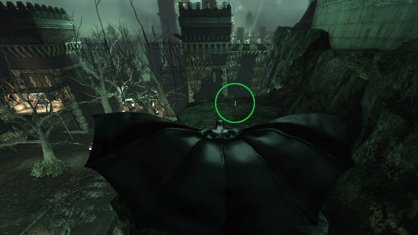
On the eastern side of this area is a rocky plateau. To reach it, climb the eastern guard tower and glide down from its roof.
ARKHAM NORTH - RIDDLER TROPHY #4
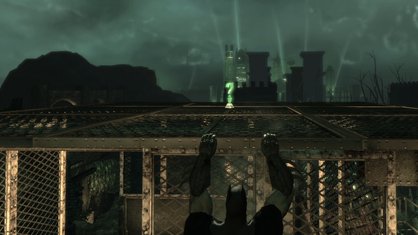
Look on the roof of the western guard tower... the tower closest to the Arkham West door.
ARKHAM NORTH - RIDDLER TROPHY #5
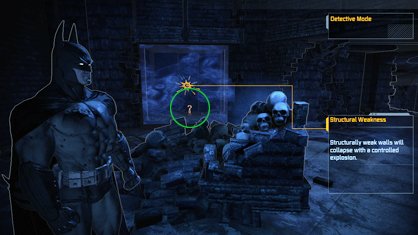
TOOL NEEDED: Explosive Gel
On your way to the Batcave, you'll enter a room with some skulls sitting in the center. The right wall is destructible with explosive gel, and has a trophy hiding behind it.
ARKHAM NORTH - RIDDLER TROPHY #6
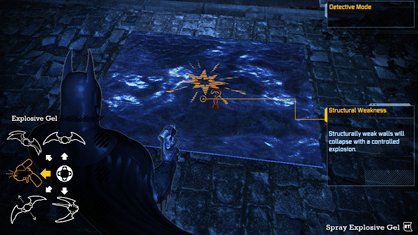
TOOL NEEDED: Explosive Gel
On the paved road, right between the two guard towers, is a destructible floor panel. Use the gel to blow it away and drop into the little hole to nab the trophy.
ARKHAM NORTH - RIDDLER TROPHY #7
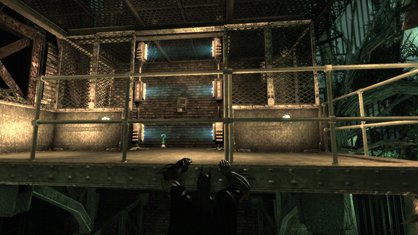
TOOL NEEDED: Cryptographic Sequencer with Range Amplifier
Stand on the road and face the main gate out of Arkham Asylum. On your left is a guard office with an electrified door. Use your upgraded sequencer to power it down and nab the trophy.
ARKHAM NORTH - RIDDLER TROPHY #8
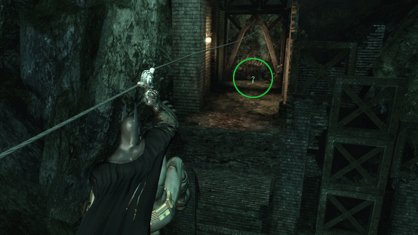
TOOL NEEDED: Line Launcher
Head to the guard tower that's closest to the Arkham West door. Stand inside its office and look west towards the cliff. You should see an alcove with the trophy. Zip across the gap with the Line Launcher.
ARKHAM NORTH - RIDDLER TROPHY #9
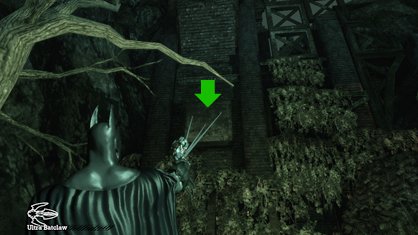
TOOL NEEDED: Ultra Batclaw
Directly below the alcove holding Trophy #7 is a destructible wall hiding Trophy #8. You need the Ultra Batclaw to pull it down.
ARKHAM NORTH - RIDDLER TROPHY #10
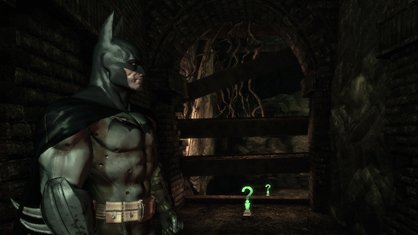
Above the entrance to the Batcave is a tunnel. Grapple up there and you'll find two Riddler trophies. This one's easy. The next one's a little trickier.
ARKHAM NORTH - RIDDLER TROPHY #11
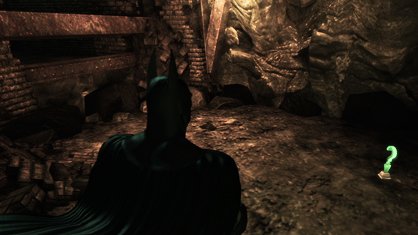
TOOL NEEDED: Ultra Batclaw
So tantalizing! This Riddler trophy is only a few feet away from the previous one, but iron bars block your path. To get to it, leave the tunnel and head into the Batcave entrance. Grapple up twice, but before heading through the steel door, turn around and look for a destructible patch of wall. Use the Ultra Batclaw to tear it down and jump over for the prize.
ARKHAM NORTH - JOKER'S TEETH #1-3
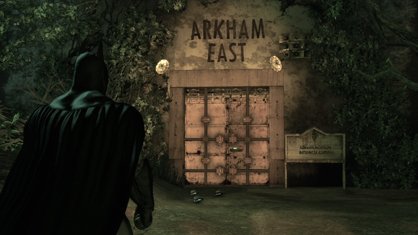
These will be directly in front of the door to Arkham East, after surfacing from the sewers and while heading to Arkham Mansion.
ARKHAM NORTH - JOKER'S TEETH #4-6
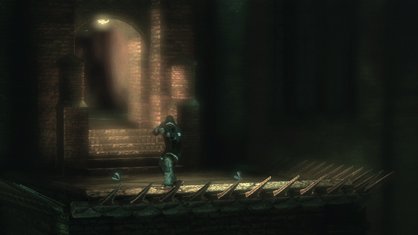
When you're breaking back into Intensive Treatment to find Killer Croc's lair, you'll have to get past this spiked sniper station. Climb one of the guard towers and use your new Line Launcher to access the platform. After taking out the sniper, take out the three sets of teeth.
ARKHAM NORTH - JOKER'S TEETH #7-8
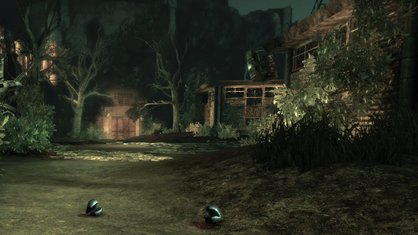
These are near the door to Arkham East. We didn't spot them until after finishing the game, so can't be sure when they first appear.
ARKHAM NORTH - JOKER'S TEETH #9-10
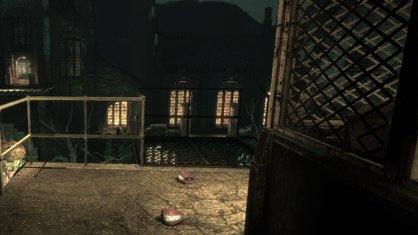
These are on the western guard tower. We didn't spot them until after finishing the game, so can't be sure when they first appear.
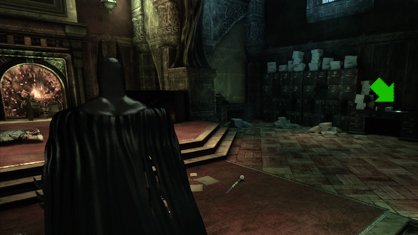
(Warden's Office)
Look for a display case on the south side of the Warden's office... it's to your right if you're facing the fireplace. On a desk against the wall is the secret map.
ARKHAM MANSION
ARKHAM MANSION - RIDDLE SOLUTIONS VIDEO
ARKHAM MANSION - RIDDLE SOLUTION #1
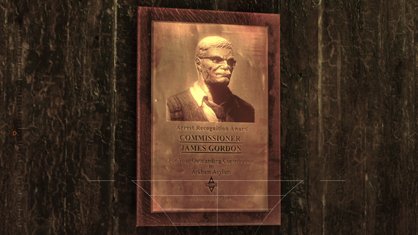
(Main Hall)
"Who is the main man in the main hall?"
On the east side of this room is a short hallway that leads to the South Corridor. On the left wall is a portrait of Commissioner Gordon. Scan it.
ARKHAM MANSION - RIDDLE SOLUTION #2
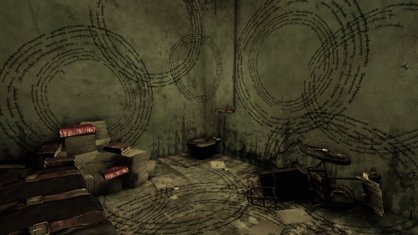
(North Corridor)
"Did Amadeus go mad, or was he just dizzy?"
On your way to Dr. Young's office, while searching for her notes, you should come across a jail cell with spiral text written in dizzying circles on the walls. Scan some of those spirals.
ARKHAM MANSION - RIDDLE SOLUTION #3
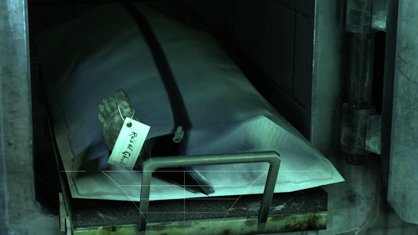
(Dr. Young's Office)
"It'll be a cold day in Hell when this Ghul rises again."
When trying to find a way into Dr. Young's office, you'll notice a wall of morgue drawers. Only one's open and, according to the toe tag, it's holding the body of Ra's al Ghul. Scan the cadaver.
ARKHAM MANSION - RIDDLE SOLUTION #4
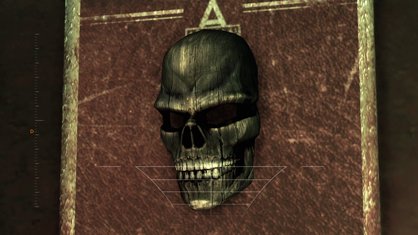
(Dr. Young's Office)
"How do you mask your feelings without losing control?"
Get inside Dr. Young's office and look for the skull-like face hanging on the wall. That belongs to the villain Black Mask. Scan it.
ARKHAM MANSION - RIDDLE SOLUTION #5
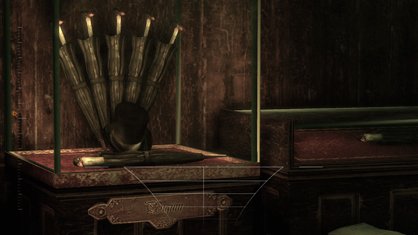
(South Corridor)
"What does a bird need in the rain?"
This hallway, which you pass through while tracking Dr. Young's fingerprints, holds several display cases. The one against the wall has Penguin brand umbrellas inside. Scan them.
ARKHAM MANSION - RIDDLE SOLUTION #6
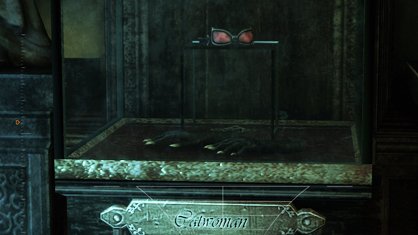
(East Wing Corridor)
"A game of Cat and mouse can be painful."
While traveling through this hallway, probably on your way to rescue Dr. Young from Zsasz, look out for a display case in the shadows. It's got Catwoman's mask and clawed gloves inside - scan them.
ARKHAM MANSION - RIDDLE SOLUTION #7
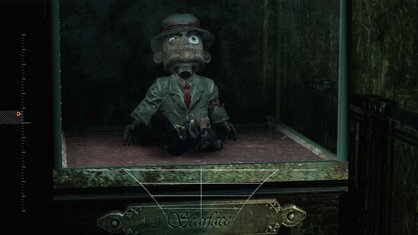
(Warden's Office)
"Isn't the Warden too old for a puppet show?"
Look for a display case on the south side of the Warden's office... it's to your right if you're facing the fireplace and contains the Scarface puppet. Scan him.
ARKHAM MANSION - RIDDLE SOLUTION #8
TOOLS NEEDED: Cryptographic Sequencer, Line Launcher
(Arkham Records Room)
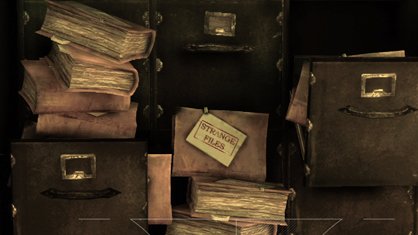
"Our records show that a Strange transfer request was made in this room."
Head for the southern door in the Records Room and use your sequencer to unlock its electrified gate. There's still the electrified floor to deal with, however, so get out your Line Launcher and zip across. The files for Professor Hugo Strange are on your right as you enter.
ARKHAM MANSION - RIDDLE SOLUTION #9
TOOL NEEDED: Detective Mode
(South Corridor)
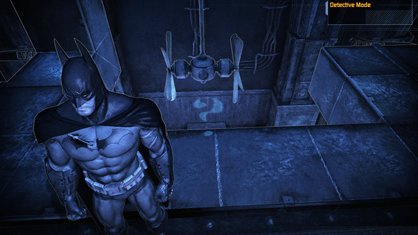
"This fiendish puzzle literally appears out of thin air."
This is a question mark alignment puzzle. Check the western wall of this corridor - above one of the display cases is the top half of the question mark. Turn around and zip up to the air vents to find the symbol's dot.
ARKHAM MANSION - PATIENT INTERVIEW #1
(Main Hall)
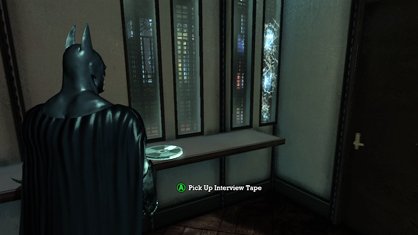
In the cathedral-like foyer at the top of this room - past the statue and branching stairs - are two security rooms, each with wall grates. The eastern one holds an interview tape - just pull open the grate to get in.
ARKHAM MANSION - PATIENT INTERVIEW #2
(Dr. Young's Office)
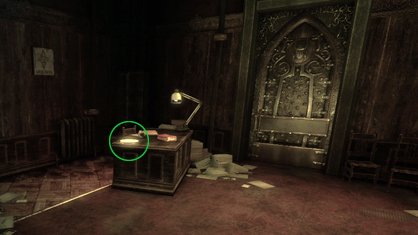
On your way out of Dr. Young's office - through a newly accessible door - you'll pass a desk with a lamp and an interview tape.
ARKHAM MANSION - PATIENT INTERVIEW #3
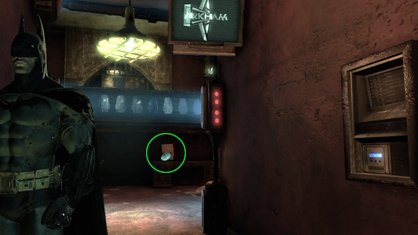
TOOL NEEDED: Cryptographic Sequencer
(Library)
When entering the Library, walk left around the circle. You should find an electrified security door. Hack the panel and take the interview tape on the other side.
ARKHAM MANSION - PATIENT INTERVIEW #4
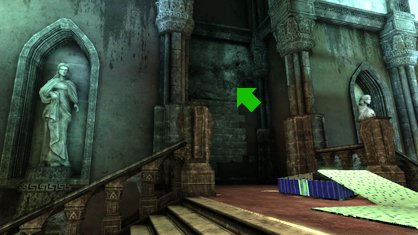
TOOL NEEDED: Ultra Batclaw
(West Wing Corridor)
On the western wall of this corridor - at the top of the stairs, before the Records Room and opposite the path to Dr. Young's office - is a destructible patch between two columns. Pull it down with the Ultra Batclaw and jump over to find the tape.
ARKHAM MANSION - PATIENT INTERVIEW #5
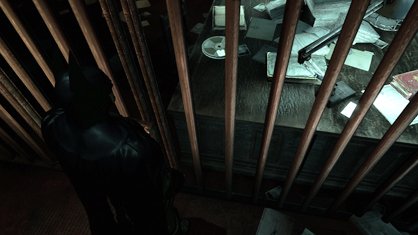
TOOL NEEDED: Ultra Batclaw
(Records Room)
You've spotted this one through bars, but how to get inside? Look for a high vent near the entrance to the Professor Strange solution (see Riddle #8). It's in the southern wing, on the eastern wall. Pull the grate off with your Ultra Batclaw and grapple up. Follow the air ducts and you'll soon reach the room with the tape.
ARKHAM MANSION - CHRONICLE #1
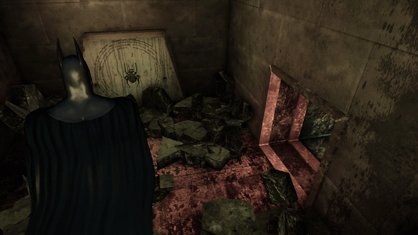
TOOLS NEEDED: Batclaw, Explosive Gel
(Mansion Entrance Hall)
You'll see this on your way from the Main Entrance Hall to the Main Hall. The door between them is locked at first, so you're forced to grapple into a ceiling air duct and crawl through. The tablet is halfway along that path, in a room right after a desctructible wall.
ARKHAM MANSION - CHRONICLE #2
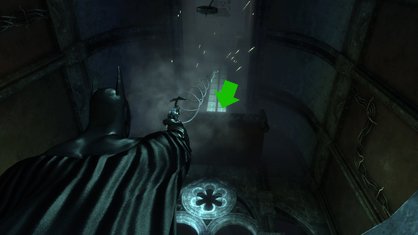
(Main Hall)
Go to the northern section of this room, where the pendulum swings and where the bell drops. Look high up, across from the cathedral-like windows. See that balcony? Grapple up there and you'll find a tablet.
ARKHAM MANSION - CHRONICLE #3
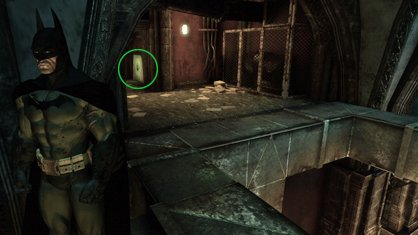
TOOL NEEDED: Explosive Gel
(South Corridor)
Keep your eyes up as you walk down this hallway. Halfway along, on the eastern side, you'll see a complicated section of air ducts and ceiling fans. Grapple there and find the destructible wall. Behind it is the beetle tablet. Note that this is the same area for Riddle #9.
ARKHAM MANSION - RIDDLER TROPHY #1
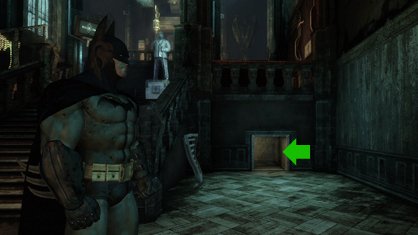
(Mansion Entrance Hall)
To the right of the very first set of stairs in this room is a wall grate. Duck in there for the trophy.
ARKHAM MANSION - RIDDLER TROPHY #2
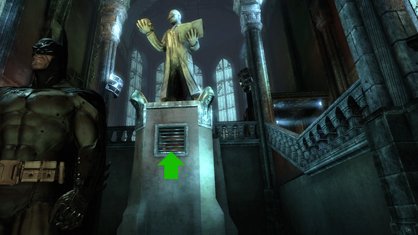
TOOL NEEDED: Batclaw
(Main Hall)
See the big statue holding a book and skull? See the wall grate on its pedestal? See the trophy within? Yup, there you go.
ARKHAM MANSION - RIDDLER TROPHY #3
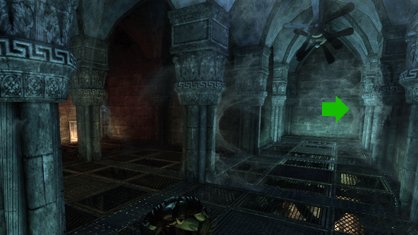
(North Corridor)
After passing by the jail cell with spiralling text on its walls, you'll grapple up to a wall grate and crawl into a large room with ceiling fans. Dr. Young's office is through a second wall grate on the left, but head forward - to the back of the room - and you'll find a trophy hidden around the corner.
ARKHAM MANSION - RIDDLER TROPHY #4
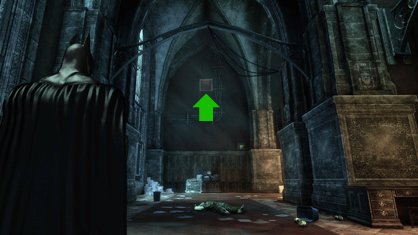
TOOL NEEDED: Batclaw
(South Corridor)
Where this corridor bends, look up to the rafters. There's a very high wall grate that you can pull open and grapple into. The trophy's inside.
ARKHAM MANSION - RIDDLER TROPHY #5
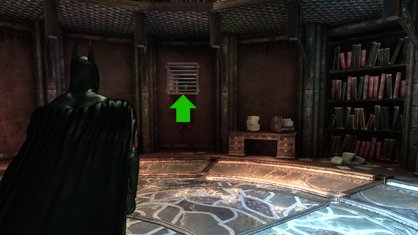
TOOL NEEDED: Batclaw
(Library)
As soon as you enter the Library, look right. See the wall grate between the two desks? Use your Batclaw to pull it off and climb in for a trophy.
ARKHAM MANSION - RIDDLER TROPHY #6
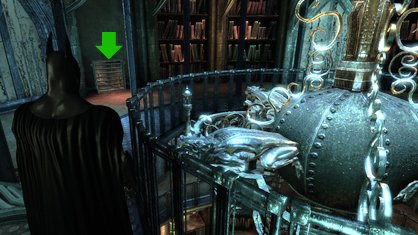
(Library)
When you're at the top of the Library, getting ready to cut the chandelier's cord, look for a grate along the circular wall. Inside is a trophy.
ARKHAM MANSION - RIDDLER TROPHY #7
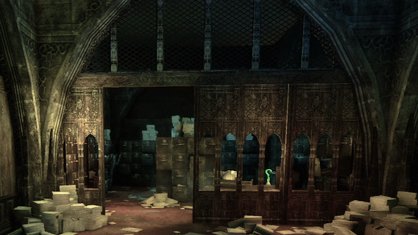
(Warden's Office)
As you're exiting the main office with the fireplace, turn right instead of left. You'll find a small file room and a trophy sitting on the desk next to a TV monitor.
ARKHAM MANSION - RIDDLER TROPHY #8
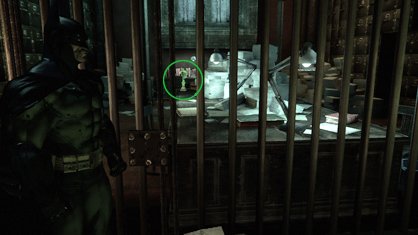
TOOL NEEDED: Ultra Batclaw
(Records Room)
You've seen this trophy through the bars, taunting you on the western end of the Records Room; once you have the Ultra Batclaw, you can finally nab it. Look up and to the right of the bars and you should notice a grate. Pull it down with the Ultra Batclaw and crawl inside. Follow the path to the trophy.
ARKHAM MANSION - RIDDLER TROPHY #9
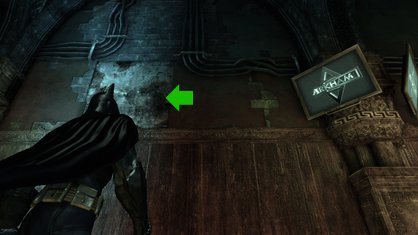
TOOL NEEDED: Ultra Batclaw
(East Wing Corridor)
Face the door to the Warden's Office and look to your left. There's a destructible patch of wall up there and, behind it, a trophy.
ARKHAM MANSION - JOKER'S TEETH #1-3
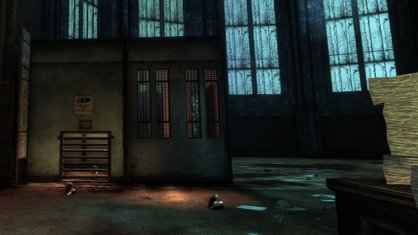
(Main Hall)
In the cathedral-like foyer at the top of this room - past the statue - are two security rooms. Three sets of teeth are chomping around the western one, though you'll have to pull open a wall grate to destroy the third.
ARKHAM MANSION - JOKER'S TEETH #4-5
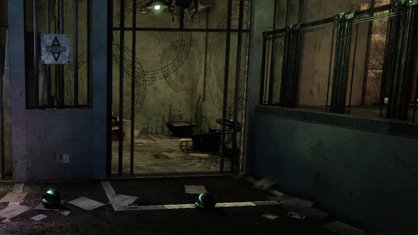
(North Corridor)
These are chomping right outside the jail cell with spiral text written on the walls. You should encounter them while looking for Dr. Young's office.
ARKHAM MANSION - JOKER'S TEETH #6-8
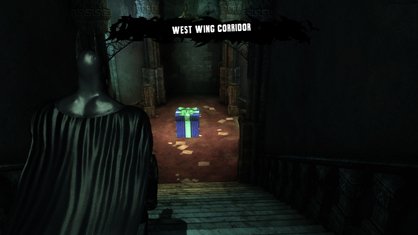
(West Wing Corridor)
After exiting Dr. Young's office, following her fingerprints, you'll run into a purple gift box in the West Wing Corridor. Destroy all three sets of teeth.
ARKHAM MANSION - JOKER'S TEETH #9-11
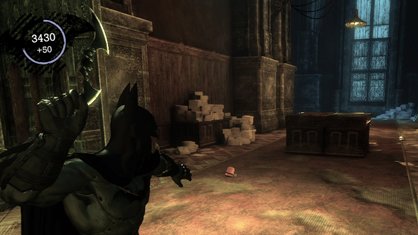
(South Corridor)
You can't miss these three as you're tracking Dr. Young's fingerprints. They're in the middle of the hallway, near the display cases... one of which holds the solution to a Penguin riddle.
ARKHAM MANSION - JOKER'S TEETH #12-14
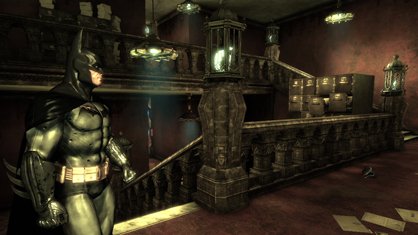
(Library)
On the stairs leading to the lowest level of the library - where the prisoners are tied up - is where you'll find these three sets.
ARKHAM MANSION - JOKER'S TEETH #15-17
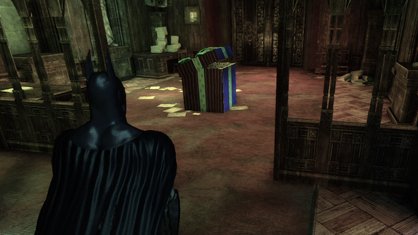
(East Wing Corridor)
You'll run into these three sets while following the Warden's DNA trail out of his office. They're in a purple gift box, right after the turn in this corridor.
ARKHAM MANSION - JOKER'S TEETH #18-20
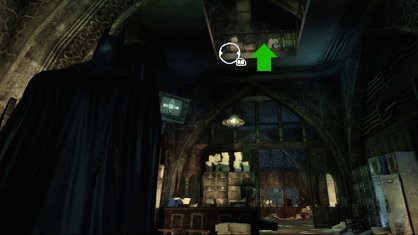
(Warden's Office)
These are the easiest-to-miss teeth in the entire game. They're on the upper floor of Warden Sharp's office... which, unless you were searching very carefully, you probably didn't even realize had an upper floor. Go to the door that leads back to the East Wing and look up at the ceiling. There's a hole you can grapple into. Arkham Mansion's final teeth are near the back of the filing cabinets.
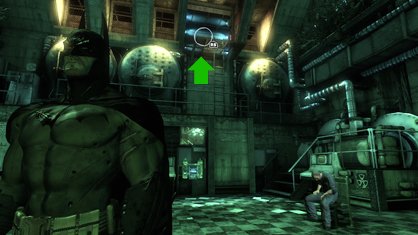
TOOL NEEDED: Cryptographic Sequencer with Range Booster Upgrade
(Glasshouse Generator Room)
This is the area where you save a janitor and turn off the electricity. Look up and you'll see an electrified gate, situated high above the room. Grapple to it, then use the long-range cryptographic sequencer (available with an upgrade) to hack the panel inside. Enter to find the map, as well as a trophy.
BOTANICAL GARDENS
BOTANICAL GARDENS - RIDDLE SOLUTIONS VIDEO
BOTANICAL GARDENS - RIDDLE SOLUTION #1
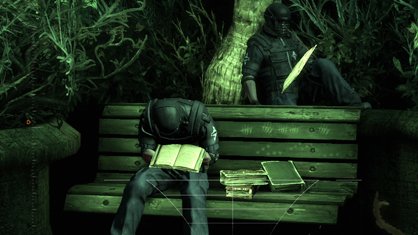
(Glasshouse Entrance)
"Is the number up for these guards?"
As soon as you've entered the Botanical Gardens, turn left and find the bench. There are two dead security men, posed with books, and numbered marks are scratched onto the nearby wood. Scan the whole scene to solve the riddle.
BOTANICAL GARDENS - RIDDLE SOLUTION #2
(Statue Corridor)
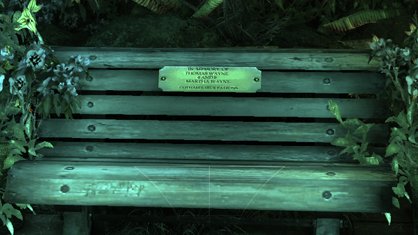
"Remember the Waynes? How could anyone forget?"
When heading to the Generator Room to save the janitor and turn off the power, you'll pass through this corridor. At its center is a garden bench with an inscription honoring Bruce's parents. Zoom in and scan the gold plate to solve the riddle.
BOTANICAL GARDENS - RIDDLE SOLUTION #3
(Botanical Glasshouse)
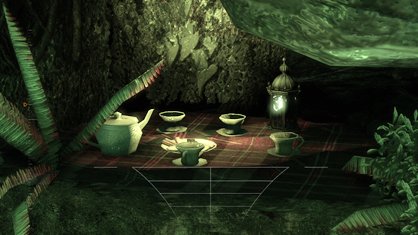
"What time is tea time in Wonderland?"
This circular greenhouse rotunda has three levels and a Poseidon-like fountain in the middle. On the second level, behind the fountain statue's back and nestled between some tree branches, is the Mad Hatter's tea set.
BOTANICAL GARDENS - RIDDLE SOLUTION #4
(Ventilation System)
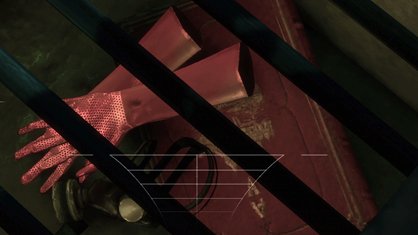
"The Ratcatcher needed more than just his charm to lead his army."
This solution is hidden in the air duct tunnels between the Flooded Corridor and the Abandoned Chamber... you crawl through them after crossing the previously electrified water. As you're moving along, keep the camera pointed downward. Eventually, you'll see a pair of gloves, a gas mask and a book under the bars below you. They belong to the Ratcatcher.
BOTANICAL GARDENS - RIDDLE SOLUTION #5
(Flooded Corridor)
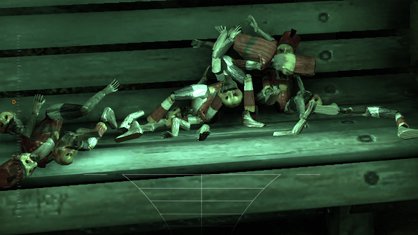
"Looks like all the king's horses trampled all the king's men."
After returning to the Flooded Corridor, you'll rescue a second janitor from prisoners. He asks you to find some orderlies in the Aviary. Before doing so, go down the southern hallway and turn the corner. In front of you is a bench with broken toy soldiers strewn across the seat. Scan them to solve the riddle and get info on the fix-it villain Humpty Dumpty.
BOTANICAL GARDENS - RIDDLE SOLUTION #6
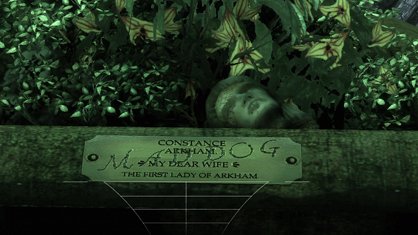
(Flooded Corridor)
"Is this a tribute to what a mad dog left behind?"
On your way to the Aviary, you'll pass through a small square room with a headless statue holding flowers. The gold inscription plate has been vandalized with the name "Mad Dog". Scan it to solve the riddle.
BOTANICAL GARDENS - RIDDLE SOLUTION #7
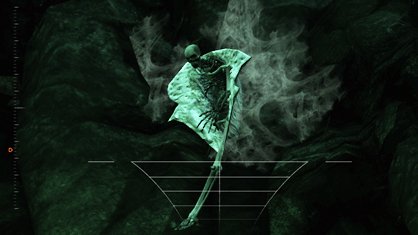
(Aviary)
"There's no closet in the Gardens, so someone is using the roof instead."
Stand facing the secret door that leads to the Titan Production Facility (it's on the western side of the Aviary) and turn left. Look up. See the cobwebbed skeleton? That's actually a Killer Moth victim in its cocoon. Scan for the solution.
BOTANICAL GARDENS - RIDDLE SOLUTION #8
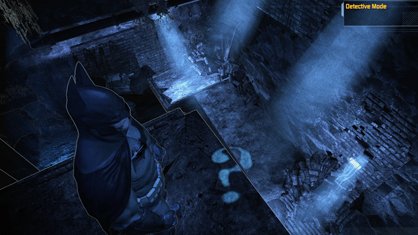
TOOL NEEDED: Detective Mode
(Abandoned Chamber)
"This challenge can only be seen by those with a different view of life."
This is a question mark alignment puzzle. Before exiting this area through the steel door, turn left and you'll see that you can jump to a lower platform (while being careful not to hit the pipe). Run along that platform and you'll reach a shimmy hand hold, which will take you to a waterfall. Climb up, turn around and jump again. Now just head right until you reach a metal catwalk - use your Batarang to cut its rope and knock it down. Halfway across the catwalk, turn left and grab hold of the brickwork. Shimmy around this section until you can climb up to the chamber's highest point. Head to the northern end of this platform - you'll need to duck under some debris - and the question mark should become clear.
BOTANICAL GARDENS - PATIENT INTERVIEW #1
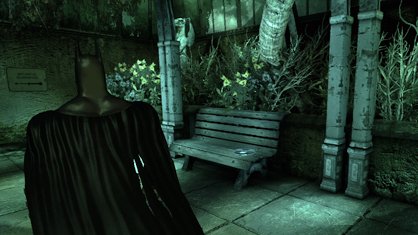
(Glasshouse Entrance)
As soon as you've entered the Botanical Gardens, look for a bench on the righthand wall. A tape sits there.
BOTANICAL GARDENS - PATIENT INTERVIEW #2
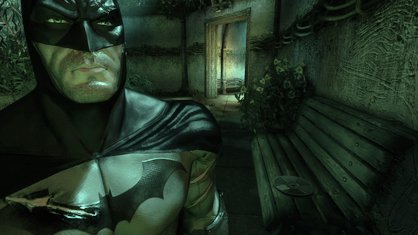
(Statue Corridor)
When heading to the Generator Room to save the janitor and turn off the electricity, you'll pass through this corridor. Along its southern side is a shadowy bench, with the tape sitting right on top.
BOTANICAL GARDENS - PATIENT INTERVIEW #3
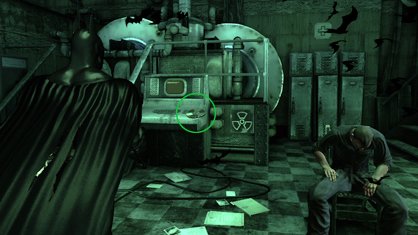
(Glasshouse Generator Room)
The tape is on a computer terminal behind the janitor's chair.
BOTANICAL GARDENS - PATIENT INTERVIEW #4
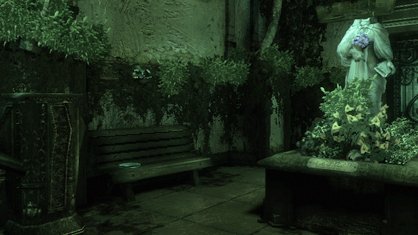
(Flooded Corridor)
This tape is sitting on a bench next to the headless Mad Dog statue (see Riddle #6), in front of the door to the Aviary.
BOTANICAL GARDENS - PATIENT INTERVIEW #5
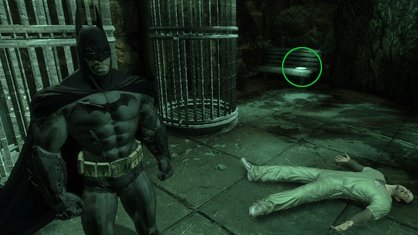
(Aviary)
The tape is on a bench in the southeastern corner of the Aviary, behind two tall birdcages.
BOTANICAL GARDENS - CHRONICLE #1
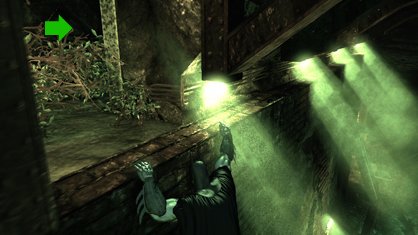
(Abandoned Chamber)
Follow the same complicated path you did to get to Riddle #8. In fact, the exact spot where you stood to scan Riddle #8 is the exact spot you need to jump from to reach this chronicle. Make sure to get a slight running start, then leap towards the northern wall and catch hold of the ledge. Shimmy left and climb up to find the tablet.
BOTANICAL GARDENS - CHRONICLE #2
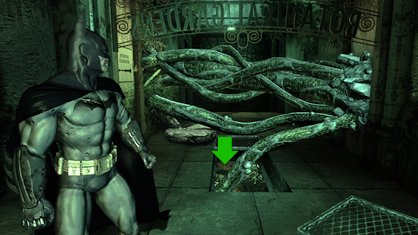
(Glasshouse Entrance)
When trying to exit the Botanical Gardens, Poison Ivy will block your way with huge, tentacle-like vines. Drop down through the floor and, before continuing with your mission, turn around and scan the beetle symbol behind you.
BOTANICAL GARDENS - CHRONICLE #3
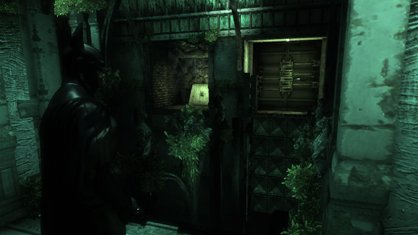
TOOLS NEEDED: Line Launcher, Ultra Batclaw
(Titan Production Facility)
Remember when you used the Line Launcher for the first time, leaving the fight with Joker's two deformed henchmen and heading out to find Poison Ivy? You would have zipped across a gap to the exit. On either side of that exit, however, is a reward. On the right is a trophy. On the left is a destructible wall (you'll need to return with the Ultra Batclaw) and a Chronicle of Arkham.
BOTANICAL GARDENS - RIDDLER TROPHY #1
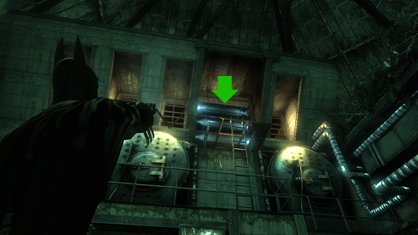
TOOL NEEDED: Cryptographic Sequencer with Range Amplifier
(Glasshouse Generator Room)
This is the area where you save a janitor and turn off the electricity. Look up and you'll see an electrified gate, situated high above the room. Grapple to it, then use the long-range cryptographic sequencer (available with an upgrade) to hack the panel inside. Enter to find a trophy, as well as the Riddler's map.
BOTANICAL GARDENS - RIDDLER TROPHY #2
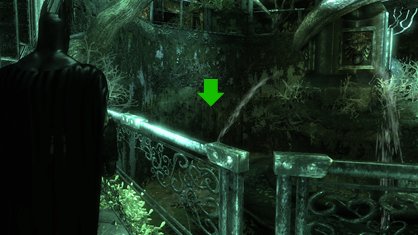
TOOL NEEDED: Explosive Gel
(Botanical Glasshouse)
When you enter this room, the first thing you'll notice is the three-story tall fountain of a man with a spear. Switch to detective mode and look at the bottom of the fountain. You'll see a destructible wall at the back. Explode it and crawl through the revealed ventilation duct to grab the trophy.
BOTANICAL GARDENS - RIDDLER TROPHY #3
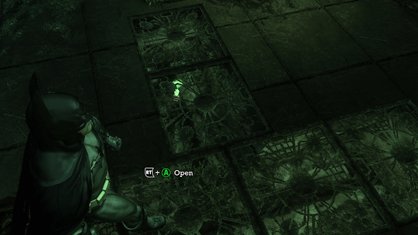
(Botanical Glasshouse)
Head to second level of this three-level room. Head to the back, or northern, side. Right past the Mad Hatter's tea set, you'll see a T-shaped series of floor grates. Pop underneath for the trophy.
BOTANICAL GARDENS - RIDDLER TROPHY #4
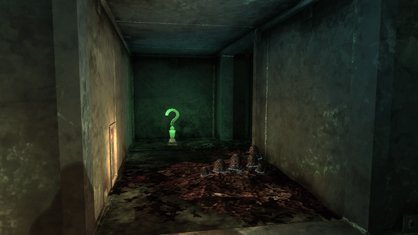
(Ventilation System)
You'll locate this in the air duct tunnels between the Flooded Corridor and the Abandoned Chamber... you crawl through them after crossing the previously electrified water. If you reach the exit, you've passed it. Go back and take a different branch until you see the trophy next to some brownish blue mushrooms.
BOTANICAL GARDENS - RIDDLER TROPHY #5
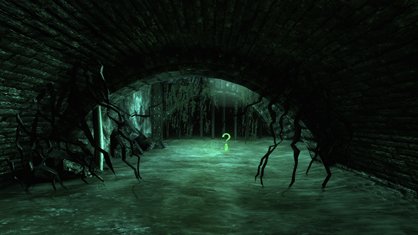
(Abandoned Chamber)
You should have noticed a large circular floor grate in the southeastern corner of this area. It's glowing green from the water below... but how to get down there? Simply make your way to the northeastern corner of the room, then drop into the sewer stream and duck into the arched tunnel. You'll see the trophy ahead.
BOTANICAL GARDENS - RIDDLER TROPHY #6
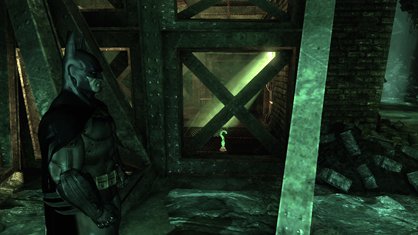
(Abandoned Chamber)
As you walk around the central structure of this room, you should see a trophy tucked on the ground level. If you climb the stairs to get inside the structure, however, you'll discover that the trophy is actually underneath the floor. Instead, head to the northern outside edge of the structure and look for an accessible grate at your feet. Pop in and follow the tunnel, then pop back out inside the structure. The trophy should be right in front of you.
BOTANICAL GARDENS - RIDDLER TROPHY #7
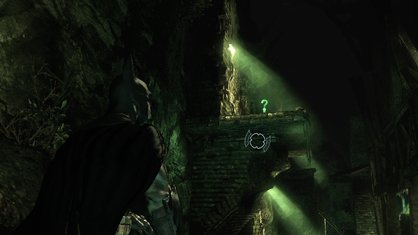
(Abandoned Chamber)
Before exiting this area through the steel door, turn around and look slightly up. A trophy, glimmering in the beam of light! Getting there is a little complicated, unless you've already made the journey for Riddle #8. First, jump across to the western platform (it's to your right if facing the trophy). Second, run forward and grab the hand holds on the western wall. Third, shimmy across and climb up into the greenish waterfall, then turn around and jump to the opposite platform. Fourth, turn right and head slightly south until you see a diagonal catwalk on your left. Finally, use your Batarang to cut the rope holding the catwalk up - it'll crash down, providing you easy access, after another quick run and jump, to the trophy beyond.
BOTANICAL GARDENS - RIDDLER TROPHY #8
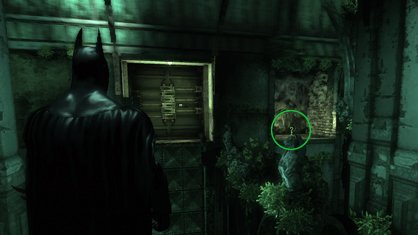
TOOL NEEDED: Line Launcher
(Titan Production Facility)
Remember when you used the Line Launcher for the first time, leaving the fight with Joker's two deformed henchmen and heading out to find Poison Ivy? You would have zipped across a gap to the exit. On either side of that exit, however, is a reward. On the left is a chronicle (though you'll need the Ultra Batclaw to get it) and on the right is this trophy.
BOTANICAL GARDENS - RIDDLER TROPHY #9
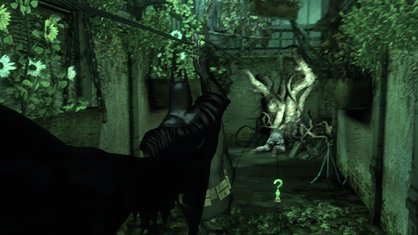
TOOL NEEDED: Line Launcher
(Flooded Corridor)
You'll walk over this trophy in your search for Poison Ivy, immediately after Line Launching through the arched greenhouse tunnel full of flower pots. Pretty hard to miss.
BOTANICAL GARDENS - RIDDLER TROPHY #10
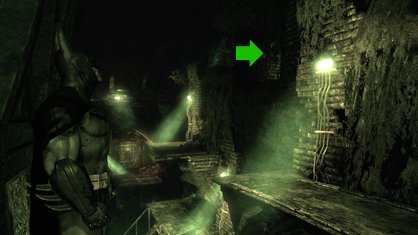
TOOLS NEEDED: Ultra Batclaw, Line Launcher
(Abandoned Chamber)
To find this trophy, you need to follow the same complicated path as you did for Riddle #8 and Trophy #7. Like with Riddle #8, you'll want to stop halfway along the catwalk and grab hold of the brickwork to your left. Once you've shimmied around and onto the central platform, check out the eastern wall in Detective Mode. Pull down the destructible patch you see with the Ultra Batclaw, then Line Launch yourself to the trophy.
BOTANICAL GARDENS - JOKER'S TEETH #1-3
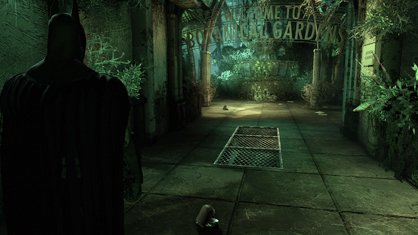
(Glasshouse Entrance)
You'll find these wandering around the very first room of the Botanical Gardens. Make sure to get all three before moving on.
BOTANICAL GARDENS - JOKER'S TEETH #4-6
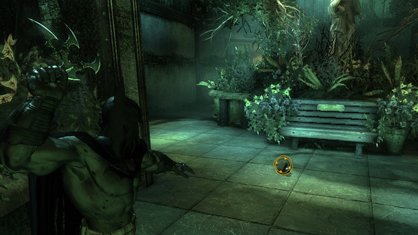
(Statue Corridor)
These are found while heading to the Generator Room to save the janitor and turn off the power. They're a little spread out, but not very hard to find and destroy.
BOTANICAL GARDENS - JOKER'S TEETH #7-8
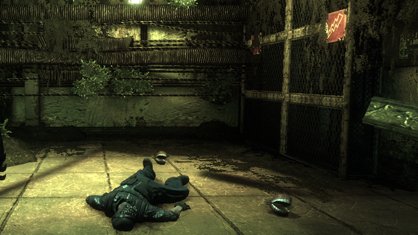
(Flooded Corridor)
Cross the water in this room after you've turned off the electricity flowing through it. Two sets of teeth are waiting for you on the other side.
BOTANICAL GARDENS - JOKER'S TEETH #9-11
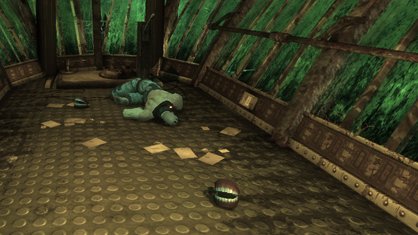
(Aviary)
You have to take out the main henchman in the control tower in order to pass this room's mission - saving the orderlies in the cages. After you've done so, destroy the three sets of teeth chattering about his body.
BOTANICAL GARDENS - JOKER'S TEETH #12-14
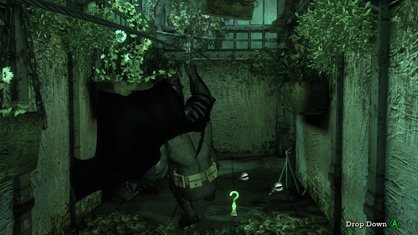
(Flooded Corridor)
You'll find these three while following Poison Ivy's trail, immediately after line launching across a narrow arched hallway full of flower pots. There's a trophy here too.
BOTANICAL GARDENS - JOKER'S TEETH #15-17
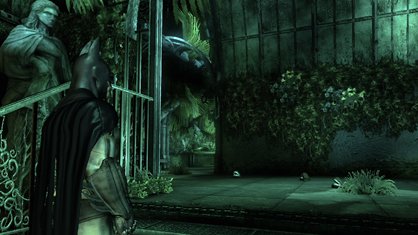
(Glasshouse Entrance)
These three will appear on your way out of the Botanical Gardens, after speaking with Poison Ivy.
BOTANICAL GARDENS - JOKER'S TEETH #18-20
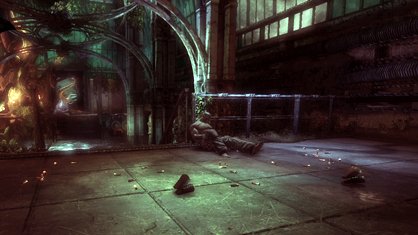
(Flooded Corridor)
These won't appear until you've returned to the Botanical Gardens with the antidote. You'll want to destroy them before crossing the electrified water.
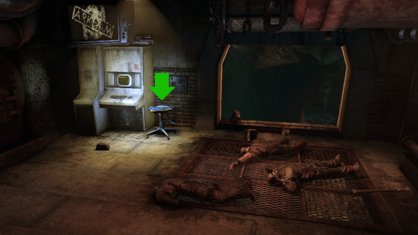
TOOL NEEDED: Ultra Batclaw
(Pump Control Room)
This is the first room you enter while trying to shut down the three Titan pump valves. You'll use the Ultra Batclaw to tear down a wall, revealing a group of thugs. Defeat them, then grab the map off the computer terminal stool.
CAVES
CAVES - RIDDLE SOLUTIONS VIDEO
CAVES - RIDDLE SOLUTION #1
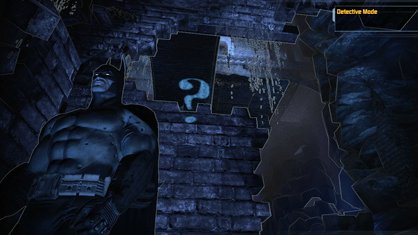
TOOL NEEDED: Detective Mode
(Main Sewer Junction)
"A puzzle has many sides, but only some are visible."
This is a question mark alignment puzzle. While running up the second collapsed column, you'll see a hand hold on the platform above. Use it to shimmy around, climb up and then look at the brick wall in front of you to spot the symbol. There's a trophy here, too.
CAVES - PATIENT INTERVIEW #1
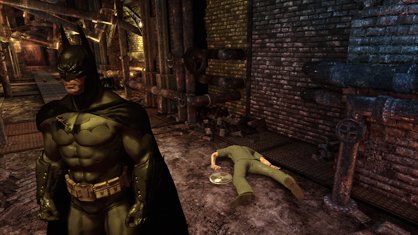
(Old Sewer)
Just follow the objective path on your first trip through the sewers and this one will be obvious. It's next to a doctor's corpse, underneath a grate hiding a Riddler Trophy.
CAVES - PATIENT INTERVIEW #2
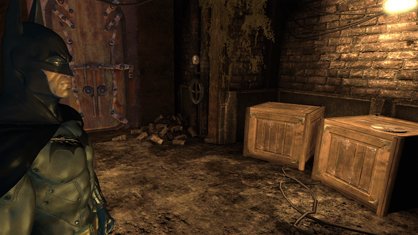
(Surface Access)
Immediately after you exit the Main Sewer Junction - the cavernous room with all the crumbling brick columns - you'll find this tape waiting for you on a couple of wooden crates.
CAVES - PATIENT INTERVIEW #3
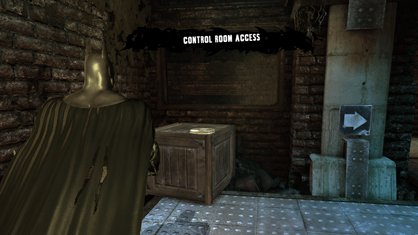
(Control Room Access)
When entering the Caves again to find Croc's Lair - from Intensive Treatment - you'll pass through this room first. The interview is waiting on top of a wooden crate.
CAVES - PATIENT INTERVIEW #4
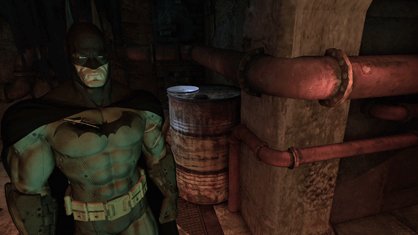
(Pump Control Room)
This is pretty hard to miss, sitting on a metal barrel in the hallway between the Pump Control Room and the Pressure Control Junction.
CAVES - PATIENT INTERVIEW #5
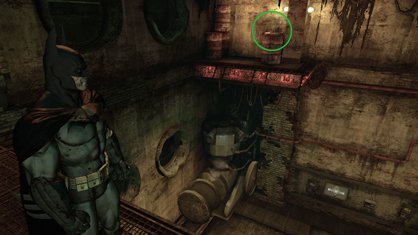
TOOL NEEDED: Line Launcher
(Pump Room)
When you enter this room, you're in a high position and the control panels are below you. Rather than drop down, Line Launch to the barb-wired platform across from you. The tape is sitting on a barrel here.
(Having trouble re-entering the pump section later in the game? When you reach the electrified door blocking your entrance into the central hub of the Pressure Control Junction - with the dead Titan henchman lying in the centre of the floor - turn on Detective Mode and follow the orange wires. They'll actually lead you back through the door you just came through... the security panel is on the other side.)
CAVES - CHRONICLE #1
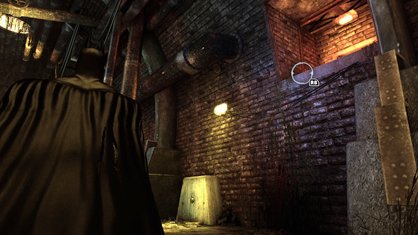
(Old Sewer)
Drop into the Old Sewer from the Batcave path and turn right. You should see the tablet only a few yards away from you, against the brick wall.
CAVES - CHRONICLE #2
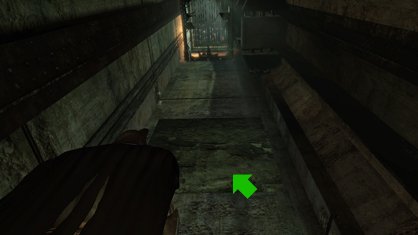
TOOL NEEDED: Ultra Batclaw
(Pressure Control Junction)
In order to escape the Caves after shutting down the Titan pumps, you need to Ultra Batclaw a couple of walls down in the elevator shaft. Behind the first one, you'll find a message from Amadeus Arkham.
CAVES - CHRONICLE #3
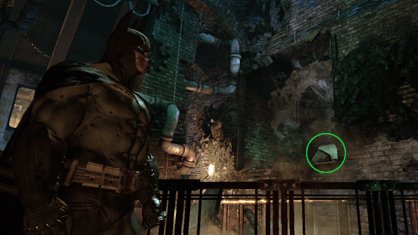
TOOL NEEDED: Ultra Batclaw
(Control Room)
As you enter this area, you can turn left or right and see a destructible patch on either of the diagonal walls. The one on the right hides a chronicle tablet. Use the Ultra Batclaw to gain entry.
(Having trouble re-entering the pump section later in the game? We did too! See our solution under Patient Interview #5.)
CAVES - RIDDLER TROPHY #1
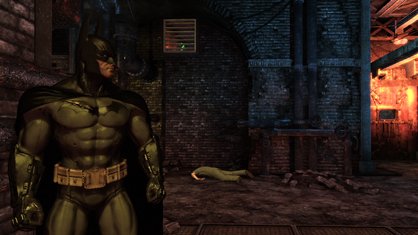
TOOL NEEDED: Batclaw
(Old Sewer)
Just follow the objective path on your first trip through the sewers and you'll probably spot this one. It's in a high grate, above the doctor's corpse and patient interview.
CAVES - RIDDLER TROPHY #2
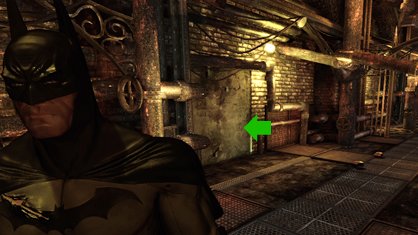
TOOL NEEDED: Explosive Gel
(Old Sewer)
As you're walking from the watery sewer area (Old Sewer) to the cavernous area with the crumbling surfaces (Main Sewer Junction), you'll pass through this hallway. It also holds an interview tape, three sets of teeth and a trophy in a high grate. This second trophy is behind a destructible wall, halfway down the passage.
CAVES - RIDDLER TROPHY #3
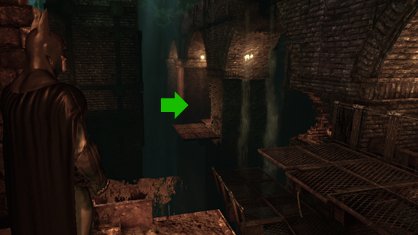
(Main Sewer Junction)
If you're starting at the bottom of this room and moving upward, the trophy is near the beginning of your climb. Just jump onto the first block, make your first small jump and turn left (or west). After a longer jump, you'll turn a corner and find it on the floor.
CAVES - RIDDLER TROPHY #4
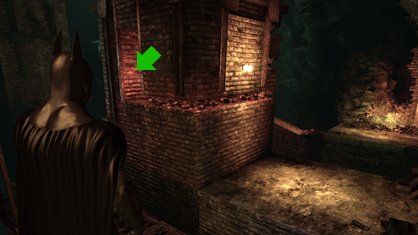
(Main Sewer Junction)
After jumping off the ground-level metal catwalks, but before jumping across to the first fallen column (which also holds two sets of chattering teeth), look at the wall next to this middle platform. See the hand holds? Grab those and shimmy left around the corner. Climb up and find the trophy in a reddish alcove.
CAVES - RIDDLER TROPHY #5
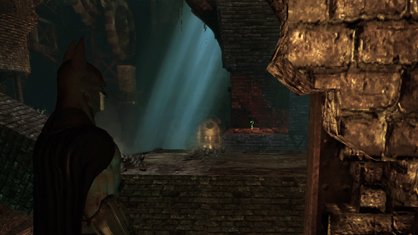
(Main Sewer Junction)
Again, this is almost impossible to miss if you're climbing the room properly. About halfway up, you'll jump into a shallow stream of water, right before walking up the second fallen column. Simply jump across to the red alcove to nab the prize.
CAVES - RIDDLER TROPHY #6
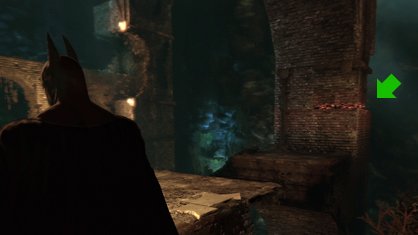
(Main Sewer Junction)
While running up the second fallen column, you'll see a hand hold on the platform above. Before jumping across to the room's exit, grab that and shimmy right, around the corner. Climb up, climb again and there's the trophy.
CAVES - RIDDLER TROPHY #7
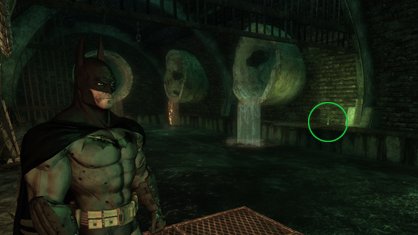
TOOL NEEDED: Line Launcher
(Croc's Lair)
This is in the long sewer tunnel with fast-running green water. The entrance to Croc's Lair is on the western end of the tunnel. The trophy is on the eastern (dead) end.
CAVES - RIDDLER TROPHY #8
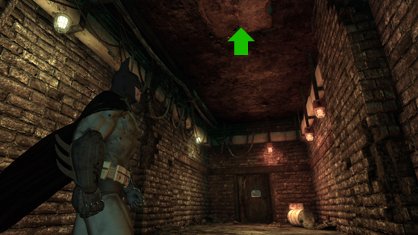
TOOL NEEDED: Ultra Batclaw
(Croc's Lair)
Before exiting this tunnel and entering the Old Sewer, take a look at the ceiling with Detective Mode turned on. If you're in the area with the metal door and the barrels, you should see a destructible panel above that you can pull down with the Ultra Batclaw. Afterwards, just grapple up to find a green-hued room and the trophy.
CAVES - RIDDLER TROPHY #9
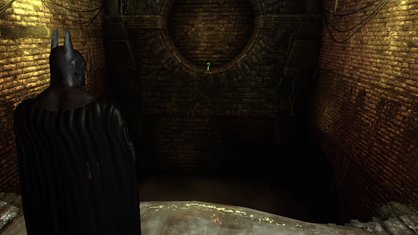
TOOL NEEDED: Line Launcher
(Old Sewer)
You'll have passed this trophy a couple times on your trips through the sewers, but you can't cross the gap and reach the circular cutout in the brick wall until you have the Line Launcher. Then the trophy is a quick zip away.
CAVES - RIDDLER TROPHY #10
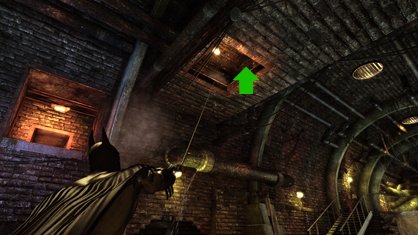
TOOL NEEDED: Ultra Batclaw
(Old Sewer)
Drop into the Old Sewer from the Batcave path and turn left, then look up at the ceiling. See the destructible panel there? Pull it down with the Ultra Batclaw and grapple into the alcove to find a trophy.
CAVES - RIDDLER TROPHY #11
TOOL NEEDED: Line Launcher
(Main Sewer Junction)
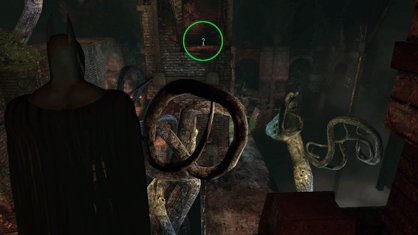
After traversing the first fallen column and jumping into the shallow stream of water, jump the next gap and into the little dead-end alcove. Turn left - far away, on the opposite side of the chamber, you should see another alcove with the trophy. Line Launch across the distance, passing some twisted vines along the way.
CAVES - RIDDLER TROPHY #12
TOOL NEEDED: Line Launcher
(Main Sewer Junction)
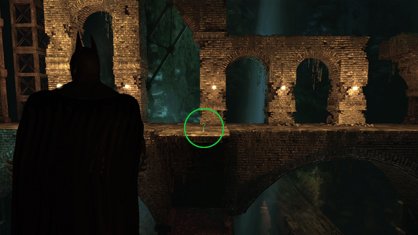
This trophy is directly on your path from the bottom of the chamber to the top, if headed towards the Pump Rooms. It's sitting right in front of one of the brick archways, directly opposite the door to Surface Access and Arkham North exit.
CAVES - RIDDLER TROPHY #13
TOOL NEEDED: Line Launcher
(Main Sewer Junction)
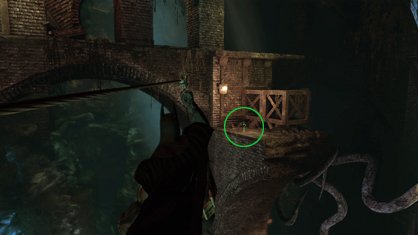
This trophy is also directly along your path from the bottom of the chamber to the top, if headed towards the Pump Rooms. You'll pass after your second Line Launch across the chamber.
CAVES - RIDDLER TROPHY #14
TOOL NEEDED: Ultra Batclaw
(Pressure Control Junction)
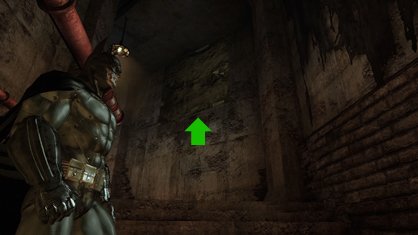
This can be found along the passage to the smaller, western Pump Room. As you head there, watch the right wall for a destructible patch. Pull it down with the Ultra Batclaw and grapple up for the trophy.
(Having trouble re-entering the pump section later in the game? We did too. Read our solution under Patient Interview #5.)
CAVES - RIDDLER TROPHY #15
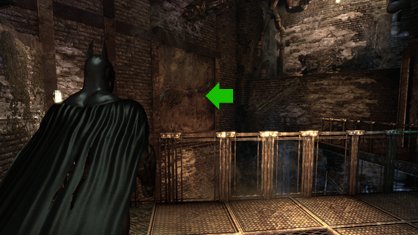
TOOL NEEDED: Ultra Batclaw
(Control Room)
As you enter this area, you can turn left or right and see a destructible patch on either of the diagonal walls. The one on the left hides a trophy. Use the Ultra Batclaw to gain entry.
CAVES - RIDDLER TROPHY #16
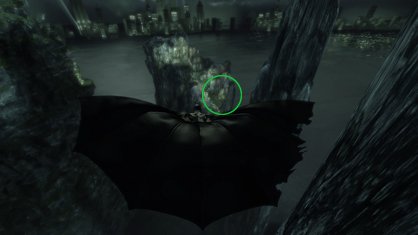
(The Batcave)
Grab this one as you're gliding from island to island between the Batcave and Old Sewer. It's on the first island, at the lowest point... the only way you could miss it is if you flew too far and forgot to look down.
CAVES - RIDDLER TROPHY #17
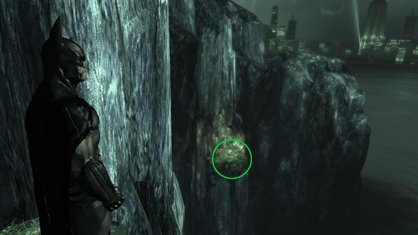
TOOL NEEDED: Line Launcher
(The Batcave)
Another trophy hidden in the island outcroppings between the Batcave and Old Sewer. You won't pass this one on the main flight path, however... you have to take a detour by gliding from the second large island to the tiny northern cliff alcove you should see on your map. To get back safely, you'll want to use the Line Launcher.
CAVES - JOKER'S TEETH #1-3
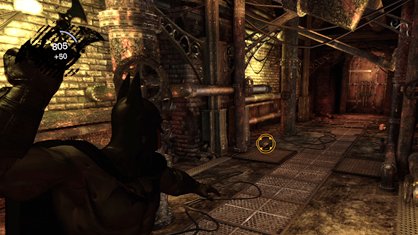
(Old Sewer)
Just follow the objective path on your first trip through the sewers (after finding the Batcave) and you can't miss these three sets. They're right past the Killer Croc interview tape, and right before the cavernous area with the crumbling surfaces.
CAVES - JOKER'S TEETH #4-5
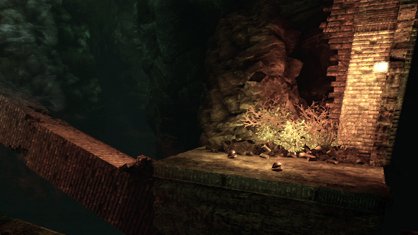
(Main Sewer Junction)
While manually scaling this room - the grapple hook doesn't work here - you can't miss these two sets of teeth. They're in a square area right before the first fallen column.
CAVES - JOKER'S TEETH #6-8
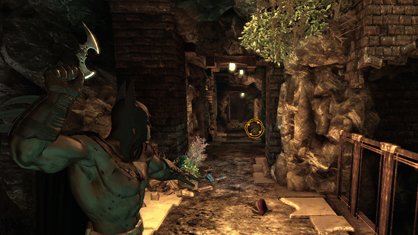
(Main Sewer Junction)
These teeth will be waiting for you at the end of your climb, along the hallway to the metal door exit.
CAVES - JOKER'S TEETH #9-11
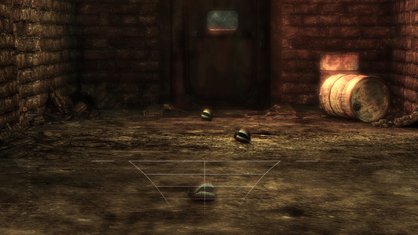
(Croc's Lair)
After defeating Killer Croc, exit his lair through the western end door. You'll pass three sets of teeth on the way out.
CAVES - JOKER'S TEETH #12-14
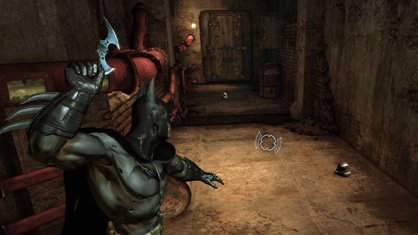
(Pressure Control Junction)
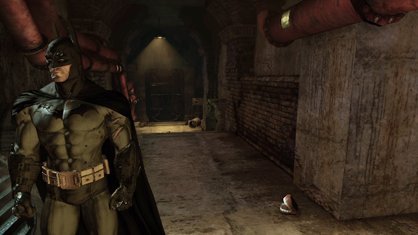
You'll encounter these three sets on the stairs between the Pressure Control Junction and the western Pump Room.
CAVES - JOKER'S TEETH #15-17
(Pressure Control Junction)
You'll encounter these three sets in the passageway between the Pressure Control Junction and the eastern Pump Room.
CAVES - JOKER'S TEETH #18-20
(Pressure Control Junction)
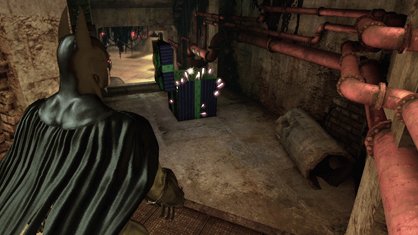
After shutting down the third and final pump in this area, the Joker will leave you a purple gift box on your way back to the Pressure Control Junction. They contain the final three sets of teeth for the Caves.
(Secure Transit)
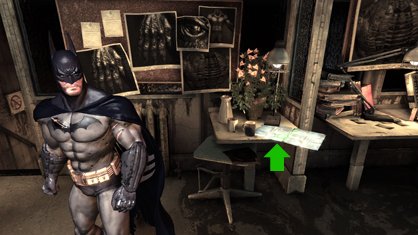
You won't be able to grab this map until you've returned to Intensive Treatment in search of Killer Croc's lair. Once you reach the very bottom of the facility - down two elevator shafts - look for the monster's meat locker. On the opposite side of the room is a staircase that leads to an office full of Killer Croc research. The map is there as well.
INTENSIVE TREATMENT
INTENSIVE TREATMENT - RIDDLE SOLUTION #1
(Intensive Treatment Lobby)
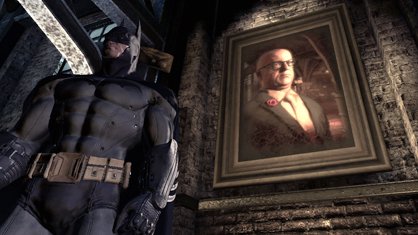
"Don't cut yourself on this Sharply observed portrait."
Impossible to miss, as the game holds your hand through this first riddle. Just scan the painting of Warden Sharp, hanging on the nearby wall, to proceed.
INTENSIVE TREATMENT - RIDDLE SOLUTION #2
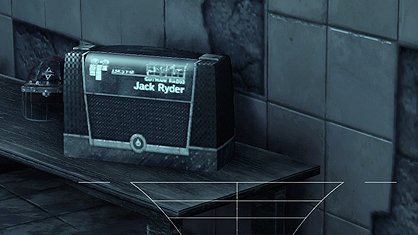
(Utility Corridor)
"You don't know Jack about Gotham. Tune in to find out."
In this locker room, simply scan the radio on the bench. It's playing jazz music and a Jack Ryder news report.
INTENSIVE TREATMENT - RIDDLE SOLUTION #3
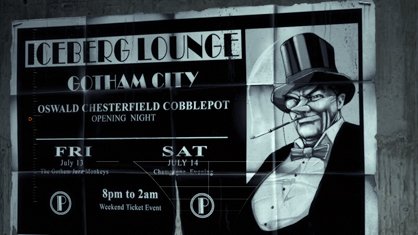
(Transfer Loop)
"A top hat and tails is the only dress code for this party in the North."
Midway along the Transfer Loop corridor, you'll spot an office with an Emergency Shutdown gate blocking half the door. Simply crouch underneath and look at the southern wall. Scan the poster advertising Penguin's Iceberg Lounge.
INTENSIVE TREATMENT - RIDDLE SOLUTION #4
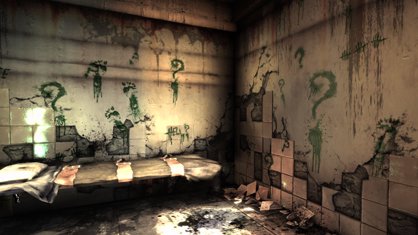
(Holding Cells)
"Where would you find my home sweet home?"
The Riddler's cell is in the area where you first start the game, the one in which the Joker escapes. Look for the room with all the green question marks painted on its walls. Note that you can't scan it when beginning Arkham Asylum because the game hasn't yet introduced you to the Riddler's Challenges.
INTENSIVE TREATMENT - RIDDLE SOLUTION #5
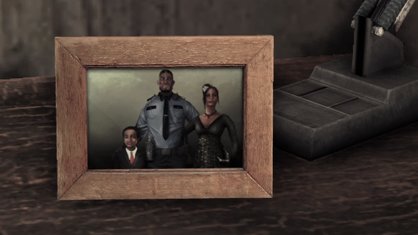
TOOL NEEDED: Cryptographic Sequencer
(Cell Block Transfer)
"Hook up with the relatives before you're transferred out of here."
You'll walk past this room during the intro to the game, but you can't access the adjacent office until later, when you return for Killer Croc's lair. Just make sure you enter the Cell Block Transfer on the eastern side and hack through the southern security gate. Up the stairs and on the desk is a portrait of Aaron Cash - the guard with a hook for a hand - and his family. Scan it.
INTENSIVE TREATMENT - RIDDLE SOLUTION #6
(Secure Transit)
"Dr. Jonathan Crane plans on elevating fear to new depths."
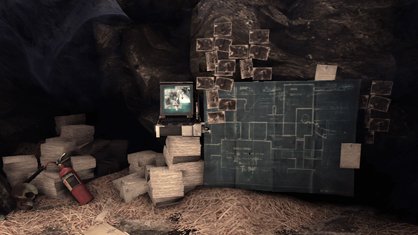
On your second trip to Intensive Treatment, after the Scarecrow has crashed the elevator, drop down the first shaft and then down the second shaft into Killer Croc's area. If you stand on top of that second elevator and look up, you should notice a wall grate in the shaft. Grapple up and crawl through the red-hued air duct until you reach the Scarecrow's straw-covered headquarters.
INTENSIVE TREATMENT - RIDDLE SOLUTION #7
TOOL NEEDED: Explosive Gel
(Patient Pacification Chamber)
"Even I was shocked when I saw how Maxie Zeus was treated!"
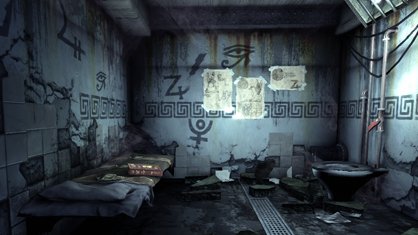
Once you have the explosive gel - or the Ultra Batclaw - return to the room where you rescued a guard from Zsasz's electric chair. One of the walls is destructible and hidden behind it is Zeus's cell.
INTENSIVE TREATMENT - RIDDLE SOLUTION #8
TOOL NEEDED: Detective Mode
(Intensive Treatment Lobby)
"A puzzle has many sides, but only some are visible."
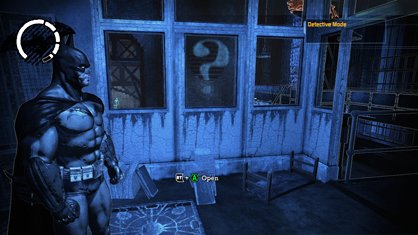
This is a question mark alignment puzzle. Head to the windowed offices in the middle of this room and turn on detective mode. You should see the top half of the question mark on one of the windows facing south (towards Frank Boles' body). Look through it and aim for the circular air vent on the far wall. The symbol should align correctly.
INTENSIVE TREATMENT - PATIENT INTERVIEW #1
(Secure Transit)
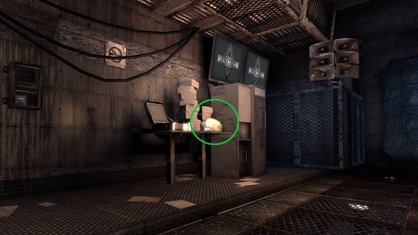
This tape is next to the elevator shaft that Harley escapes up and that you're forced to climb. Just look for a set of stairs on the ground level and follow the passage to a desk.
INTENSIVE TREATMENT - PATIENT INTERVIEW #2
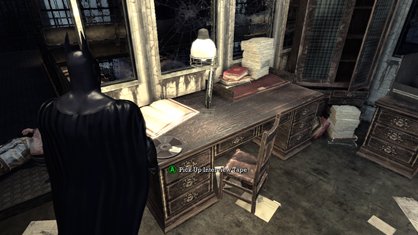
(Intensive Treatment Lobby)
In the centre of this warehouse-like room is a raised office. A desk on the eastern side has the tape sitting on its corner.
INTENSIVE TREATMENT - PATIENT INTERVIEW #3
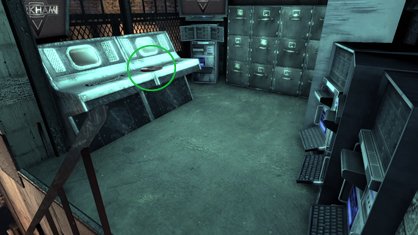
(Cell Block Transfer)
You'll walk past this room during the intro to the game, but you can't access the adjacent office until later, when you return for Killer Croc's lair. Just make sure you enter the Cell Block Transfer on the eastern side and hack through the northern security gate... the one that isn't Aaron Cash's. The tape is up the stairs.
INTENSIVE TREATMENT - PATIENT INTERVIEW #4
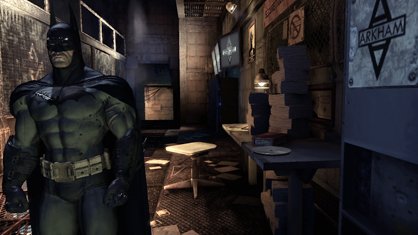
(Secure Transit)
If you enter the elevator shafts area from one of the Cell Block Transfer doors, simply turn right and you should see stairs to an upstairs office. Follow them to find the tape.
INTENSIVE TREATMENT - PATIENT INTERVIEW #5
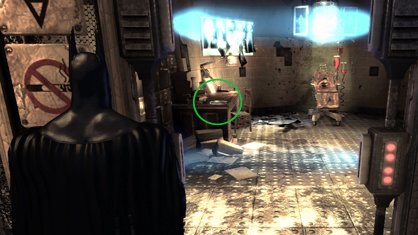
TOOL NEEDED: Cryptographic Sequencer
(Decontamination)
Once you have the ability to hack security panels, return to this room, where you cleared Joker toxin for the very first time. Inside is an office with an electrified door. Now that you can bypass the door, the tape is easy to grab off the desk within.
INTENSIVE TREATMENT - CHRONICLE #1
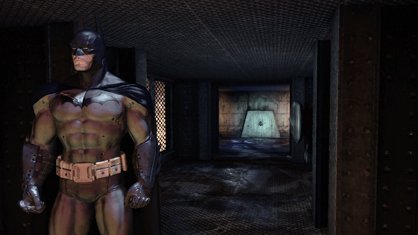
(Secure Transit)
You can't miss the beetle symbol as you're climbing the elevator shaft. It's near the very top, right before an encounter with enemies.
INTENSIVE TREATMENT - CHRONICLE #2
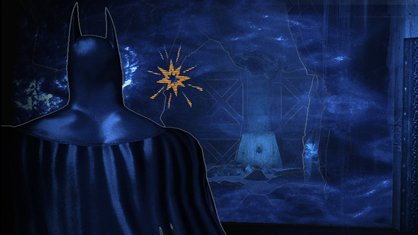
TOOL NEEDED: Explosive Gel
(Secure Transit)
You might also spot this tablet while climbing, if you have your Detective Mode turned on. About halfway up, through a crawl space, there's an empty room with two destructible walls. The chronicle's behind the left one... return when you have the explosive gel (or Ultra Batclaw).
INTENSIVE TREATMENT - CHRONICLE #3
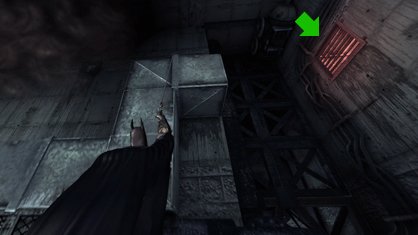
TOOL NEEDED: Ultra Batclaw
(Transfer Loop)
In the eastern roundabout area of the Transfer Loop, keep your eyes toward the ceiling until you spot a high wall grate. Grapple to the opposite air duct, use your Ultra Batclaw to pull down the grate and carefully jump across to grab onto the small ledge. Once inside the secret area, you'll find the tablet with no problem.
INTENSIVE TREATMENT - RIDDLER TROPHY #1
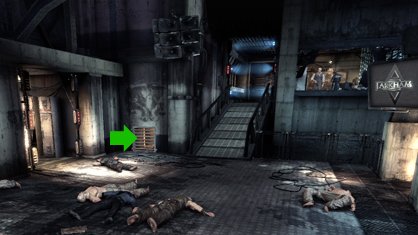
(Holding Cells)
After the Joker escapes and you've dealt with his two waves of thugs, look towards the south side of the room (where you can see Commissioner Gordon through the window). The trophy is behind the wall grate next to the cell.
INTENSIVE TREATMENT - RIDDLER TROPHY #2
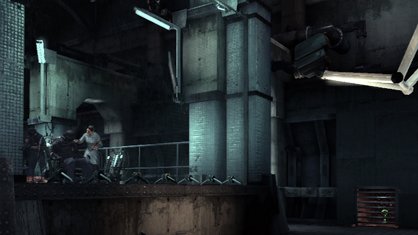
(Patient Pacification Chamber)
In the room where you saved a guard from Zsasz's electric chair, there are two wall grates. The one in the northeast corner continues the story forward, while the one in the southwest corner hides a trophy.
INTENSIVE TREATMENT - RIDDLER TROPHY #3
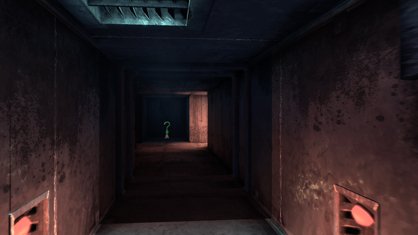
(Processing Corridor)
Escape the Patient Pacification Chamber by opening the northeast wall grate. The trophy is near the end of the air duct passage, right before the exit grate.
INTENSIVE TREATMENT - RIDDLER TROPHY #4
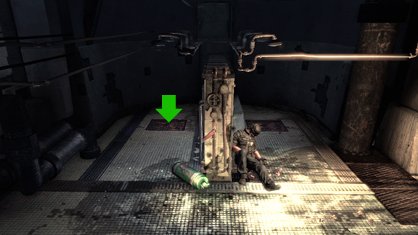
(Decontamination)
Go to the large decontamination chamber where you saved guards from Joker's toxin. Near the middle and on the western side are some showers with two floor grates on either side. Pop down into either one to find the trophy.
INTENSIVE TREATMENT - RIDDLER TROPHY #5
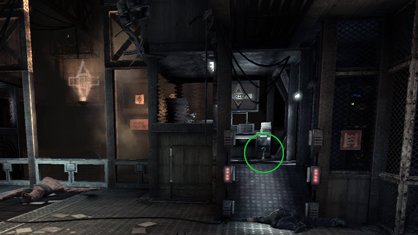
(Secure Treatment Transfer)
In the room where you fight Joker's first mutated test subject. One control room has a guard. The other control room has the trophy.
INTENSIVE TREATMENT - RIDDLER TROPHY #6
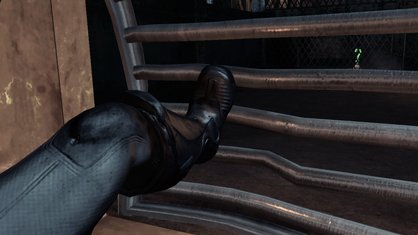
(Maintenance Access)
On your return to Intensive Treatment in search of Killer Croc's lair, this is the area you'll come through first. Look for an openable grate while crawling through the vents. You should already be able to see the trophy straight ahead of you, through more bars... to get to it, you'll have to climb above it and then drop down into the passage next to it.
INTENSIVE TREATMENT - RIDDLER TROPHY #7
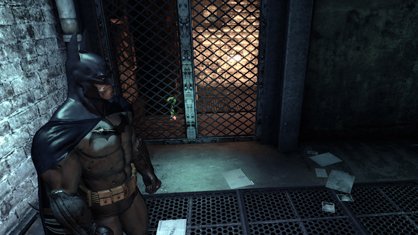
TOOL NEEDED: Explosive Gel
(Utility Corridor)
This trophy is hidden in the same area as the Jack Ryder radio. You can't get it at the beginning of the game, however, because it is behind a destructible wall. Return when you have explosive gel or the Ultra Batclaw.
INTENSIVE TREATMENT - RIDDLER TROPHY #8
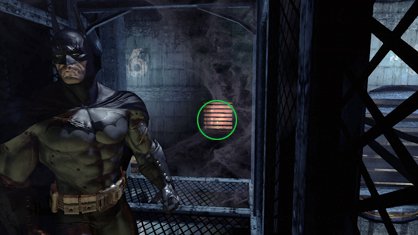
TOOL NEEDED: Ultra Batclaw
(Secure Transit)
While climbing the elevator shaft, keep your eyes peeled for an orange glowing wall grate with a green trophy inside. You probably noticed it at the beginning of the game, but once you have the Ultra Batclaw, you can return and pull that grate off. Then, all you need to do is get a running jump and grab onto the bit of ledge. Pull yourself into the duct and the trophy is yours.
INTENSIVE TREATMENT - RIDDLER TROPHY #9
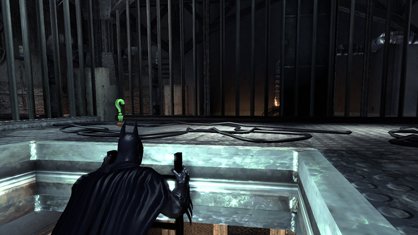
TOOL NEEDED: Cryptographic Sequencer
(Decontamination)
Once you have the ability to hack security panels, return to this area, where you cleared Joker toxin for the very first time. Inside is an office with an electrified door. Now that you can bypass the door, do so and climb the ladder you discover within. The trophy is at the top.
INTENSIVE TREATMENT - RIDDLER TROPHY #10
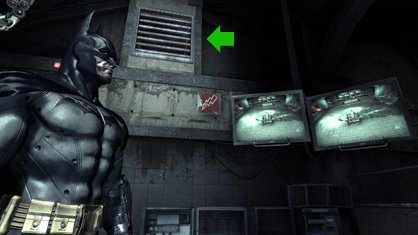
TOOL NEEDED: Batclaw
(Patient Pacification Chamber)
Head to the upper levels of this area. You were up here before taking out Zsasz the first time. On the western side, near the top of some ramps, is this wall grate. Pull it down and find the trophy behind.
INTENSIVE TREATMENT - JOKER'S TEETH #1-3
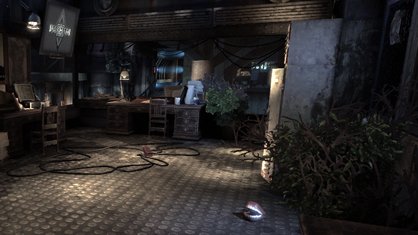
(Holding Cells)
This area holds two offices. One has Gordon and Boles trapped inside. The other, near the Processing Corridor, is where you'll find these three sets of Joker's teeth.
INTENSIVE TREATMENT - JOKER'S TEETH #4
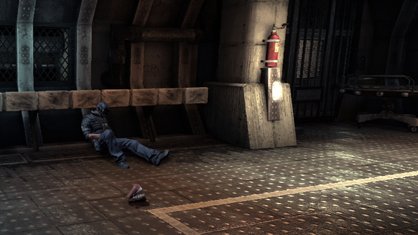
(Processing Corridor)
The single set of teeth is in the corner of this hallway, right next to a slumped guard.
INTENSIVE TREATMENT - JOKER'S TEETH #5
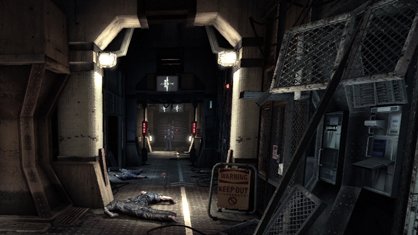
(Processing Corridor)
This is a dead end at first, with a guard named Eddie Burlow trying to get the locked door open. The single set of teeth is in the middle of the hallway.
INTENSIVE TREATMENT - JOKER'S TEETH #6-8
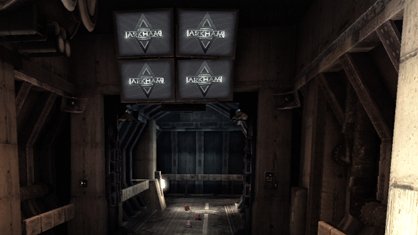
(Decontamination)
As soon as you exit the Processing Corridor and enter the Decontamination area - through the door that Eddie Burlow was trying to unlock - you'll find three sets of chomping teeth in the hallway. They're right before the room full of Joker toxin.
INTENSIVE TREATMENT - JOKER'S TEETH #9-11
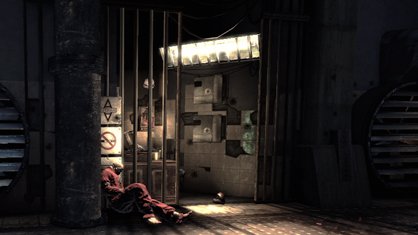
(Decontamination)
In the large decontamination chamber are three sets of teeth. The first is immediately after the north entrance, the second is in the middle of the floor a bit further inside and the third is near the control panel that you Batarang'd to clean the toxin.
INTENSIVE TREATMENT - JOKER'S TEETH #12
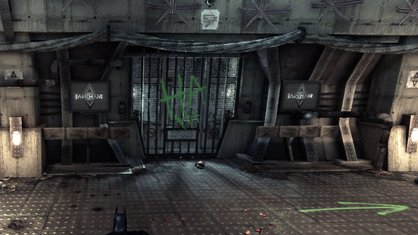
(Transfer Loop)
You'll find this set immediately after exiting the decontamination chamber on its southern side. It's in front of a door painted with a bright green "HA HA".
INTENSIVE TREATMENT - JOKER'S TEETH #13
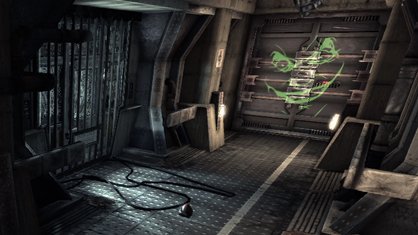
(Transfer Loop)
Keep following the green arrows after collecting Teeth #12 and you'll find this set right before the door with Joker's painted face in green. A cutscene with Joker and his mutated test subject follows immediately after this spot, so try to get the teeth beforehand.
INTENSIVE TREATMENT - JOKER'S TEETH #14-16
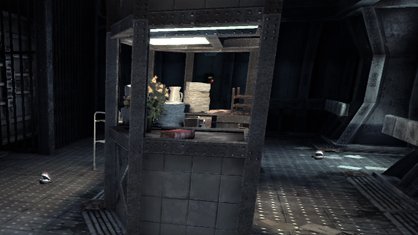
(Transfer Loop)
While following Gordon and Bole's trail, you'll pass through a reception area in which you hear Joker take a worried wife's call. Three sets of teeth surround the central desk.
INTENSIVE TREATMENT - JOKER'S TEETH #17
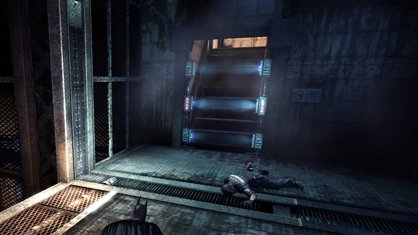
(Secure Transit)
At the top of the elevator shaft, you meet a large group of thugs. The teeth are to the side, next to an electrified door and dead security guard.
INTENSIVE TREATMENT - JOKER'S TEETH #18-20
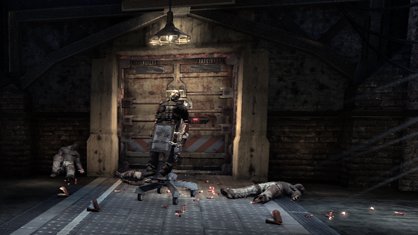
(Intensive Treatment Lobby)
When Gordon's trail ends and you find the "dead end", three sets of teeth are chattering around the body.
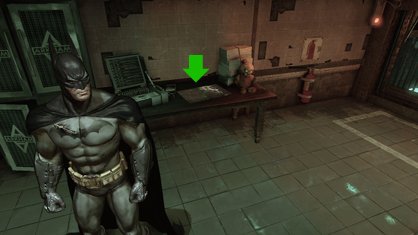
(Experimental Chamber)
The map to the Medical Facility is in the area where you must save Gordon from Harley Quinn without being detected by guards. When you enter that area for the first time, you should be in a room with a window that overlooks everything else. On a desk is both the map and the solution to one of the riddles - a teddy bear.
MEDICAL FACILITY
MEDICAL FACILITY - RIDDLE SOLUTIONS VIDEO
MEDICAL FACILITY - RIDDLE SOLUTION #1
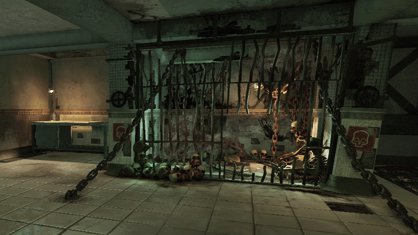
(Sanatorium)
"TICK! TOCK! News flash! Someone is not getting out of here alive."
Drop down to the bottom most floor of this room and look for the ripped-open cage full of skulls and chains. Scan the entire gruesome scene to solve the riddle.
MEDICAL FACILITY - RIDDLE SOLUTION #2
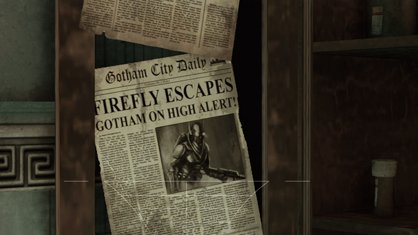
(Patient Observation)
"Was this fire fly too hot off the press?"
This solution is in the room where you Batarang three control panels to clear the Joker's toxin and save Aaron Cash. See the little sub-office? Where you probably dropped that hanging thug through the roof? Go inside and check out the newspaper clippings on the cabinet. They're about - surprise, surprise - the villain Firefly.
MEDICAL FACILITY - RIDDLE SOLUTION #3
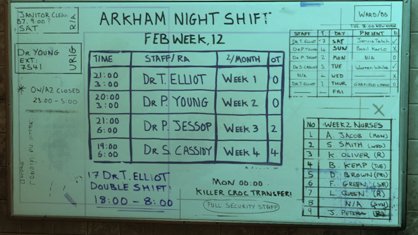
(Surgery Room)
"Shhhhsshh! Rumors persist that Tommy Elliot operates in Arkham. Can it be true?"
Unstrap Dr. Chen from the operating chair, then turn around and grapple up to the balcony behind you. The whiteboard on the right is what you want to scan for information on the villain Hush.
MEDICAL FACILITY - RIDDLE SOLUTION #4
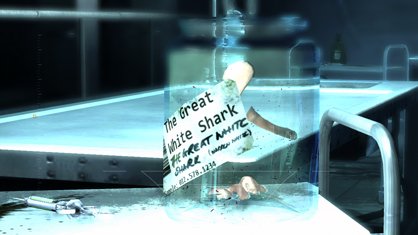
(Morgue)
"What silent killer of the oceans can be found in a tiny jar?"
After dealing with the Scarecrow in the morgue, look for a glass jar sitting next to one of the autopsy tables. Inside are the nose and ears of a new Batman villain, the Great White Shark. Scan the jar to solve the riddle.
MEDICAL FACILITY - RIDDLE SOLUTION #5
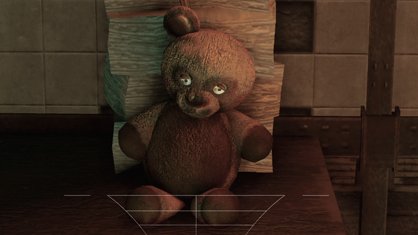
(Experimental Chamber)
"Is this bear the Bane of his life?"
This solution is in the area where you must save Gordon from Harley without being detected by guards. When you enter that area for the first time, you should be in a room with a window that overlooks everything else. On a desk is both the answer to the riddle - Bane's childhood teddy bear - and the Riddler's map.
MEDICAL FACILITY - RIDDLE SOLUTION #6
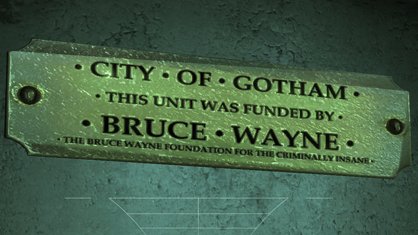
(Medical Foyer)
"Is the generosity of our benefactors on the Wayne?"
This solution is in the very first room of the Medical Facility, but you can't access it until you've completed the level. Once you have, and Harley's not watching over the foyer any more, return there and scan the gold plated inscription on the wall.
MEDICAL FACILITY - RIDDLE SOLUTION #7
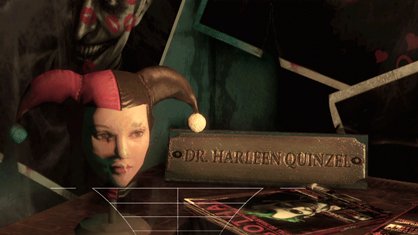
TOOL NEEDED: Batclaw
(Secure Access)
"Are you going to take your hat off to Harley, Bats?"
You probably noticed Harley Quinn's office - and the jester hat inside - when coming through the Medical Facility the first time. Unfortunately, you didn't have the Batclaw yet, so couldn't remove the high wall grate next to the elevator doors. Once you do, the solution is just a grapple, crawl and short drop away.
MEDICAL FACILITY - RIDDLE SOLUTION #8
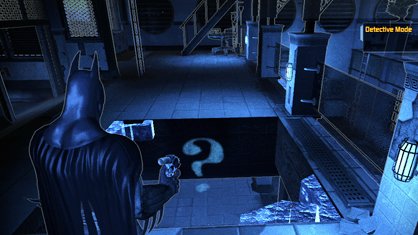
TOOLS NEEDED: Explosive Gel, Detective Mode
(Sanatorium)
"A question can only be answered from a new perspective. Don't you agree?"
This is a question mark alignment puzzle. Head to the western side of the middle level and blow up the floor panel. When you look north and downward through the newly created hole, the symbol should be staring back at you.
MEDICAL FACILITY - PATIENT INTERVIEW #1
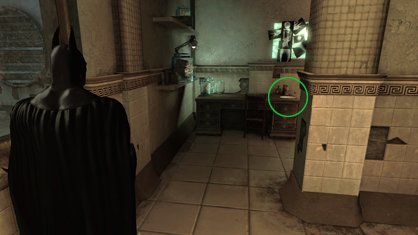
(Sanatorium)
Go to the elevator area. Opposite the rescued doctors is a short hallway with an office at the end. Inside, on the desk, is the interview tape.
MEDICAL FACILITY - PATIENT INTERVIEW #2
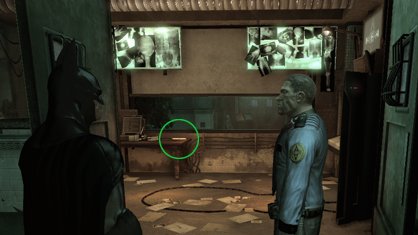
(Patient Observation)
Check out the office where Aaron Cash and his coughing doctor friend were trapped by the Joker's toxin. If you haven't saved them yet, do so to open the doors. If you have, grab the tape off the desk here.
MEDICAL FACILITY - PATIENT INTERVIEW #3
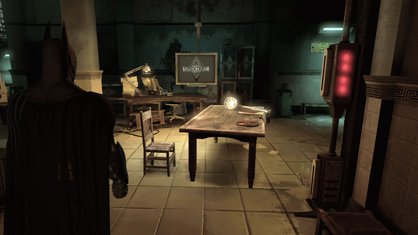
(Medical Foyer)
This tape is in the very first room of the Medical Facility, but you can't grab it until you've completed the level and Harley no longer blocks off the foyer. Return anytime afterwards to claim the interview.
MEDICAL FACILITY - PATIENT INTERVIEW #4
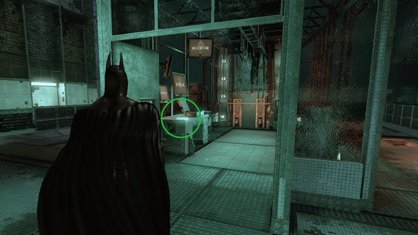
(Experimental Chamber)
Return to the room in which you discovered Bane and rescued Gordon. Inside the central holding cell - where Bane was being kept - is a patient interview.
MEDICAL FACILITY - PATIENT INTERVIEW #5
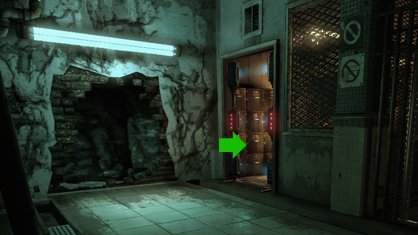
TOOL NEEDED: Cryptographic Sequencer
(Secure Access)
Enter this room from the elevator area and turn left. Next to the crumbling wall - which you destroyed on your first trip through here - is an electrified security door. Hack it open and grab the interview tape inside.
MEDICAL FACILITY - CHRONICLE #1
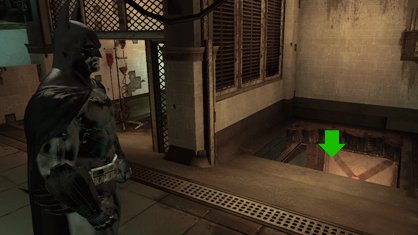
TOOL NEEDED: Explosive Gel
(Sanatorium)
When you enter the Sanatorium from the Medical Foyer, turn left and walk along the western side of the room. Tucked between the first and third patient rooms is an empty area with a destructible floor. Blast it and drop down to find the chronicle.
MEDICAL FACILITY - CHRONICLE #2
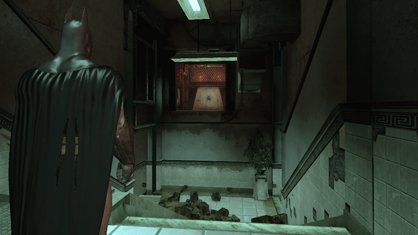
TOOL NEEDED: Ultra Batclaw
(Medical Foyer)
Go to the Sanatorium door, but rather than exit the Foyer, turn 180 degrees and check the wall opposite. It's destructible if you have the Ultra Batclaw and the beetle tablet is behind it.
MEDICAL FACILITY - CHRONICLE #3
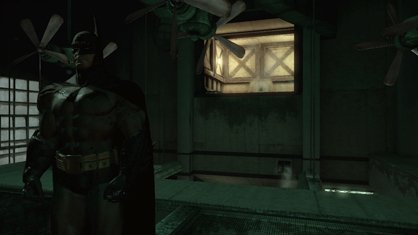
TOOL NEEDED: Ultra Batclaw
(X-Ray Room)
This is where you first met Dr. Young, rescuing her from thugs. Grapple to the roof of the X-Ray area - which also holds a trophy - and turn back towards the exit. You should see a destructible panel on the wall. Pull it down with the Ultra Batclaw and jump in to scan the tablet.
MEDICAL FACILITY - RIDDLER TROPHY #1
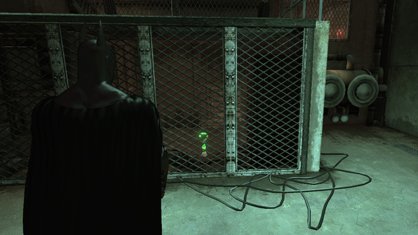
(Maintenance Access)
When you first break into the Medical Facility, you'll see this trophy trapped in a metal box. To get it, just follow the same air duct that takes you out of here, but branch right about halfway through. Simple.
MEDICAL FACILITY - RIDDLER TROPHY #2
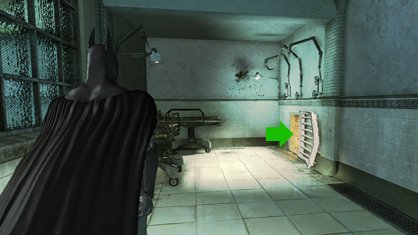
(Sanatorium)
On the lowest floor of this room, go to the northernmost end of the showers. You should find a wall grate. Open it and follow the path to the trophy. Alternately, you can use the explosive gel to blow open the destructible wall on this floor. It leads to the same area.
MEDICAL FACILITY - RIDDLER TROPHY #3
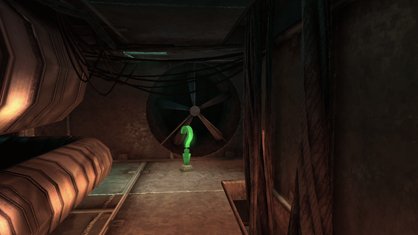
(Upper Corridor)
This area is recognizable by the three coloured lines - blue, red and yellow - that run along its halls. Follow the red path and look for a ventilation grate. The trophy is inside the air ducts, accessible from two such grates along the red path.
MEDICAL FACILITY - RIDDLER TROPHY #4
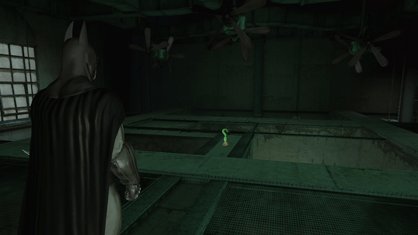
(X-Ray Room)
After saving Dr. Young, just grapple onto the roof above her to find the trophy.
MEDICAL FACILITY - RIDDLER TROPHY #5
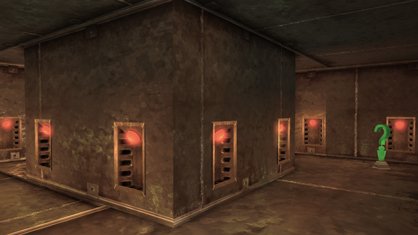
(Experimental Chamber)
You should stumble upon this trophy while sneaking through the ventilation ducts, trying to avoid detection by the guards and rescue Commissioner Gordon from Harley.
MEDICAL FACILITY - RIDDLER TROPHY #6
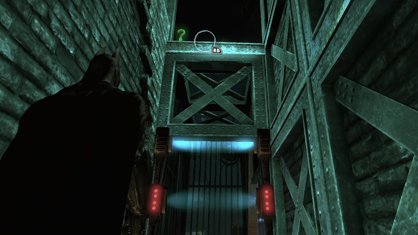
(Experimental Chamber)
You can't miss this one. It's on the roof of the room holding Harley and Gordon... just grab it before crashing in and triggering the cutscene.
MEDICAL FACILITY - RIDDLER TROPHY #7
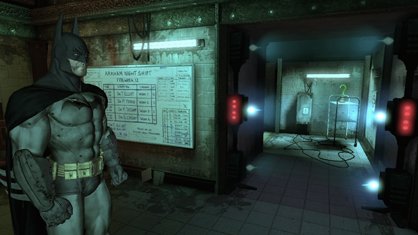
TOOL NEEDED: Cryptographic Sequencer
(Surgery Room)
This is the area in which you unstrapped the doctor from an operating chair... and also the location of the Hush Riddle (#3). When you were here earlier in the game, you will have noticed an electrified security door. Now you can simply hack the panel and walk upstairs for the trophy.
MEDICAL FACILITY - RIDDLER TROPHY #8
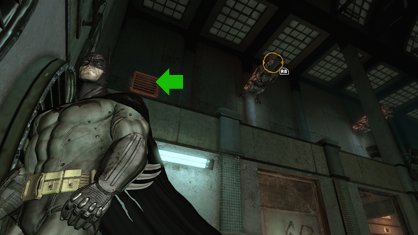
TOOL NEEDED: Ultra Batclaw
(Sanatorium)
On the eastern wall of this room, high up with the gargoyles, is a wall grate. Pull it down with the Ultra Batclaw and enter to nab a trophy.
MEDICAL FACILITY - RIDDLER TROPHY #9
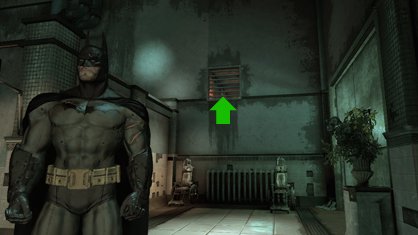
TOOL NEEDED: Ultra Batclaw
(Patient Observation)
Immediately upon entering the main room, the one in which you saved Aaron Cash and the doctor from Joker toxin, look at the wall to your right. See the grate? Use the Ultra Batclaw to pull it down and crawl through for a trophy.
MEDICAL FACILITY - JOKER'S TEETH #1-3
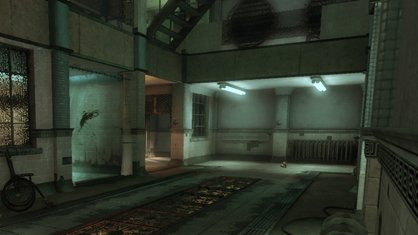
(Sanatorium)
On the lowest floor, at the southern end, are three sets of teeth. They're a little spread out, but you should see them all without trouble.
MEDICAL FACILITY - JOKER'S TEETH #4-6
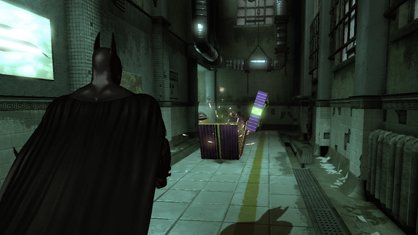
(Upper Corridor)
After saving Dr. Young in the X-Ray room, exit and you will find a purple gift box waiting for you in the hall. Approach and it'll explode, revealing the three sets of teeth.
MEDICAL FACILITY - JOKER'S TEETH #7-9
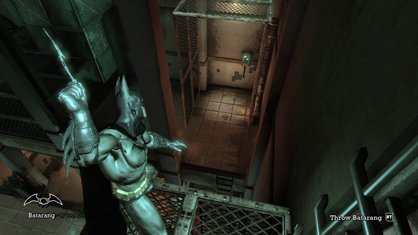
(Patient Observation)
This is the room in which you had to Batarang three control panels to clear the Joker's toxin and save Aaron Cash. There are three sets of teeth in here, on the mid-level catwalks surrounding the middle of the room. Watch the video for their exact locations.
MEDICAL FACILITY - JOKER'S TEETH #10-12
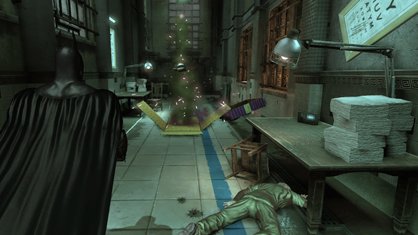
(Upper Corridor)
After saving Aaron Cash and the doctor in Patient Observation, you'll find another purple gift box in the outside hallway. It contains another three sets of teeth.
MEDICAL FACILITY - JOKER'S TEETH #13-15
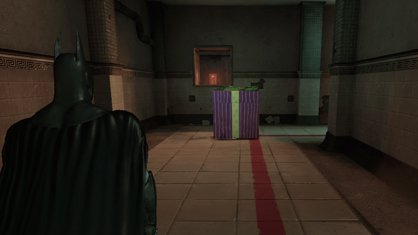
(Upper Corridor)
After saving Dr. Chen in the Surgery Room, you'll find the third purple gift box waiting for you. Watch out! This one - or whichever one you find last - includes an angry inmate with a knife as well.
MEDICAL FACILITY - JOKER'S TEETH #16-17
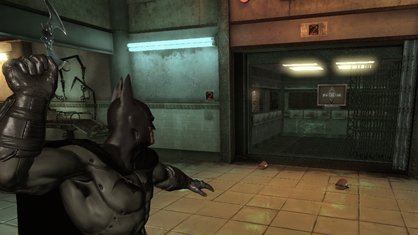
(Sanatorium)
Before boarding the elevator to the Morgue, take the time to smash the two sets of Joker teeth right in front of it.
MEDICAL FACILITY - JOKER'S TEETH #18-20
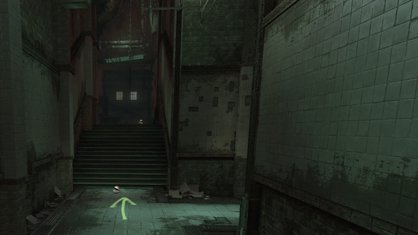
(Lower Corridor)
After escaping Scarecrow and the morgue, but before encountering Harley and Bane, you'll follow green arrows through a couple of hallways and up some short stairs. Three sets of teeth are on or right next to those stairs.
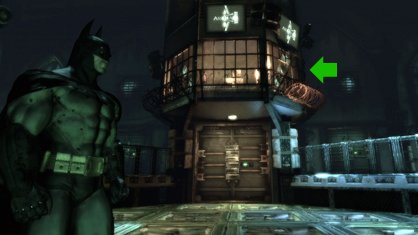
(Extreme Incarceration)
After locking away Harley Quinn, simply walk into the control tower she formerly occupied. The map is on a desk on the ground level, right past the main door.
PENITENTIARY
PENITENTIARY - RIDDLE SOLUTIONS VIDEO
PENITENTIARY - RIDDLE SOLUTION #1
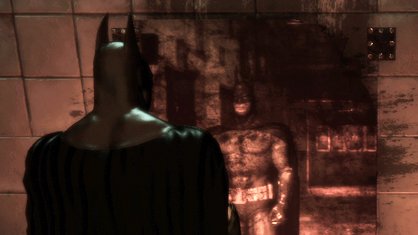
(Cells Access)
"How do you reflect on your successes and failures, Batman?"
There's a restroom to the west of the Penitentiary's reception area. Go to the Women's side and scan Batman's reflection in the grimy mirror.
PENITENTIARY - RIDDLE SOLUTION #2
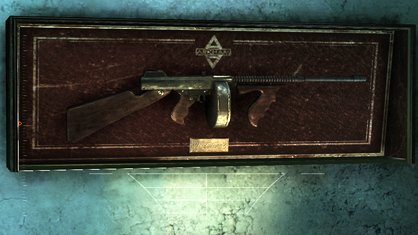
(Main Cell Block)
"Two people, one voice, no gun?"
Ignore all the crazy people in this room - if they haven't already been released - and grapple to the raised area above their cages. Look north and you'll see a catwalk that leads to a separate room. The wall is inscribed with Latin and there is a display case with Ventriloquist's machine gun inside. Scan it to solve the riddle.
PENITENTIARY - RIDDLE SOLUTION #3
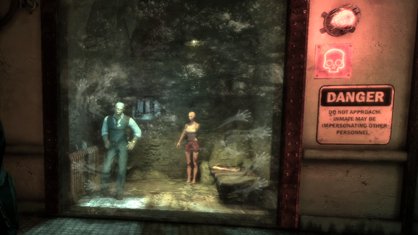
(Security Control Room)
"A case of mistaken identity?"
At the back of this room is a holding cell with handprints smeared all over the glass. There's a sign warning that the prisoner within can impersonate other people. He might be Aaron Cash, Warden Sharp or Commissioner Gordon when you see him... but in reality, it's Clayface. Scan him to solve the riddle.
PENITENTIARY - RIDDLE SOLUTION #4
TOOL NEEDED: Cryptographic Sequencer
(Main Cell Block)
"This room is the end of days for even the most celebrated killer."
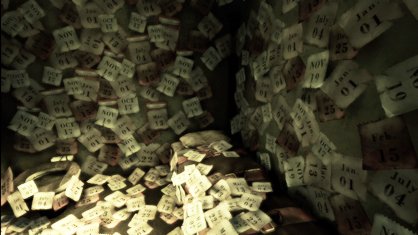
While chasing Harley and fighting off escaped lunatics, look for a small cell covered in calendar pages. Scan the room for the solution and more info on the villain Calendar Man.
PENITENTIARY - RIDDLE SOLUTION #5
(Controlled Access)
"What has four walls, two sides, and one ex-DA?"
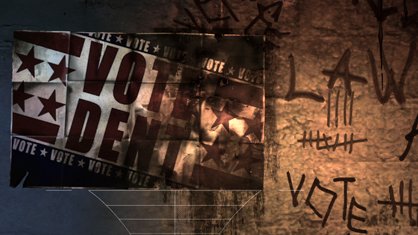
Why, that must be Harvey Dent, aka Two-Face! You can't miss his cell - it's the one with the big "Vote Dent" poster on the wall and the "Vote Dent" button next to the toilet. Scan the poster to solve the riddle.
PENITENTIARY - RIDDLE SOLUTION #6
(Extreme Incarceration)
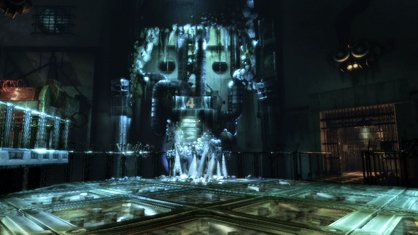
"All alone in your cell? Why don't you break the ice with the most dangerous prisoners?"
Clearly, this riddle is referring to Mr. Freeze. You'll find his rather large and rather frozen prison cell in the area where you locked up Harley Quinn. Scan the whole thing.
PENITENTIARY - RIDDLE SOLUTION #7
TOOL NEEDED: Ultra Batclaw
(Guard Room)
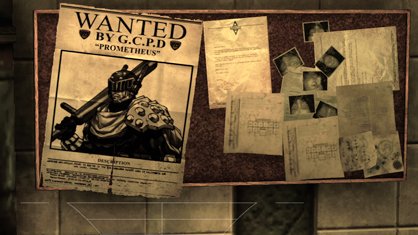
"Prometheus, Arkham guards' most wanted and most hated."
To gain access to the solution, you'll need to get rid of the green Joker toxin in this room first. Grapple to the vents above the two guards and tear down the destructible wall there. Then, look across the gas-filled room to see another destructible panel - you'll need the Ultra Batclaw for this one. Once that's destroyed, simply throw a Batarang at the control box to clear the toxin. Now you're free to drop down and locate the locker area, which holds a poster of the cop-hating villain Prometheus.
PENITENTIARY - RIDDLE SOLUTION #8
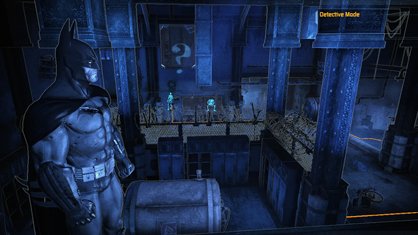
TOOLS NEEDED: Ultra Batclaw, Detective Mode
(Guard Room)
"When is something right in front of you but still hidden from view?"
This is a question mark alignment puzzle. To get the right view, you need to clear the Guard Room of green toxin first. Check the Prometheus Riddle above to see how. Next, go across to the room that held the toxin switch box and look back to the vent area above the guards' control room... where you just were. The symbol should be lined up perfectly.
PENITENTIARY - PATIENT INTERVIEW #1
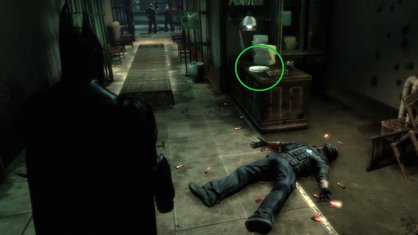
(Cells Access)
Immediately upon entering the Penitentiary through the front door, you should see this interview tape waiting for you on a desk to the right side.
PENITENTIARY - PATIENT INTERVIEW #2
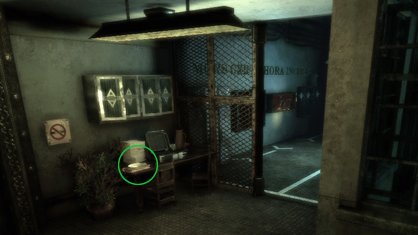
(Main Cell Block)
This is one of the offices that is accessible by catwalk from the raised area above all the crazy people's cages. It's to the left if you're facing Ventriloquist's gun display case. The tape is on a desk.
PENITENTIARY - PATIENT INTERVIEW #3
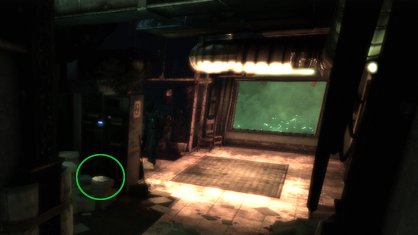
(Guard Room)
Rescue the two guards from Harley - the ones hanging above the electrified water - and follow them into the room with the green fogged windows. The interview tape is easy to spot on the cluttered desk in here.
PENITENTIARY - PATIENT INTERVIEW #4
TOOL NEEDED: Batclaw
(Controlled Access)
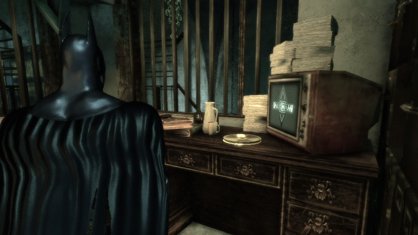
In this room, you need to pull down a ceiling grate and grapple up to an office in order to turn off the electrified gate below. While up here using your cryptographic sequencer, make sure to pick up the interview tape sitting nearby.
PENITENTIARY - PATIENT INTERVIEW #5
(Extreme Incarceration)
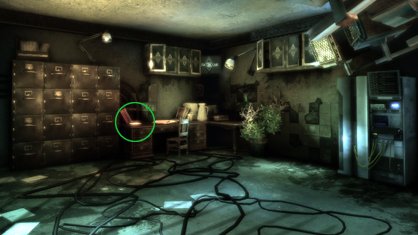
After throwing Harley into the prison cell, head inside the control tower she formerly occupied. At the top level, right outside the area with the numbered security panels, is a desk with the tape.
PENITENTIARY- CHRONICLE #1
TOOLS NEEDED: Cryptographic Sequencer, Explosive Gel
(Extreme Incarceration)
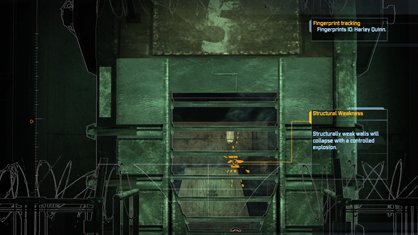
In the room where you lock up Harley, check out cell #5 on the upper right side. Inside is a trophy... and beyond that, an Arkham chronicle. To get inside, you'll need to head back to the main control tower and go upstairs to the numbered security panels. Use your sequencer to hack into panel #5 and the door below will open. Nab the trophy, then destroy the cell's back wall with gel. The chronicle symbol is revealed! To escape afterwards, just grapple up.
PENITENTIARY - CHRONICLE #2
TOOL NEEDED: Ultra Batclaw
(Guard Room)
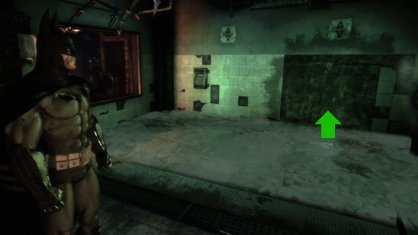
To gain access to this chronicle, you'll need to get rid of the Joker toxin in the Guard Room first. See the Prometheus Riddle for how to do so. Once the area's cleared, check the southern wall for a destructible panel, and beyond it, the beetle symbol.
PENITENTIARY - CHRONICLE #3
TOOLS NEEDED: Explosive Gel, Line Launcher
(Main Cell Block)
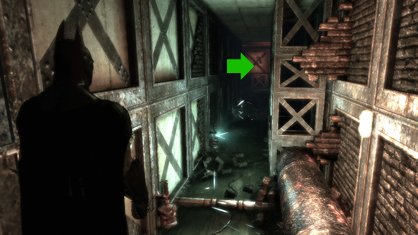
In the short hall that leads from the Main Cell Block to The Green Mile, watch the left wall for a destructible patch. Beyond is a long stretch of electrified water. To get across and scan the chronicle, you'll need the Line Launcher.
PENITENTIARY - RIDDLER TROPHY #1
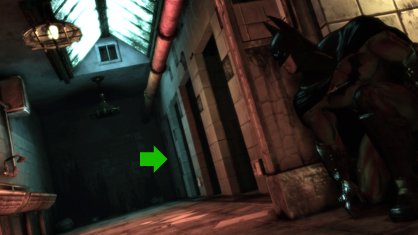
(Cells Access)
There's a restroom to the west of the Penitentiary's reception area. Go to the Men's side and look for the trophy in the last stall.
PENITENTIARY - RIDDLER TROPHY #2
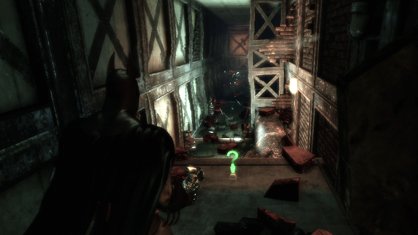
(Main Cell Block)
In the short hall that leads from the Main Cell Block to The Green Mile, watch the left wall for a destructible patch. Blow it up and you'll find a trophy, as well as a bunch of electrified water.
PENITENTIARY - RIDDLER TROPHY #3
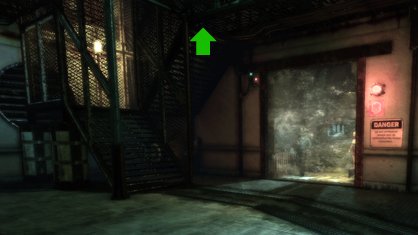
(Security Control Room)
At the back of this room, to the left of Clayface's hand-smeared glass cell, is a metal staircase. Follow it up and explode the small bit of destructible wall you find. A trophy is in the area behind.
PENITENTIARY - RIDDLER TROPHY #4
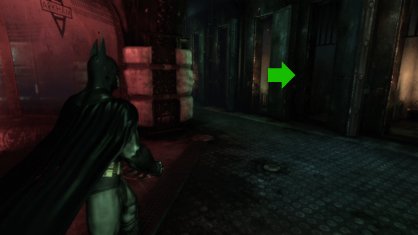
(The Green Mile)
This is the room that holds - or held - Poison Ivy. In fact, you won't find the trophy until after she and all the other prisoners in the area have been released. Then it's just sitting in one of the cells on the western side.
PENITENTIARY - RIDDLER TROPHY #5
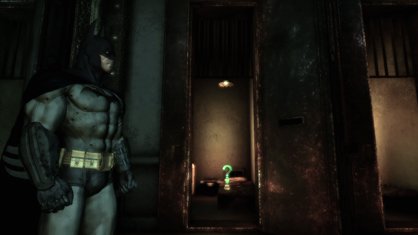
(Main Cell Block)
This is the room with Calendar Man's paper-plastered cell. Along the southern wall of the room is another cell with a trophy sitting on its bed.
PENITENTIARY - RIDDLER TROPHY #6
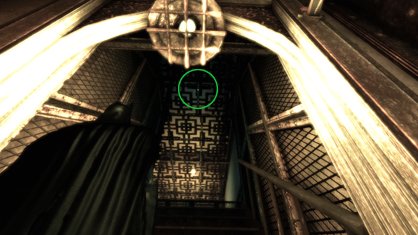
(Main Cell Block)
As you're walking up the stairs between the western Main Cell Block and the Guard Room section, look up. Through the ceiling pattern, you should spot a trophy. To get it, head into the Guard Room, hang a left and pull down the grate you see high above you on the left wall. Grapple up and follow the air ducts until you arrive in the desired area.
PENITENTIARY - RIDDLER TROPHY #7
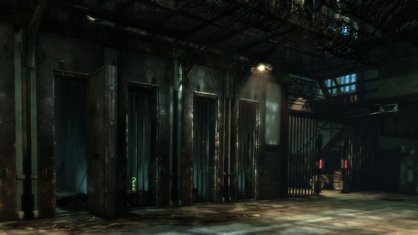
(Controlled Access)
When you're walking through this row of cells, you might notice a trophy - behind bars - on the northern side of the room. To get it, you must head upstairs, bomb the destructible walls and drop down into the cell from above.
PENITENTIARY - RIDDLER TROPHY #8
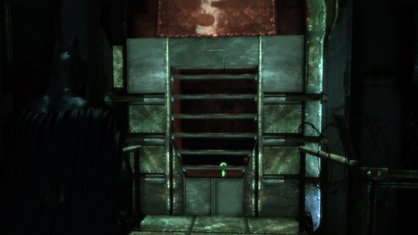
TOOLS NEEDED: Cryptographic Sequencer, Explosive Gel
(Extreme Incarceration)
In the room where you lock up Harley, check out cell #5 on the upper right side. A trophy! To get inside, though, you'll need to head back to the main control tower and go upstairs to the numbered security panels. Use your sequencer to hack into panel #5 and the door below will open. Voila - the trophy is yours! Harley will trap you in here, but one of the walls is destructible. Blast and grapple your way out, nabbing an Amadeus Arkham symbol along the way.
PENITENTIARY - RIDDLER TROPHY #9
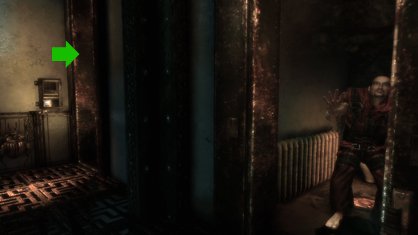
TOOL NEEDED: Cryptographic Sequencer
(Security Control Room)
Once you have the sequencer, go back to the room where you found Warden Sharp and the impersonator Clayface. Climb the stairs at the northern end, where there are two cells at the top. One contains a super creepy inmate with one arm; the other contains the trophy. Just hack the panel to get in.
PENITENTIARY - RIDDLER TROPHY #10
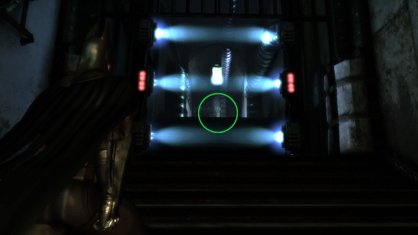
TOOL NEEDED: Ultra Batclaw
(Guard Room)
To grab this trophy, you'll need to clear the Guard Room of Joker toxin first. See the Prometheus Riddle above to see how. Once done, simply grapple to the area that held the toxin switch box and walk through the door. The trophy is on the other side, no longer separated from you by an electrified gate.
PENITENTIARY - JOKER'S TEETH #1-3
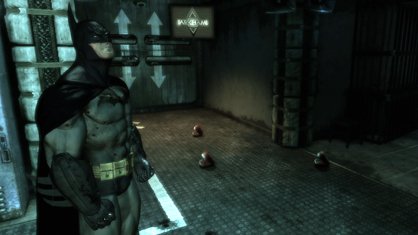
(Cells Access)
Before leaving the first area of the Penitentiary, you'll come across three sets of teeth in front of the door to the Main Cell Block.
PENITENTIARY - JOKER'S TEETH #4-6
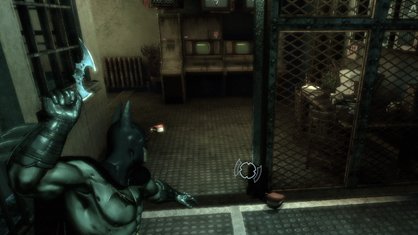
(Main Cell Block)
Grapple to the raised area above all the crazy people's cages. Turn north and cross the catwalk into the room with the Ventriloquist's gun. Turn left and you'll see the teeth chattering around a side office.
PENITENTIARY - JOKER'S TEETH #7-9
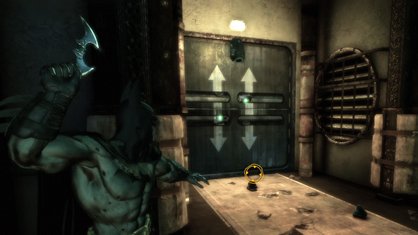
(Guard Room)
After rescuing the two guards from Harley - the ones hanging above the electrified water - the teeth will be impossible to miss. They're in front of the door leading back to the Main Cell Block.
PENITENTIARY - JOKER'S TEETH #10-15
(Main Cell Block)
These will be directly in your path as you chase after Harley. The first three are right outside the Calendar Man's paper-covered cell. The next three are near the exit of the Main Cell Block as you enter Controlled Access and the boss fight.
PENITENTIARY - JOKER'S TEETH #16-17
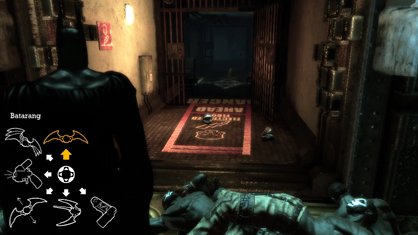
(Extreme Incarceration)
Lock away Harley Quinn, then walk through the door at the bottom of her control tower. Two sets of teeth are right inside.
PENITENTIARY - JOKER'S TEETH #18-20
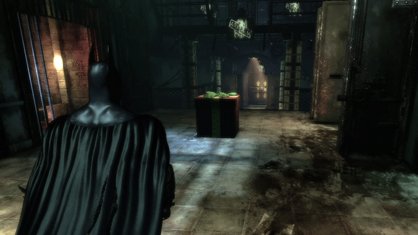
(Controlled Access)
After locking away Harley, exit Extreme Incarceration and you'll find a purple gift box waiting for you in Controlled Access. Just approach to release the three sets of teeth.
Sign up to the GamesRadar+ Newsletter
Weekly digests, tales from the communities you love, and more
- Leon HurleyManaging editor for guides
