Batman: Arkham City Riddler guide - how to find and solve every Riddler challenge
Our walkthrough to every Batman: Arkham City Riddler challenge! Riddles, trophies, cameras, balloons, and more!
Batman: Arkham City Industrial District Riddler Trophies
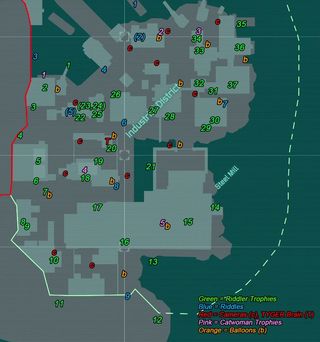
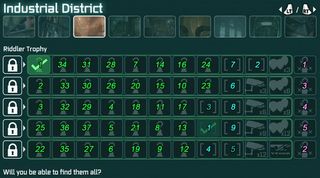
INDUSTRIAL DISTRICT - RIDDLER TROPHY #1
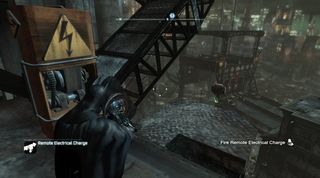
Use your remote electric charge to dip the crane into the water, then bring it back up. There should be a Riddler trophy resting in the crane’s hook. Use your batclaw to grab it.
INDUSTRIAL DISTRICT - RIDDLER TROPHY #2
There is a structural weakness under the Gotham Hardware sign. Blow it using your explosive gel. Once inside, use your remote electric charge on the two generators to manoeuvre the Riddler trophy over to the right.
INDUSTRIAL DISTRICT - RIDDLER TROPHY #3
This is another carnival-style “test your strength” kind of test. You need to dive bomb from a very high place (the massive chimneys to the east) and make sure to hit your shockwave when you land on the panel.
INDUSTRIAL DISTRICT - RIDDLER TROPHY #4
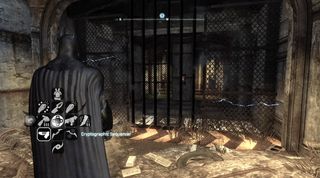
Use your cryptographic sequencer with range amplifier to hack the console. This will raise the electrified bars and allow you to reach the trophy.
INDUSTRIAL DISTRICT - RIDDLER TROPHY #5
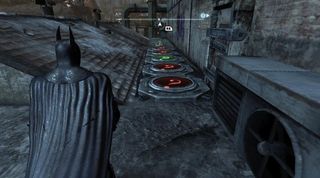
Run along this series of panels, making sure you only step on each one as it turns green.
INDUSTRIAL DISTRICT - RIDDLER TROPHY #6
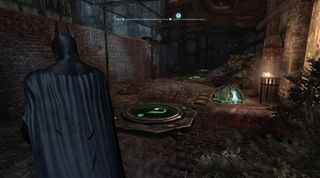
Stand on the first panel and use your line launcher to get to the second without touching any other part of the ground. You’ll need to drop from the line soon after you launch it, so be ready. Repeat for the third panel.
INDUSTRIAL DISTRICT - RIDDLER TROPHY #7
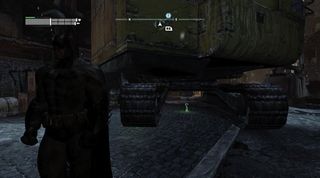
Underneath the crane.
INDUSTRIAL DISTRICT - RIDDLER TROPHY #8
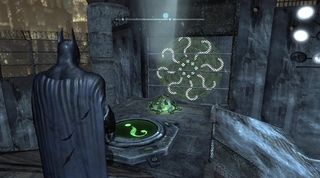
When you step on this Riddler panel, one of the many switches in front of your will light up. A moment later, all of the switches light up and then rotate. If you can hit the switch that light up first, the trophy is yours.
INDUSTRIAL DISTRICT - RIDDLER TROPHY #9
Open the door on the left with your remote electrical charge. Once inside, stand on the Riddler panel in order to activate the console on the other side of the chain link fence. From where you are, use your cryptographic sequencer with range amplifier to hack the console, which will open the trophy cage. Then just blow the weak wall with gel and claim your prize.
INDUSTRIAL DISTRICT - RIDDLER TROPHY #10
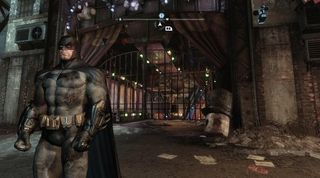
Do a running slide under these bars, then look straight up. The trophy is on the ceiling, just above the car closest to the bars. Use your batclaw to get it down.
INDUSTRIAL DISTRICT - RIDDLER TROPHY #11
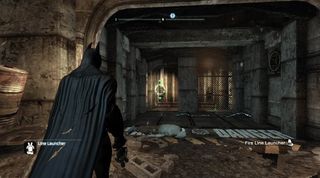
Use your line launcher to get to the trophy without touching the electrified ground. Use the button near the trophy to turn the electricity off, allowing for a painless escape.
INDUSTRIAL DISTRICT - RIDDLER TROPHY #12
This is the elusive trophy. Get on a high part of the roof of the steel mill and face south. There is a hole in the side of the prison wall. You’re going to need to do a dive bomb then pull up in order to make the distance.
INDUSTRIAL DISTRICT - RIDDLER TROPHY #13
You need to dive bomb from the steel mill roof and pull up just before entering the cage in the water. Make sure to keep your dive close to the cage entrance or you’ll overshoot it when you pull up.
INDUSTRIAL DISTRICT - RIDDLER TROPHY #14
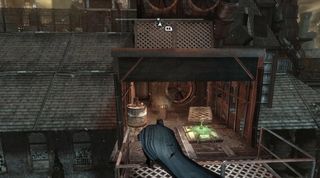
On this balcony at the eastern most part of the Steel Mill.
INDUSTRIAL DISTRICT - RIDDLER TROPHY #15
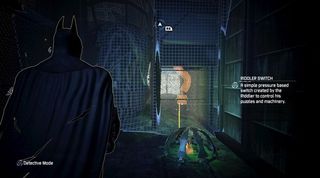
You’ll notice the Riddler switch is facing the direction opposite its cage. Throw a remote control batarang to hit the switch, which will give you plenty of time to grab the trophy seeing as you’re already standing right next to it.
INDUSTRIAL DISTRICT - RIDDLER TROPHY #16
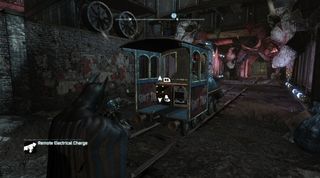
Zap the train engine with a remote electrical charge. This will move it forward and position it right underneath a structural weakness. Stand on the engine and use your explosive gel, then use your batclaw to take the trophy off the ceiling.
INDUSTRIAL DISTRICT - RIDDLER TROPHY #17
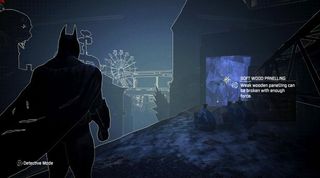
You can punch (or flying kick ‘cause it’s cooler) right through this soft wood panelling to reach the trophy on the other side.
INDUSTRIAL DISTRICT - RIDDLER TROPHY #18
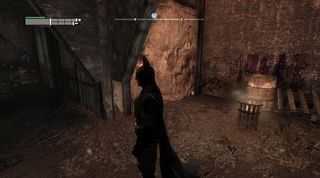
At ground level look for this flaming trash can. The wall next to it is a structural weakness. Use your explosive gel.
INDUSTRIAL DISTRICT - RIDDLER TROPHY #19
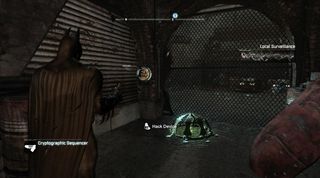
Hack the device next to the trophy cage with your cryptographic sequencer.
INDUSTRIAL DISTRICT - RIDDLER TROPHY #20
There is some soft wood panelling on the side of this skinny building that you can glide through but be careful; there is a panel on the wall opposite the weak wood that you need to touch before hitting the ground (which is covered in red panels). The only way to do this is by pulling off a dive bomb & pull up combo. As soon as you touch the panel on the wall, make sure to push off and glide again.
INDUSTRIAL DISTRICT - RIDDLER TROPHY #21
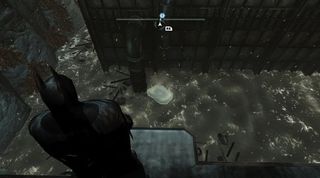
Look down in the water with detective mode on. You’ll notice there is a rusty hatch down there. Use your freeze blast to create a raft directly under said hatch, then use your batclaw to pull it open. The Riddler trophy will fall out.
INDUSTRIAL DISTRICT - RIDDLER TROPHY #22
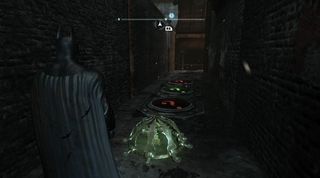
These panels alternate from green to red. You need run at a steady speed as you follow along with them, making sure to only step on a panel when it is green. Step on all three when they’re green and the trophy cage will open.
INDUSTRIAL DISTRICT - RIDDLER TROPHY #23 (Inside Zsasz hideout)
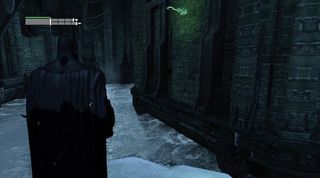
From the floating wooden bridge, throw a freeze blast into the water to your right. If you can throw it far enough, you’ll be able to see a trophy on the wall when you jump out to your makeshift raft. Use your batclaw to nab your prize.
INDUSTRIAL DISTRICT - RIDDLER TROPHY #24 (Inside Zsasz hideout)
After you’ve defeated Zsasz, turn on the console at the centre of the room. This will create an electric arc nearby. Head back through the double doors you came in through and look to the left to find a vent. Crawl through it, and emerge next to a caged trophy. From here, you want to manoeuvre a remote controlled batarang through the arc of electricity and back into the ducts, where there is a fuse box. Make sure to wait for the water level to fall.
INDUSTRIAL DISTRICT - RIDDLER TROPHY #25
There are three panels on the sides of the three giant chimneys in the area. You’ll have to touch all three in a row without touching the ground. Glide to the far chimney, then push off and do a grapnel boost off of one of the tall chimneys to gain some altitude. This should give you time to glide around and hit the second panel. Repeat this process for the third.
INDUSTRIAL DISTRICT - RIDDLER TROPHY #26
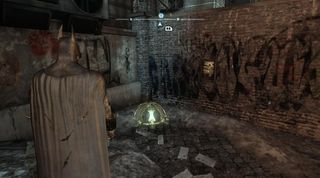
Hack the console with your cryptographic sequencer. Nice and easy...
INDUSTRIAL DISTRICT - RIDDLER TROPHY #27
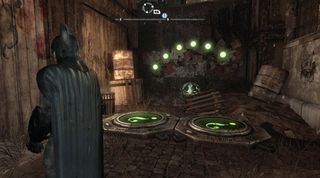
The panel on the left adds three lights to the pattern. The panel on the right adds four. Your goal is turn on all the lights and leave nothing unlit. If all else fails, just keep stepping on the left panel.
INDUSTRIAL DISTRICT - RIDDLER TROPHY #28
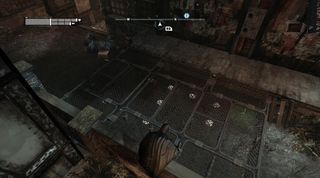
Use your disruptor: mine detonator to remove the mines. You can only do two at time before a lengthy cool down period, so be patient.
INDUSTRIAL DISTRICT - RIDDLER TROPHY #29
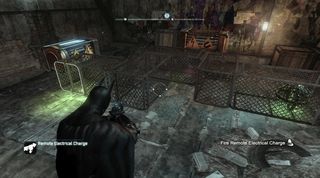
Use your remote electric charge on the two generators in order to force the trophy to the other end of the chain link maze.
INDUSTRIAL DISTRICT - RIDDLER TROPHY #30
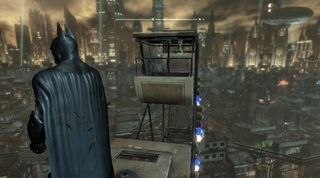
This trophy is on the ceiling of one of the pods at the top of the ferris wheel. Use your batclaw to grab it.
INDUSTRIAL DISTRICT - RIDDLER TROPHY #31
Standing on this Riddler panel will partially open some heavy metal doors for a short period of time, provided you stay on the panel. Step onto the panel and immediately throw a remote batarang through the metal door in front of you. Pilot it into the switch on the right, then immediately throw a quick batarang at the centre switch. Finally, throw another remote batarang through the metal door and into the switch on the left. If you’re quick enough, you should be able to hit all three switches before the metal door shuts.
INDUSTRIAL DISTRICT - RIDDLER TROPHY #32
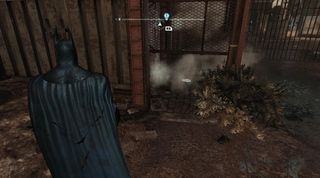
You’ll need the freeze blast to block the steam-spewing pipes and the disruptor: mine detonator to disarm the two proximity mines. Do all that and the trophy is yours.
INDUSTRIAL DISTRICT - RIDDLER TROPHY #33
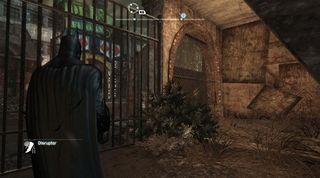
There is some soft wood panelling at street level across from the entrance to Joker's Funland. Punch your way through it to find a trophy.
INDUSTRIAL DISTRICT - RIDDLER TROPHY #34
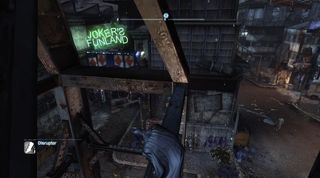
There is some wood panelling on side of the building in which this trophies lies. Glide into it from a height and grab the trophy. Looks like Catwoman might have a harder time here though...
INDUSTRIAL DISTRICT - RIDDLER TROPHY #35
Step into the cage (follow the arrow) and use your line launcher. Prepare to fire the line again at a perpendicular angle to the first as soon as you can. Once you’ve done that, quickly use the line launcher tightrope. From here, you can grapple up to the trophy.
INDUSTRIAL DISTRICT - RIDDLER TROPHY #36
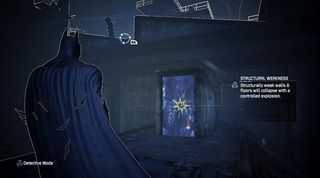
Just use your explosive gel on this structural weakness.
INDUSTRIAL DISTRICT - RIDDLER TROPHY #37

The panel to open this trophy cage is on the roof of this structure. Once you step on it, you’ll have six seconds to drop down and grab the trophy with your batclaw. This should be more than enough time.
Industrial District:
- Riddler trophies
- Catwoman Riddler trophies
- Riddle solutions
Jump to Section:
- Park Row
- Bowery
- Amusement Mile
- Subway
- Steel Mill
- Museum
- Wonder City
- Physical Challenges
Current page: Industrial District Riddler Trophies
Prev Page Amusement Mile Riddle Solutions Next Page Industrial District Catwoman TrophiesSign up to the GamesRadar+ Newsletter
Weekly digests, tales from the communities you love, and more

