Demon's Souls walkthrough and step-by-step guide to Boletaria
Our walkthrough will make getting through Demon’s Souls easier
Tower of Latria 3-1 walkthrough - Prison of Hope
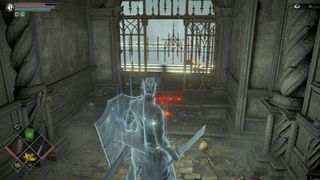
Tower of Latria starts off in a prison, with the goal of making your way to the bottom floor and outside. It’s confusing since each floor looks the same. From the starting point, go left and wrap around to the opposite side. Grab the Prison of Hope, 3F Cell Key on the wall along the way and continue ahead, then make a left to the next section past the cauldron.Use the geometry to take cover from the Mind Flayer’s attacks and strike in between animations.
From the hallway that connects the two main areas, turn left, and again - wrap around to the right to grab the next key, Prison of Hope, 3F Key, in an identical spot as the last. You can now head back to the starting cell and make your way to the gate beside it, which can now be opened thanks to the key you grabbed.
Pass through the fog and take this path upstairs. Head forward and once again, wrap around to the right (take note of the gate that leads outside). Continue ahead and you’ll come to an open section that leads through a cell. Pass through it and make a right when you get to the next area and you’ll find the Prison of Hope, 4F Key and Prison of Hope, 4F Cell Key. Now return to the gate mentioned above to go outside.
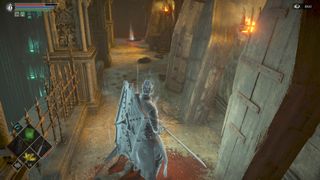
Follow this path to the next area and stick to the left side (note that you can free a merchant NPC called the Once Royal Mistress on the right side). Keep going and you’ll be able to open yet another gate. Take the steps down to the floors below.
Keep going until you reach another gate that leads to the Prison of Hope, 1F Key and the Prison of Hope, 1F Cell Key on a wall. Ahead is another gate, but there’s also one to the right that you can’t access right now. Keep this gate in mind because you’ll need to come back here using the Warden’s Key. For now, go forward and keep going down, all the way to the bottom floor, though another fog gate. Finally, at the bottom, open up another gate and you’ll be on the ground floor.
In the distance you’ll see the Prisoner Horde, an enemy made of bodies. Directly behind this enemy is a path that leads to the outside. Either run past the Prisoner Horde or take it out and then make your way outside using the path behind it, where you’ll trigger a cutscene.
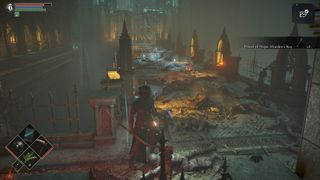
Go left and then right, straight towards the ballista machine and grab the Prison of Hope Warden’s Key - located on the ground just before you’d take damage. Now, head back to the locked we mentioned above and open it using the Warden’s Key. Follow this path along to the left and you’ll coupe to a double gate. Open it and keep going into the tall tower, through the fog gate on the bottom floor, which leads to the backside of the deadly bolt machine. You can now turn it off to collect the items in front of it, safely.
Now, head up to the other tower (identical to the one you just went through) behind the ballista machine and follow this path all the way up, to the church, and to an enemy Dregling that you need to kill in order to defeat the next boss (if you don't the boss will be healed while you fight her so don't listen to anything he says). Behind him is the Prison of Hope, Special Key, which you can use to free the Sage Freke NPC on the third floor of the prison.
Finally, head back down the tower, behind the bolt machine and up to the church and take out the Baby's Nail Black Phantom. The best strategy is to back away so she pulls out her bow and then rush her as she switches to her melee weapon. Use the nearby rubble as cover and don’t get greedy when attacking. Once she’s down, run up to the church to start the Fool’s Idol boss fight.
Fool’s Idol boss
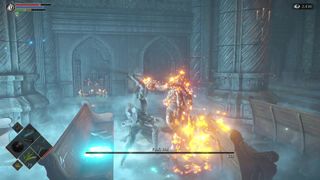
Fool’s Idol is one of the easiest boss encounters in the game (as long as you’re prepared) and if you’ve followed along, you should be well equipped to take her down. The main thing you should know about this fight is that after a while, she’ll clone herself and hide among the duplicates -- hence the name Fool’s Idol.
You can only damage the real one and one way to tell which one is the real one is by looking at the attacks. The real Fool’s Idol fires a massive Soul Ray, while the fake ones use the smaller, less deadly Soul Arrow. If you leave some of her followers alive they'll also turn to face the real one. Use the columns to hide behind and then run up and get a few hits in. Repeat this process a few times and she’ll be down in no time. Afterward, you’ll be carried up to the next area.
Fool's Idol Archstone 3-2 walkthrough - Upper Latria
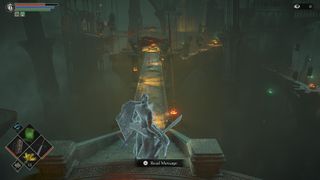
Comparatively speaking, Fool’s Idol Archstone is much easier than the previous one. It does have its fair share of confusing, labyrinthian paths, but we’ll guide you through it every step of the way. Start by going straight, past the fire, and into the tower ahead, make your way up the steps.
At the top will be a bridge you can take to the left, but also take note of the blocked off path that continues up the stairs. We’ll be returning here after we clear it out. For now, take the bridge, and make your way into the next tower, through the fog. Keep going and ride the elevator all the way to the top. It takes it a while to come down, so be patient and keep your guard up while you wait.
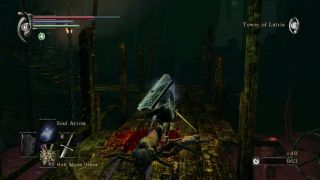
Take out all the Dreglings at the top to trigger a cutscene. Then, follow the path beside the enemies you just defeated, down some steps that lead to cages you can ride down to the swamp. Take the cage at your 12 o’clock (instead of the one on the left) and ride it down. At the bottom, just behind the cage are some steps you can use to get onto the wooden platform. From here, follow the path up to the natural, rocky section and make your way up, along another wooden platform, and up to another rocky area.
Pass through the fog and continue ahead. From here, it’s pretty linear, but be careful of the Black Phantom Mind Flayer and the Giant Man Centipedes. You’ll see a Crystal Gekko and a small bridge to its right. Take this path and follow it up to the tower, just like before. Ride the elevator up and take out the Dregglings, just like before.
Take the path next to where the Dregglings were and you’ll end up close to the start of the level - just before the very first tower you entered. From here, drop down from the broken platform and either go right - back to the Archstone and to the Nexus to level up, or left, back up the tower to reach the previously inaccessible section. When you’re ready, go up this tower and continue up the stairs, all the way to the top. Again, be careful of the Mind Flayer here. At the top is a fog you can pass to get to the next boss.
Maneater boss
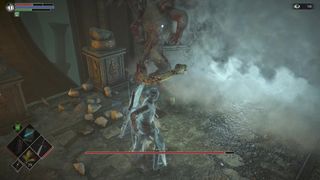
To be frank, Maneater is one of the toughest bosses up to this point. There’s a lot going against you, like the fact that you can easily get knocked off the narrow platform, the Maneater’s damage output, and the additional Maneater that spawns in after you lower the first one’s health to around 20% (or after 100 seconds).
With that in mind, your goal should be to take out the first one as quickly as you can, before the second one spawns in. Use magic or a powerful melee weapon to damage the Maneater from behind. Try to only attack after it executes its lunge attack, which leaves it open to be hit.
Play conservatively and get behind the Maneater to pull off a few attacks, then back away and either block or roll through its attacks. If you stick close to it, you won’t have to worry too much about its long range attacks. Just be cautious when it flies away and try not to lock on, as the camera can get wonky.
The second Maneater is basically the same (but uglier) so repeat the process and try not to get close to the edge of the walkway - you’ll likely get knocked off. Once you’re down to one Maneater, you can use the flame bowl in the center of the boss arena to deflect the boss’ attacks. Only strike when it’s safe and then retreat behind the flame bowl again. After they’re down, head to the Archstone on the opposite end to begin the final section of this world.
Maneater Archstone 3-3 walkthrough - The Ivory Tower
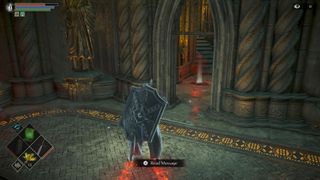
Luckily, this section is extremely short. All you need to do is climb the steps while taking out Man Centipedes and Black Phantom Mind Flayers. The second Mind Flayer is guarding a Crystal Gekko, so try to pull its attention toward you and take it out without triggering the Gekko. Just behind it is the fog to the next boss and thankfully, it’s easier than the last.
Old Monk boss
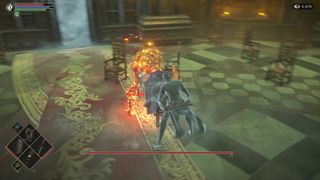
If you’re playing online this boss can actually be controlled by another real player, which can be very tough and unpredictable. To be safe, we recommend to switch the game to offline mode from the main menu. Once you do, you can fight him normally.
Start off by two-handing your melee weapon and mashing the light attack. This will stun the boss, then back away to regain stamina and repeat the process. If you get hit and need to heal, take your shield out and try to circle around him to get a backstab. After the backstab animation, quickly heal before he gets up. Or, simply roll far away (or hide behind a chair) to heal.
Be careful of his long range magic attacks. If you stay close, you'll still have to dodge his Homing Soul Arrows, so when you see them appear, back away so you’ve got more time to react. Then run back to him to get a few hits in. If you follow the method we described, you should be able to take him out in no time. Return to the Nexus, level up and get ready for the next area.
Jump to Section:
- Demon's Souls walkthrough: Tutorial
- Demon's Souls walkthrough: Boletarian Palace (part 1)
- Demon's Souls walkthrough: Stonefang Tunnel
- Demon's Souls walkthrough: Tower of Latria
- Demon's Souls walkthrough: Shrine of Storms
- Demon's Souls walkthrough: Valley of Defilement
- Demon's Souls walkthrough: Boletarian Palace (part 2) and End Game
Current page: Demon's Souls walkthrough Tower of Latria 3-1
Prev Page Demon's Souls walkthrough Stonefang Tunnel 2-1 Next Page Demon's Souls walkthrough Shrine of Storms 4-1Sign up to the GamesRadar+ Newsletter
Weekly digests, tales from the communities you love, and more
Joseph loves Nintendo and horror games. With the Nintendo Switch, he's ready to get spooky anytime, anywhere. He specializes in covering Call of Duty: Warzone and action RPGs like Dark Souls, so you can bet he's looking forward to Elden Ring, the brainchild of George RR Martin and Hidetaka Miyazaki. You can find Joseph's work at GamesRadar, Digital Trends, Inverse, and PLAY Magazine. When he's not writing about video games he can usually be found petting his cats and listening to some Progressive Metal. He thinks Meshuggah is tight.
