A full Sekiro walkthrough to help you master FromSoftware's samurai Souls
Where to go and who to kill in Sekiro Shadows Die Twice
Sunken Valley
Sunken Valley
From the Old Graves Idol go back to the bridge behind the palace again. Cross the bridge and go down the path to grab the Great Serpent Shrine Idol. The Tengu mask NPC is here again. If you have mastered a skill and talk to him, you will get the Mushin Esoteric Text.
Grapple across the canyon then grapple down the canyon to the Under-Shrine Valley Idol. Turnaround (bright eyes) and go through up through the icy canyon. Grab the Prayer Bead from this area (there is a pool of water here that you can dive into when you gain the ability for another Headless fight) then return to the Under-Shrine Valley Idol.
Go down the canyon, grapple across to the gunman below and tell him off with your sword. Grapple up to a tree then grapple across to your left. Then go left and up another ledge you can climb and follow this to a Gourd Seed before coming back to this spot. Wall hug walk across this next part then grapple across to a tree and then jump down to grab the Sunken Valley Idol in the area below.
The Gun Fort
The Gun Fort
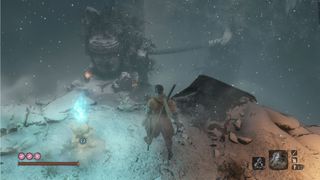
This next bit is pretty brutal if you take your time so move quickly. Grapple down to the path below you then immediately grapple left to a tree and pause for breath further in to this little island. Grapple up to the next island and there will be a Snake Eyes gunner in front of you, fight them if you want to but beware of the gunner in the tree to the right of the Buddha statue head. Either after you have killed her or if you want to avoid her, run around to the left of the statue head sticking close to it and jump up.
Make your way up and the sprint across the bridge ahead dropping down the hole halfway across. Grapple the point as you fall. Grapple along towards the cliff face on your left and take time to kill the gunmen on the various platforms here. Continue moving up via grappling hook and ledge climbs until you reach a large flat area. Kill off the enemies before moving towards the wooden barricade. Jump up and kill off all the enemies here before moving further into the cave system and grabbing the Gun Fort Idol. Follow the corridor along in order to fight *squints* Long-arm Centipede Giraffe (Big Voldo)… Kill him off for a Prayer Bead.
Explore the hole in the floor to find your way to the cavern again, grapple above you and grab the item from the cave filled with wall lizards. Exit the cave and continue on the path via grappling hook to see some smaller Voldo enemies and grab another Prayer Bead. Go back to the room you fought Big Voldo in by grappling up and around, or just use the Homeward Idol. Go through the door behind where he was.
Sunken Valley Passage
Sunken Valley Passage part 1
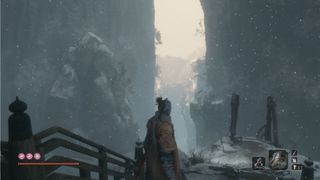
Make your way across the bridge and be very surprised when a big old snake breaks the hell out of it and you drop into a pool of water. Swim as fast as you can forwards and stick to the right to find a safe area. Stay right as you head out of this safe area towards a cavern and the Riven Cave Idol.
Grapple up to a small opening and exit this area. Follow the path to your left and jump up until you can see the Buddha statues. Kill the MONKEY WITH A BLOODY SWORD that drops down. Now then, there are lots of smaller items both up here amongst the statues and monkeys as well as a few down in the poison pool.
There are two paths here. The first is the high path. If you grapple from statue to statue you will eventually see a horde of monkeys. Go past these monkeys and on the right side of the canyon behind them is a a statue rope. Walk along this to claim the Bodhisvatta Valley Idol. If you then jump down you can fight the Guardian Ape. (If you do this before doing the Poison Pools… again section - a couple of sections on - you will have to fight the Guardian Ape again). Killing this will net you the Guardian Ape’s Watering Hole Idol and another Memory to increase your attack power as well as the Slender Finger Prosthetic Tool. Behind this is a cave with the Lotus of the Palace you need for the main quest.
Inner Sanctum
Inner sanctum
If you take the Lotus of the Palace back to Young Lord at the Upper Tower - Kuro’s Room Idol and follow the conversation between him and Emma you will be tasked with finding the Mortal Blade in Senpou Temple.
Travel to the to the Main Hall Idol using the Homeward Idol and check the altar in front of where the NPC was. Ring the bell. Complete the Folding Screen Monkeys boss fight for a Memory and the Puppeteer Ninjutsu. You will be transported elsewhere, walk forward and grab the Inner Sanctum Idol. Go inside the building and talk the NPC here. Congratulations, you know have the Mortal Blade. Travel back to the Upper Tower - Kuro's Room Idol via the Homeward Idol and have a couple of chats with the Young Lord. (You can also use the Mortal Blade to end the life of the Hanbei the Undying in the Dilapidated Temple if you are feeling kind and want a Hidden Tooth item)
Black Badger
Black Badger
Warp to the Senpou Temple Idol and go right and down to where the kite control is. Equip the Puppeteer Ninjitsu and then backstab the Rat here and use it. Go up and find Black Badger overlooking the kite. Chat to him and then make your way through the area. Go up to the big building and into the rafters. Go through that space and out of the window then grapple onto the big tree.
You can now use the kite to grapple to the other side. Make your way down the cliff side using grappling and leaps of faith by going right and down. At the lowest level you can go left into a cave. Drop down for the Sunken Valley Cavern Idol. Talk to Black Badger and then follow the path outside. Walk to the end of the log and drop attack the enemy below. Then attack again when the prompt appears. Grab the item where you land and warp using the Homeward Idol.
Sunken Valley Passage part 2
Sunken Valley Passage part 2
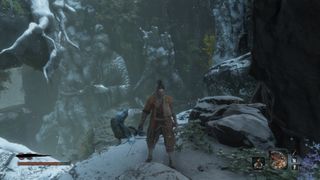
The second path is down low. This is the path we have taken so far. Grapple to the statue on your left then grapple to the one on the other side that is praying. From here, jump off of this one away from it and hit the grapple button as you fall. Look down again to see a tent with a merchant inside. Buy the Green Mossy Gourd from him if you want to.
Cave of Nonsense (not the official name)
Cave of Nonsense (not the official name)
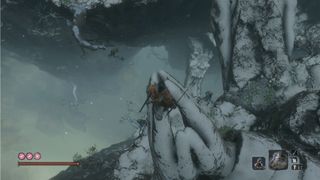
Behind the merchant is a cave to drop down into. This cave is full of utter nonsense. There are both poison lizards in here and enemies that literally come out of the walls. Not to mention the giant snake body throughout that will lash around if you hit it or jump off of it. Stick to the right hand side of the cave until you see the snake body coiled around a stone spire. Go across, under the snake's body, immediately after passing this and jump up. Now stick to the left-hand side.
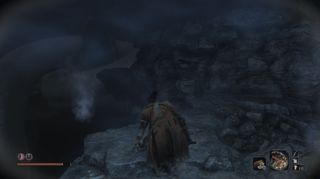
You will see a wall with the wall hug markers on it, beyond this the snake will attack you. Drop down to the left of the wall and then jump up to a cowering monkey. Look up and to the left to see a grappling point. Equip the Mist Raven prosthetic and grapple up being ready to immediately use the prosthetic. Hold down the direction of the small hut to dodge towards it and run inside. Go through here and grab the Dried Serpent Viscera from the shrine.
Grapple up to a small path, follow it until it has a small drop, grab the item, then turn around and look up for another grapple point. Grapple up there and ledge climb. Welcome back to Blighttown, sorry, Poison Pools.
Poison Pools… again
Poison Pools… again
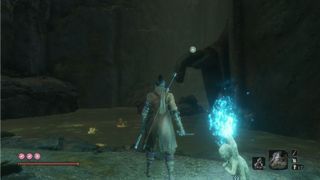
Rest at the Poison Pools idol to your right. Grapple to the buddha hand and then around to a small piece of land. Kill the two gunmen here. Go to the wall and sneak around the base of the fallen statue. Ahead of you is another Snake Eyes gunner who you need to kill to progress. Sneak up on her then finish her off for a Prayer Bead.
The opening should now be clear of fog and you can walk down it. There is an incredibly suspicious large cavern now. (After you have killed the Guardian Ape later on you can come here and fight it again for two Prayer Beads, another Memory, and the Bestowal Ninjutsu, make sure to bring the Mortal Blade to finish off the centipede. If you then leave this area and come back there will be another mini-boss). Sneak around it (or run if you are feeling frisky) and head for the opening at the back. Grapple up this and follow this path along. You will come out in a forest area. Drop down and talk to the NPC before grappling across the gap. Walk around the corner to find the Hidden Forest Idol.
Hidden Forest
Hidden Forest
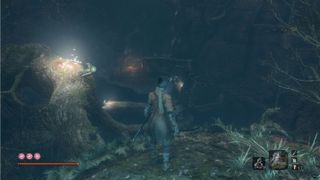
From this Hidden Forest Idol go forwards and onto a tree branch. If you look to your right and down slightly you should see a small Buddha Statue. Make your way down to this using your grappling hook and chat to the NPC. If you fall off you will probably survive but be aware that if you do there is another Headless down here so you may not survive that. After chatting to the NPC make your way through the large opening ahead of you.
From here, make your way left carefully fighting everything you can. There is a wall with wall hug markers on it. Go along this for an item then make your way back. Ahead of this point on the left is a tree you can grapple to, do so. Go through the narrow path and below you is an enemy who resembles the Drunkard from the memory but this one is a Glutton. Sneak attack him and kill him off for a Prayer Bead.
Grapple up past where the Glutton was and follow the cliff around on your right grappling as you do so. Make your way up this path until you find a tree to walk along. Make your way along to the building’s roof. Go around to the front of the building and look down. Drop onto the rafters here before drop attacking the Mist Noble. Just unleash hell and attack before it can recover. This will clear the fog and reveal a new path behind the building.
Mibu Village
Mibu Village
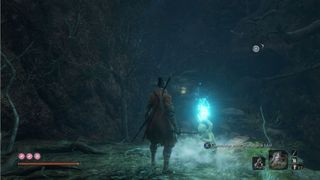
Follow this path until you reach an edge. Drop down this and grapple down to the Mibu Village Idol. If you then follow the river down you will find a poison ninja guarding a Carp Scale. Opposite the idol is a merchant who is selling two more Carp Scales. Make your way upstream and kill off the villagers as you do so. You will come to the village proper and should be able to grapple onto a couple of roofs.
Drop into the first house and have a chat to the NPC for an update on what’s going on locally. Go back outside of the house and swim across the river. Make your way down the path on this side and at the back on a roof is the Pine Resin Ember which is needed for a Flame Vent upgrade.
Go back to the main village and grab the Gourd Seed from the tree in the centre before heading to the back of the village. There are trolls and villagers everywhere plus ones that come out of the ground. Be careful. At the back of the village is the Water Mill Idol so grab this. You can chat to the NPC here if you want and then follow the path. There is a crying musician and if you talk to her she will try and fight you. And, if you try to run past, she will try and fight you. Her name is O’Rin of the Water and she is obnoxious.
If you don’t want to do this fight you can simply swim upstream from the river and grapple onto the bridge. Grapple onto the tree just after the bridge and stick to your left and follow the path. Enter the area which is clearly hiding a boss and fight off the Corrupted Monk…
If you don’t want to do this fight you can simply swim upstream from the river and grapple onto the bridge. Grapple onto the tree just after the bridge. If you go right into the river (jump through the fence) and turnaround to face the building you can grapple up for a Prayer bead. If you instead stick to your left and follow the path. Enter the area which is clearly hiding a boss and fight off the Corrupted Monk for another Memory and the Mibu Breathing Technique. This allows you to swim underwater. Grab the Wedding Cave Idol in front of you and then make your way inside to collect the Shelter Stone. If you try and warp to the castle now you will notice something is amiss.
Ashina Castle again
Ashina Castle again
From the Abandoned Dungeon Entrance Idol go outside past the guard who is sat down. Things have gone horribly awry here so it is best to be swift when travelling through this area. If you move forwards past the gate that the red samurai emerges from you can then jump into the water. Do so and dive down when in the channel. There should be a Treasure Carp in here too.
Make your way through underwater and emerge in the castle grounds. Climb out of the water and make your way past the duelling enemies. You are on the other side of the gate to the Ashina Castle Idol. As you did earlier on in the game, follow the path to your right, grappling up to rooftops and make your way to the largest roof again. Go around the back and look up to the window that you previously grappled up to for the Upper Tower - Antechamber Idol and do so again.
From here, make your way into the room with the walkways and jump down to find another Chained Ogre. Take this one out (it should feel much easier than the first fight) for a Prayer Bead. Warp back to the Upper Tower - Antechamber Idol using the Homeward Idol.
This time go past the walkways and through the door on the other side. Take a left and go up the stairs. Go through to the next room to find the Upper Tower - Ashina Dojo Idol once again. There is now another boss in the next room called the Lone Shadow Vilehand. His name is only partially correct though as there is actually another enemy to your left as you enter the room. Assassinate the normal one and then fight the Vilehand. Defeat this enemy for a Prayer Bead and access to the next area.
Ashina Castle Roof
Ashina Castle Roof
Make your way outside of the window and find your way up to the roof. You have a cutscene to watch, enjoy this brief moment of not being stabbed. Talk to Owl and make a decision. If you choose not to be loyal then you will have to fight Emma and then Isshin to get the ‘bad’ ending. If instead you choose to remain loyal to the Young Lord then you will have to fight Great Shinobi Owl. Defeating him gets you a Memory and the Aromatic branch.
Reactivate this Castle Tower Idol then head downstairs. Grab the Upper Tower - Kuro’s Room Idol again and then talk to the Young Lord a lot before smelling some incense. Talk to the Young Lord a lot more and it is time to go and visit the Divine Realm. To get there, warp to the Wedding Cave Door Idol and go into the cave. Once inside enter the wedding carriage and pray. Enjoy this cutscene before the last new area of the game.
Fountainhead Palace
Fountainhead Palace
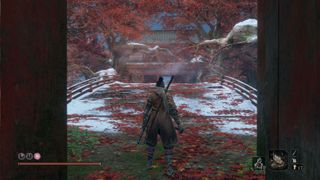
Welcome to the Fountainhead Palace. Have a walk down your, uh, vehicle to the floor and go forwards to grab the Fountainhead Palace Idol. Have a walk through the gate to fight the Corrupted Monk properly this time. You get a Memory and a Dragons Tally Board from this fight. Continue over the bridge and grab the Vermillion Bridge Idol.
Go through the gate and head right and down, grappling where you can and jump down to the roof in the water. There is a building ahead of you, enter it on the left-hand side and work your way through it and take the right-hand exit. Grapple up to the tree on your left then up to the roof. Make your way to the other side of this and then drop down. Move through the courtyard ahead and go through the exit on the right side of it to grab the Mibuu Manor Idol.
This is a stealth section, feel free to use Gachiin’s Sugar here as it is very helpful. Go into the building taking the corridor on your right and talk to the NPC to find out why you should hide. You want to stick to the left side of the next room and follow it around into a room with a samurai. Kill them off and go into the corridor on the right before grappling into the ceiling. Walk through the crawlspace and drop down in the same corridor once the guards have passed you. Continue hugging the left-hand wall and you will come to a gate you can go through for the Flower Viewing Stage Idol.
Start making your way over the bridge, stop to have a small heart attack before grappling to the tree on your right. Look to the roof on your left and grapple to it. Make you way around the back of it and follow the grapple points and jumps up to the top of some stairs next to a door you can’t open. Go down these stairs and through the building before jumping down to the platform below. Go to the platform ahead and to your left to grab the Great Sakura Idol.
Grapple onto the tree and kill of the Okami Leader for a Prayer Bead. Look left and down into the water and you should see a roof with another NPC atop it. Jump down and swim over to them and have a chat to find out that a big old carp has taken up residence in the passage to the palace underwater. Follow this roof along and dive under water, you should see the carp dive under you so follow it. If you missed it, follow the length of the roof and go right for a bit and then down. Be a little coy as you enter the cavern as you need to not get eaten. Make your way to the back of the area and swim through the upper window of the building there before diving down, forwards, and the back up and out. Grapple up a few times to reach the Palace Grounds Idol.
(side quest) At this point you can find another Pot Noble. Go through the building ahead of the Palace Grounds Idol and go left. Immediately turn left and go the edge, to your right on the cliff face is a cave you can grapple to. Jump out while facing it and grapple up. Go through this little cavern and then to the other side of the building for the Near Pot Noble Idol. If you give him some scales and then talk to him a lot you can get some special bait. If you go back to the Palace Grounds Idol and go right, then right again you can grapple up to the roof of this little building. If you then follow the grapple points down you can find the Feeding Grounds Idol. If you ring the bell and feed the fish the special bait it will perish. Then go to the Guardian Ape’s Watering Hole Idol and collect the Great Whisker. Take this back to the NPC at the Feeding Grounds Idol for a Divine Grass. Then go back to the Near Pot Noble Idol for a Lapis Lazuli.
Back at the Palace Grounds Idol sneak into the building and take a right, follow this path and you should see a long red chest on your right just before the door. Open that and grab your final Gourd Seed. Go through the door and grapple up above you. Take the stairs here and then turn right and take some more stairs up to discover the Sanctuary Idol.
Move up past the Sanctuary Idol in order to enter a cave. Pray in here and watch a cutscene before fighting the Old Dragons of the Tree. Kill them off and you get to fight the Divine Dragon. You get Divine Dragon Tears and a Memory for this.
Ashina Castle and Ashina Reservoir
Ashina Castle and Ashina Reservoir
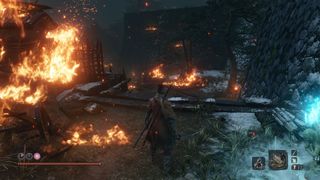
Here we are, the final stretch. Have a chat to Emma to get the Secret Passage Key. Go out through the library window and follow the smoke signals down into a small courtyard. You should be near the entrance to Ashina Reservoir, look around for a door and drop down when inside. Go outside while down there and activate the Ashina Reservoir Idol again. (At this point the world is very different and there are several changes to the Ashina area. If you make your way from the castle to Ashina Outskirts there are new items to find. If while there you head back to where you fought the very first General mini-boss there will be a new idol here that will teleport you to a boss fight with the Demon of Hatred which can be killed for a Memory and the Flames of Hatred Idol)
Eavesdrop on the two guards ahead. One of them is another Ashina Seven Spears mini-boss you can fight if you want to. Whether you fight or not, you want to go left onto a tree then look left and grapple up to the ledge. This will take you to the path from the tutorial where you lost your arm. Climb across the tree and jump over to the ledge before moving forwards and making your way across the underside of the bridge again. Drop down on the other side and keep going down until you reach the Near Secret Passage Idol.
Go through the door, through the cavern and watch a cutscene. Fight off Genichiro, Way of Tomoe again, ideally without taking healing. Then fight Isshin, The Sword Saint. Once the fight is done go behind him and finish the job for a Memory and the Dragon Flash skill. Then simply go over to the Young Lord and interact with him for the ‘good’ ending.
Congratulations. It is done.
Sign up to the GamesRadar+ Newsletter
Weekly digests, tales from the communities you love, and more
Jason Coles is a freelance writer and editor, covering gaming, tech, and fitness. Jason has written guides for GamesRadar+ and PC Gamer, reviews for Play magazine, and a host of other content for the likes of Eurogamer, Dicebreaker, and PCGamesN. Jason also served as the editor of The Indie Game Website and is passionate about helping new writers break into the industry with his Word Count Mentoring initiative.
- Leon HurleyManaging editor for guides
