Dead Space 3 crafting guide
DIY Weapons…
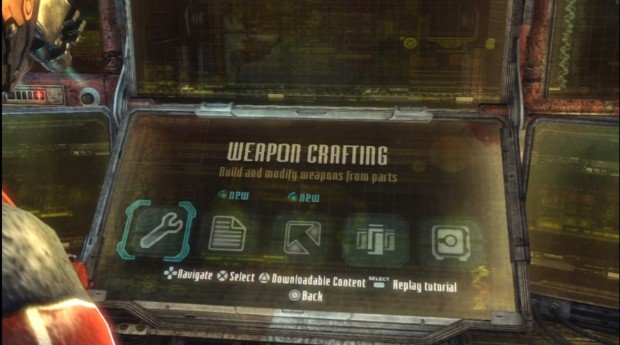
One of the new features to Dead Space 3 is the ability to craft your own weapons from the various parts that you find throughout the game. Using the work benches, the weapons you make can differ in numerous ways and you can make just about any variation of a weapon that you can think of. The in-game tutorial doesn’t explain much of anything about the crafting process and many people will be left scratching their heads as to what to do. Once you get the hang of it though, it’s actually a rather deep and rewarding process, and you’ll find that it can be a satisfying experience experimenting with different formations, creating a weapon that is unexpectedly devastating.
Before we get to it, the best place to mess around with the crafting is to go to the Weapon Crafting Arena by selecting it from the campaign menu before starting your game. Here you can tool away on the provided bench with the weapon parts you already possess and experiment with them. When you are in here, and you create a weapon that you find to your liking, you can simply save and exit and the weapon will be added to your inventory to use during your campaign play through. It’s a nice feature that lets you get the most out of messing around with different compositions without fear of getting jumped from behind by sneaky necromorphs. To test out the creations you make, you can also unleash a few baddies within the arena, on your difficulty of choice. Now let’s get down to making things go boom.
ASSEMBLING
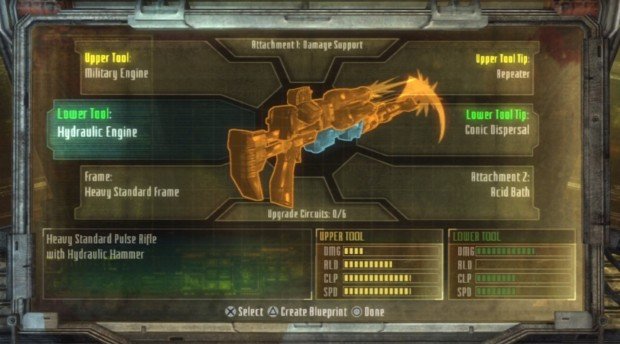
There are 8 different parts of the weapon that you can change, but it all starts with the frame. The frame will determine if your weapon is capable of having a lower attachment on it, as well as how many circuits are open on it to give it some extra points in damage, reloading speed, clip size, and fire rate. You can look below the list of frames to see the attributes of each. The information on the right of the frame screen will inform you on how many circuits it has and the stats it offers before making your selection. Below the list of frames, you’ll see a resource list that will tell you what you need to have to create the frame if you haven’t found the particular frame through the game.
Once you have decided on a frame that you want to use, then it’s time to add some armaments to it. The first thing you‘ll need to do after you have picked a frame, is to choose what your upper tool will be. This will determine what kind of gun archetype you will have. There are numerous types to pick that range from plasma, flamethrowers, electricity, etc. and if you haven’t found the weapon parts for a particular attachment, then they can also be created from the tool menu. The types of upper tools are:
MILITARY ENGINE: Bullets
PNEUMATIC TORCH: Incendiary Ammo
SURVEY CHARGE: Explosive Ammo
TELEMETRY SPIKE: Bolted Ammo
PLASMA CORE: Plasma Infused Ammo
RIP CORE: Blades
TESLA CORE: Electrical Ammo
Again, each different archetype of tool offers varying stats on damage, reload speed, etc. so make sure to keep an eye on the differences in the lower right corner. Once you have decided on the upper tool, you can then choose the tip of the weapon which will affect how the ammo type is dispensed. This will decide if the weapon has a precise firing ability or a spread as well as change other attributes. Say if you chose a pneumatic torch tool, the two tips available are Compressor and Precision.
The Compressor will make the torch a flamethrower, while the Precision will make it a torch that freezes enemies instead of burning them. In the case of having a Telemetry Spike for a tool, the tips available for it can make it fire either as a shotgun in one big burst, or quick and fast like a machine gun; basically a rapid firing javelin gun. Each tool has its own varying types of tips, some more than others, and each one will greatly affect how the weapon behaves.
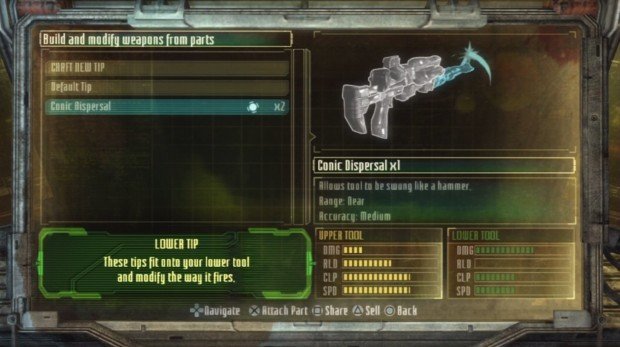
Once you have settled on an upper tool, you can now do the same process for the lower tool of the gun- if the frame you chose supports it. The process is just like the upper tool and you will need to choose a tool as well as a tip. The lower tool should complement the upper tool, so if you have a mid-range gun on the upper, choose either a melee weapon like the Hydraulic Engine, which can make your gun like a chainsaw or a hammer, or a close range weapon, such as a shotgun, for the lower.
You can choose whichever you like, as the lower tools are the same as the upper- with the exception of the Hydraulic Engine-but it’s a good idea to have a lower attachment that is a different type of fire than the upper. Now that you have chosen the base type of weapon types, you can spice things up a little by adding two different attachments to the gun. The attachments also depend on the type of tools you have selected but the attachments available are:
DAMAGE SUPPORT: Increases damage for you and your partner
AMMO SUPPORT: Increases clip size for you and your partner
SAFETY GUARD: Prevents splash damage from explosive weapons
MEDIC SUPPORT: Health packs consumed also heal partner
STASIS SUPPORT: Stasis packs consumed also recharge partner
SCOPE: Zooms in your aim
EXPLOSION AMPLIFIER: Increases explosion radius
STASIS AMPLIFIER: Stasis shots have a larger radius
FULL ZOOM SCOPE: Allows you to zoom in your aim further than scope
AMMO SWEEPER: Automatically picks up nearby ammo packs
FLAME GLAZE: Adds fire damage to projectiles
ELECTRIC CHARGE: Adds an electric charge to projectiles
STASIS COATING: Slows down enemies when shot
ACID BATH: Coats projectiles with acid that does damage over time
AMMO BOX: Automatically reloads clip when empty
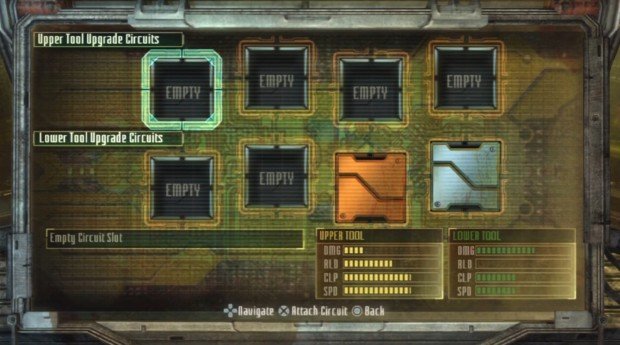
CIRCUITS
The last part of crafting a weapon is to add circuits to it. Different frames will allow you to have a different number of circuits, with the most being 4 for the upper tool and 4 for the lower tool. If a frame only has 2 circuits for example, others can be unlocked by using the Tungsten resource. To add circuits, you will first need to have collected some through the game. These can be found all over the place as well as be given to you as rewards for collecting artifacts, logs, etc.
The circuits let you add modifiers to damage, reload speed, rate of fire, and clip size. Some circuits will add attributes for one feature, while at the same time removing them from another. It’s a balance that you need to settle on, but as you get farther into the game, the circuits will add +2 to almost each of the attributes. Be sure to sell the unneeded circuits to get yourself some extra resources, especially tungsten, that can be used to create other things.
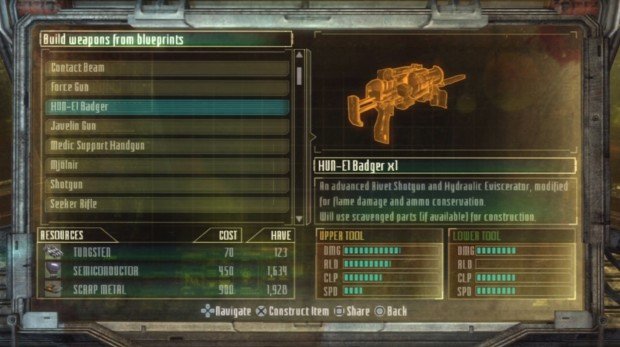
BLUEPRINTS
Now that your weapon is complete, you can choose to create a blueprint of it, so that if you decide to dismantle it later on for parts, you can easily recreate it without having to rebuild it piece by piece. There are also numerous blueprints that can found throughout the game (see our Blueprint Locations Guide) that will allow you to build already prefabricated-and cleverly named- weapons. If you have the blueprint for a weapon, then you don’t need to have the specific weapon parts to create it, you just need to have the resources that are required- as listed on the bottom left of the blueprint screen- available in your stash.
RESOURCES
Throughout the game you will constantly be picking up Transducers, Semiconductors, Scrap Metal, Somatic Gel, and Tungsten. These are all resources that will be needed to create weapon parts and blueprint prefabricated weapons. Using the scavenger bot is a good way to always have resources coming in, as is selling all the unwanted stuff in your inventory.
Ammo packs will give you loads of scrap metal and selling unwanted circuits will give you plenty of resources ranging from just scrap metal and semiconductors, to tungsten for the more valuable circuits. Keep an eye on the circuits you have and don’t use anymore as they will start to pile up rather quickly. The resources that they are turned into can often be more valuable than the circuit itself, depending on how much crafting you do.
CRAFTY WEAPONS
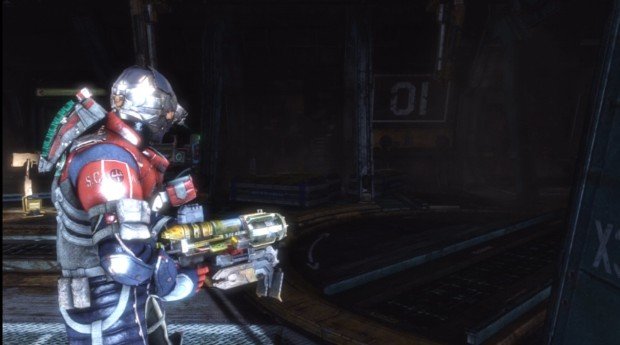
Here are some examples of crafted weapons that lay the smack down on the necromorphs something fierce:
S.C.A.F. CHAIN GUN with HYDRAULIC EVISCERATOR
FRAME: Heavy S.C.A.F. Frame
UPPER TOOL: Telemetry Spike
UPPER TIP: Diffraction Torus
LOWER TOOL: Hydraulic Engine
LOWER TIP: Default
ATTACHMENT ONE: Damage Support
ATTACHMENT TWO: Acid Bath
HEAVY STANDARD ROCKET LAUNCHER with RIVET SHOTGUN
FRAME: Heavy Standard Frame
UPPER TOOL: Survey Charge
UPPER TIP: Directed Suspension Field
LOWER TOOL: Telemetry Spike
LOWER TIP: Conic Dispersal
ATTACHMENT ONE: Safety Guard
ATTACHMENT TWO: Stasis Coating
HEAVY ELITE BULLPUP RIFLE with CHAIN LIGHTNING GUN
FRAME: Heavy Elite Frame
UPPER TOOL: Military Engine
UPPER TIP: Rail Accelerator
LOWER TOOL: Tesla Core
LOWER TIP: Diffraction Torus
ATTACHMENT ONE: Ammo Sweeper
ATTACHMENT TWO: Stasis Coating
RELATED GUIDES
- Dead Space 3 Artifact Locations Guide
- Dead Space 3 Text Log Locations Guide
- Dead Space 3 Blueprint Locations Guide
- Dead Space 3 Peng Location Guide
Be sure to check out our Dead Space 3 Review if you haven't already.
Sign up to the GamesRadar+ Newsletter
Weekly digests, tales from the communities you love, and more
Jeff McAllister is a freelance journalist who has contributed to GamesRadar+ over the years. You'll typically find his byline associated with deep-dive guides that are designed to help you scoop up collectibles and find hidden treasures in some of the biggest action and RPG games out there. Be sure to give Jeff a thanks in the comments while you're completing all of those tricky Achievements and Trophies.
