Donkey Kong Country: Tropical Freeze KONG Letter and Puzzle Piece locations guide
Track down all the collectibles with our complete guide
Weekly digests, tales from the communities you love, and more
You are now subscribed
Your newsletter sign-up was successful
Want to add more newsletters?
Join the club
Get full access to premium articles, exclusive features and a growing list of member rewards.
Autumn Heights
- 2-1: Windmill Hills
- 2-2: Mountain Mania
- 2-3: Horn Top Hop
- 2-4: Sawmill Thrill
- 2-A: Crumble Cavern
- 2-B: Rodent Ruckus
- 2-5: Alpine Incline
- 2-6: Wing Ding
- 2-K: Bopopolis
2-1: Windmill Hills
Puzzle Piece #1
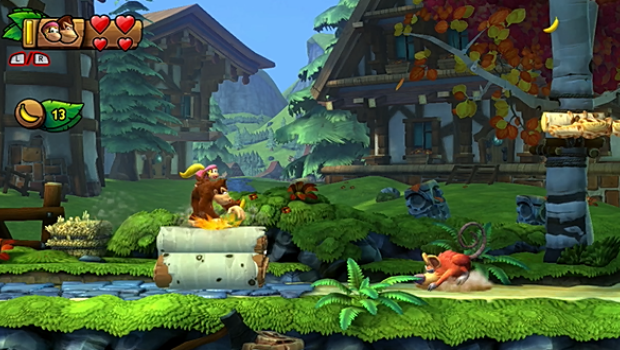
At the start of the level is a pile of logs--slam them to reveal a ring. Yank it out to pull up a barrel. Head left, then chuck this at the target to open a bonus room. Collect the bananas before time runs out for your first puzzle piece.
Letter K

Near the start of the level, you'll see this atop an owl between two windmills. Time your jump off his head to nab it.
Puzzle Piece #2
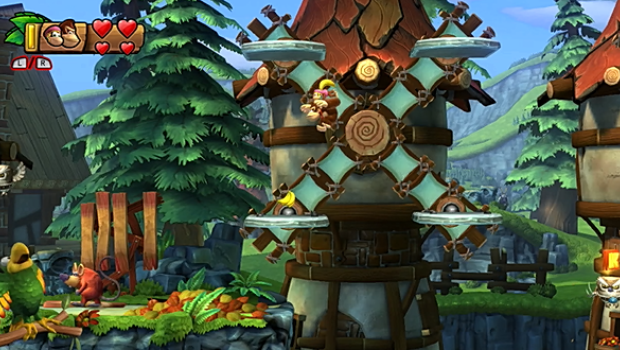
The pair of windmills also holds some bunches of bananas. Collect them all to earn a second puzzle piece.
Puzzle Piece #3
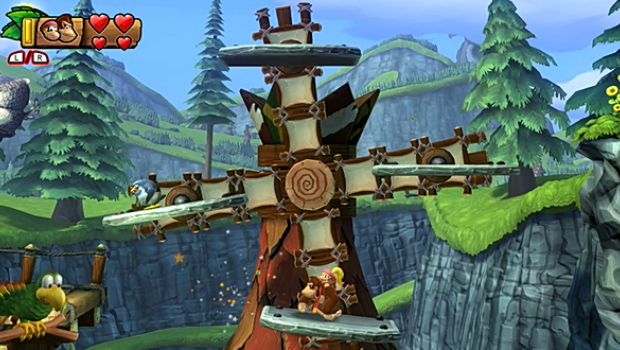
You'll next come to a windmill with some penguins aboard. Take them out to earn another puzzle piece.
Puzzle Piece #4
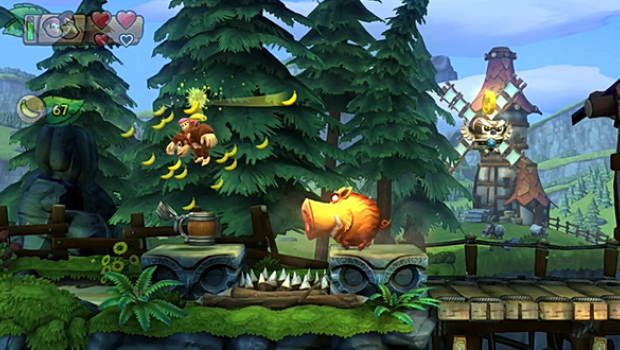
Just past the checkpoint, you can slam this stein to spawn some bananas. Collect them before they disappear to earn a puzzle piece.
Puzzle Piece #5

Past the next checkpoint is a hanging bag. Bounce from the fire-spitting pig to the Diddy barrel above, then chuck it at the bag to reveal a puzzle piece.
Puzzle Piece #6
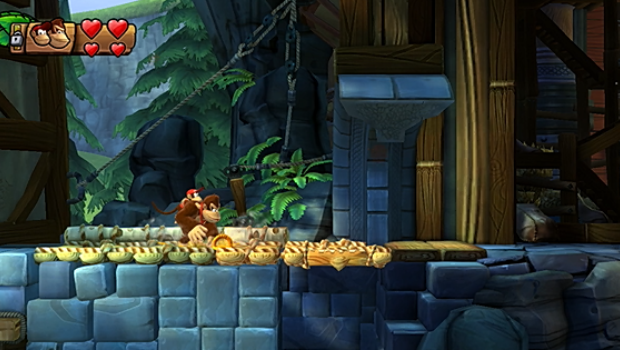
Just ahead is a pile of leaves. Roll through them to reveal a ring--pull it up to reveal a hidden tunnel below. Slam through the trap door to enter and grab the puzzle piece down here.
Weekly digests, tales from the communities you love, and more
Letter O
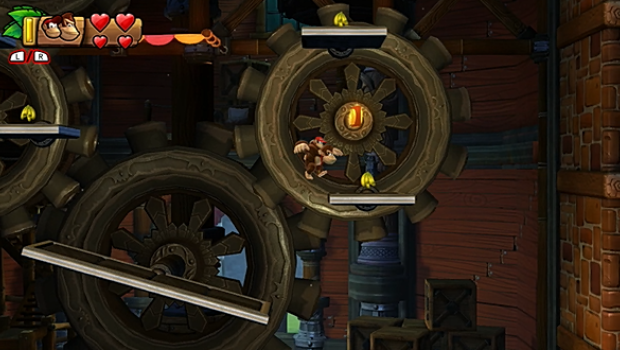
You'll find this inside the windmill beyond. Simply jump the right-side cog platforms to reach it.
Puzzle Piece #7

In the same area, head to the upper left corner to find a bonus room. Collect the bananas in here before time expires to earn another puzzle piece.
Puzzle Piece #8
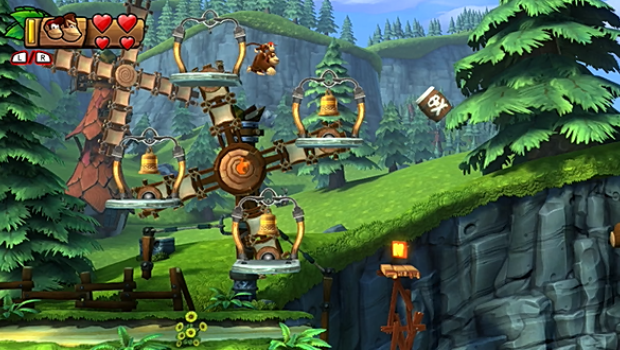
After the gondola ride is a windmill with several bells. Slam them all to spawn a puzzle piece.
Letter N
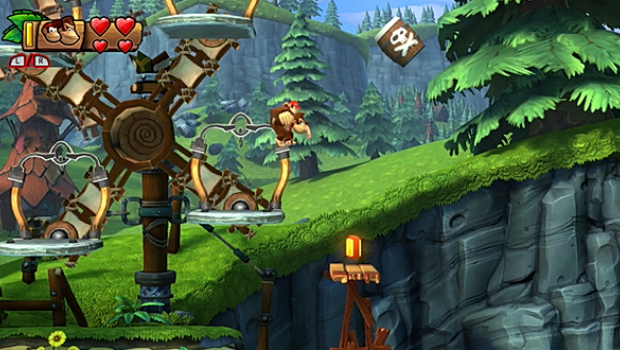
Now leap the KONG letter nearby. Be sure to jump back before the platform collapses!
Letter G
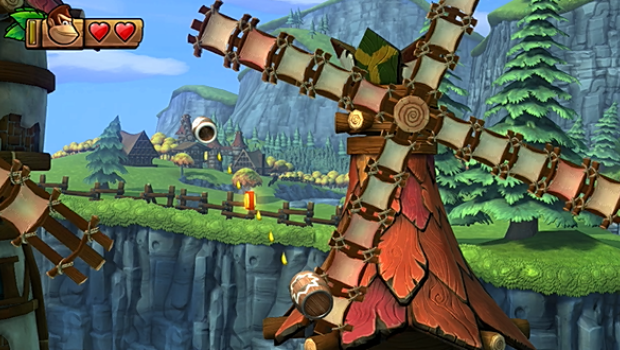
You'll get the last KONG letter by default when you blast through some barrel cannons.
Puzzle Piece #9
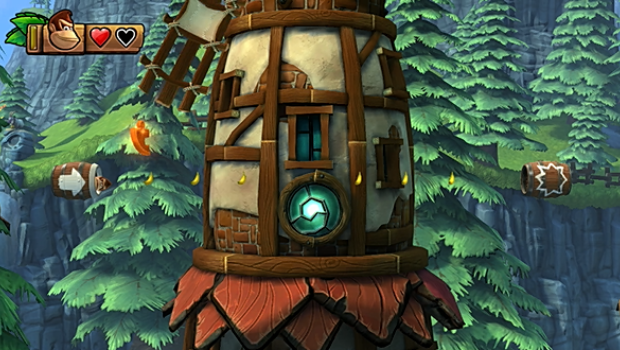
After bouncing around the windmill blades during the barrel cannon section, pause at this pair. When the puzzle piece swings into view, time your shot to grab it out of the air.
2-2: Mountain Mania
Puzzle Piece #1
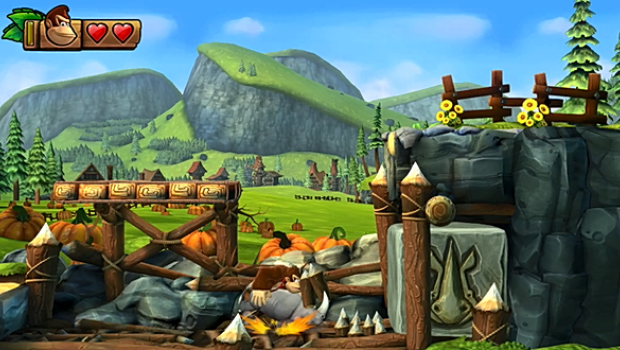
After acquiring Rambi, backtrack to the first section of spikes. Charge across them and bust through the Rambi block here to reveal secret area harboring a puzzle piece.
Letter K
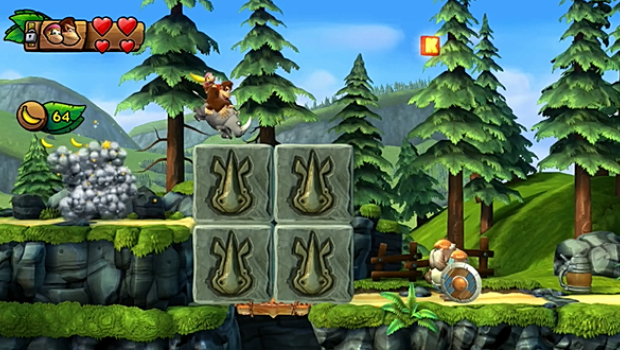
When you reach the stack of Rambi blocks, use the walrus enemy to bounce atop them. From here, you can leap to the first KONG letter.
Puzzle Piece #2
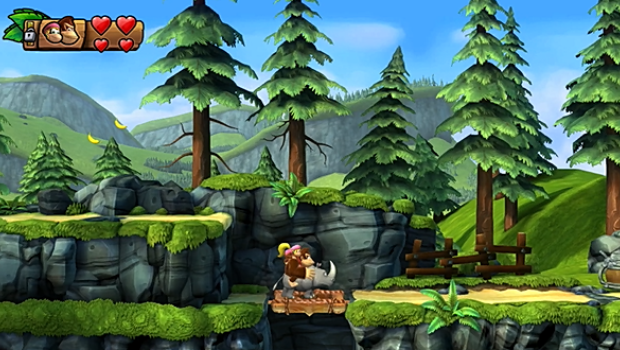
Now bust up the Rambi blocks to reveal a trap door, then slam through to reach a bonus room. Grab the bananas before time expires to earn a puzzle piece.
Puzzle Piece #3
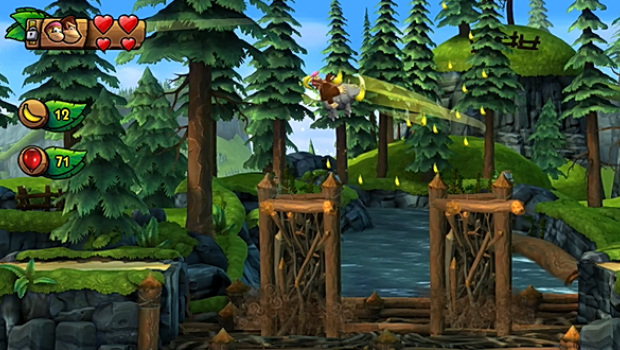
When you spot these twin platforms, jump to them to spawn circles of bananas. Collect them before they disappear to earn another puzzle piece.
Letter O
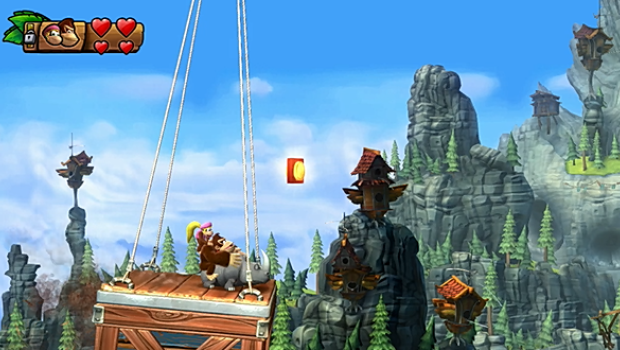
Past the checkpoint is a swinging crate. You can grab the KONG letter while riding it.
Puzzle Piece #4
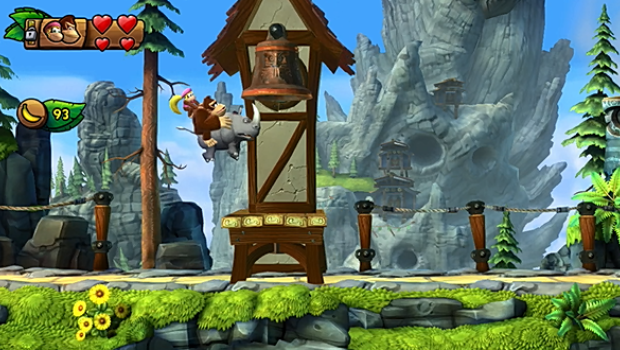
In the next section are several dangling bells Rambi can destroy. One contains a puzzle piece.
Puzzle Piece #5
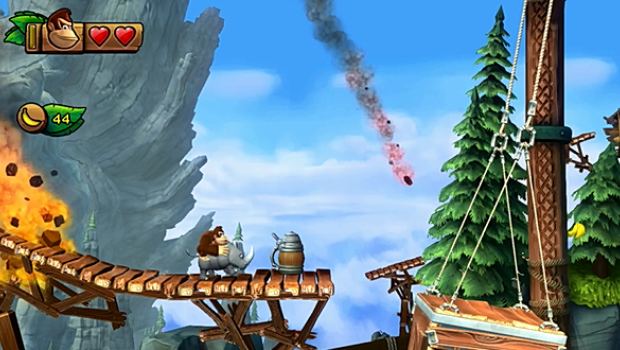
During the segment with the collapsing bridges, quickly slam this stein to reveal a puzzle piece.
Letter N

You can leap to this while charging across the collapsing bridges. Bounce to it via the walrus enemies.
Puzzle Piece #6
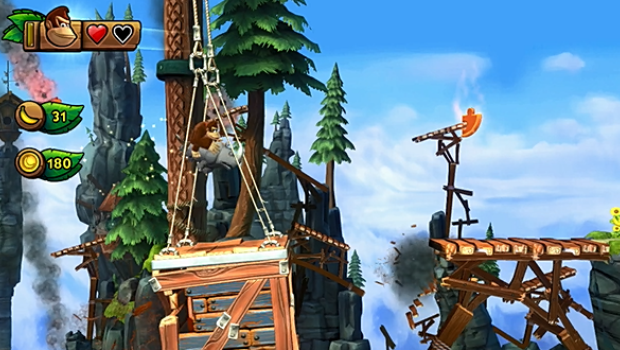
Near the end of the bridges is a blue flame. Grab the banana bunch, single bananas, and banana medals around him to spawn a puzzle piece.
Puzzle Piece #7
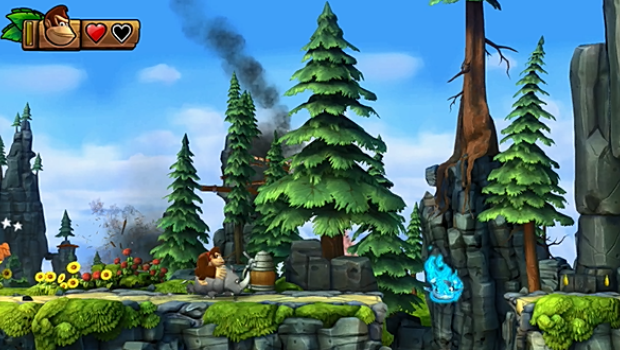
Immediately past the bridges is another stein. Slam it for another puzzle piece.
Letter G

During the mountain collapse section, look for this last KONG letter in a tunnel. Bounce off the rat enemy to reach it.
2-3: Horn Top Hop
Puzzle Piece #1
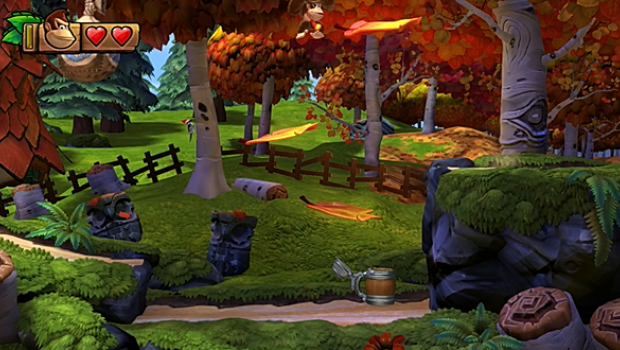
There's a hanging bag at the start of the level. You can use the nearby helmeted penguin to get it. Alternatively, leap up the falling leaves to find a ring--yank it up to acquire a barrel. Toss this at the bag to spawn a puzzle piece.
Letter K

Use the air from the giant horn to grab this KONG letter and proceed further in the level.
Puzzle Piece #2
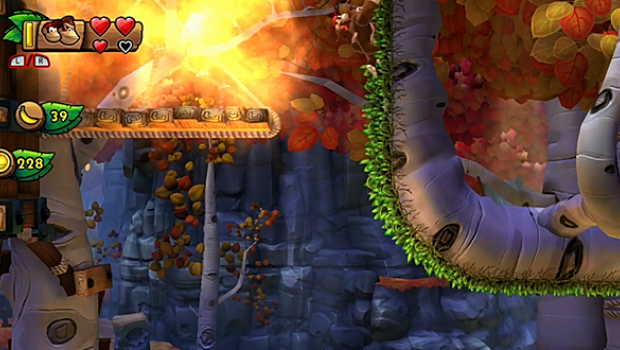
Take out the fire-snorting pig and grab onto the hanging grass. Climb to the left to find a hidden ledge where a puzzle piece hides.
Letter O
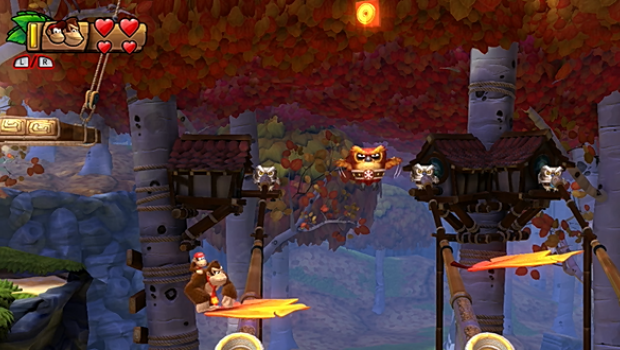
You have to bounce off the fire owl to reach this one. Time your jump just right to dodge his flames and grab your prize.
Puzzle Piece #3

Near the end of the same area, look for this lower boardwalk. Jump there to enter a bonus room. Collect the bananas inside before time runs out to earn a puzzle piece.
Letter N
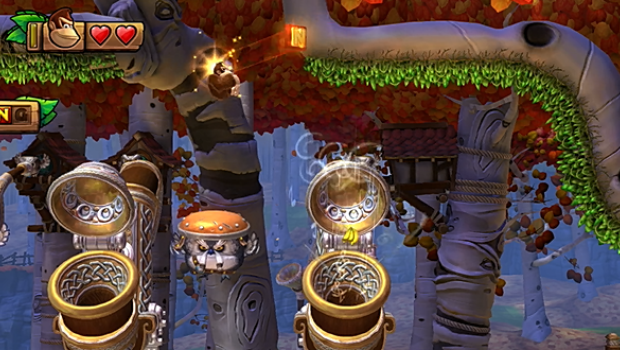
You'll spot this one soon after the next checkpoint. Simply bounce off the shielded owl to get it.
Puzzle Piece #4

After the following checkpoint is a pile of leaves--roll through to reveal a windy crack. A helmeted penguin and a puzzle piece will pop through alternately. Time a roll to grab the piece when it emerges.
Letter G
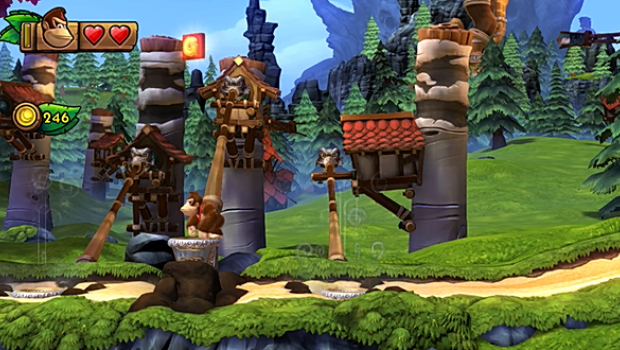
The final letter appears just beyond. You'll have to ride the wind up, then bounce off of the penguin that emerges to reach it.
Puzzle Piece #5
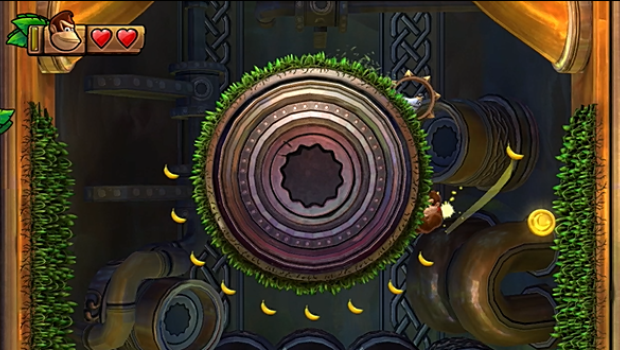
Inside the final wind chamber is a circle of hanging grass. Grab on, then collect the bananas around the perimeter to spawn a final puzzle piece.
2-4: Sawmill Thrill
Puzzle Piece #1

Start the level by heading left. Move into the hollow tree here to reveal some hanging grass. Climb up to reach a hidden puzzle piece.
Letter K
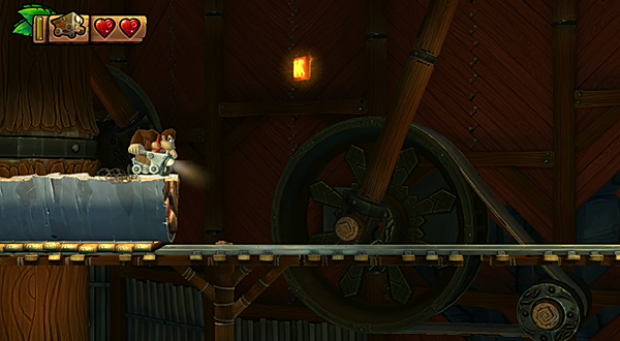
When you enter the saw mill proper, jump from the first split log to reach this KONG letter.
Puzzle Piece #2

Just after the first log, you can duck under a second one. Do so to grab the puzzle piece inside.
Letter O
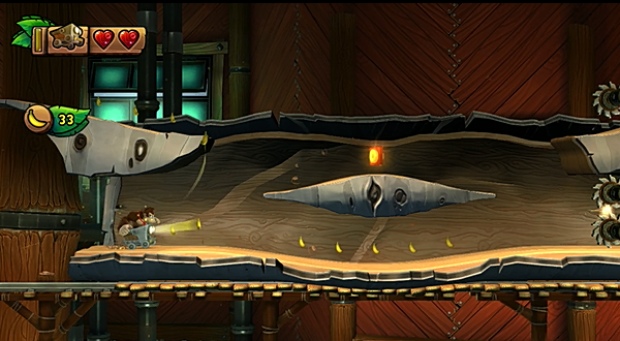
When you move through this giant hollow log, jump the middle platform to grab the KONG letter.
Letter N

Jumping during the water section causes you to dive for a moment. Time this to actually dive under the second owl and grab the submerged KONG letter.
Puzzle Piece #3
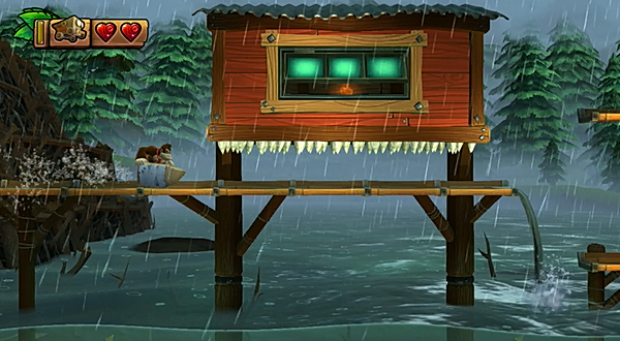
When you spot this shack above the track, leap up to enter it. There's a puzzle piece inside.
Puzzle Piece #4

Just before leaving the water, use a jump to sink under the owl and enter a bonus room. Collect the bananas here before time expires to earn another puzzle piece.
Puzzle Piece #5
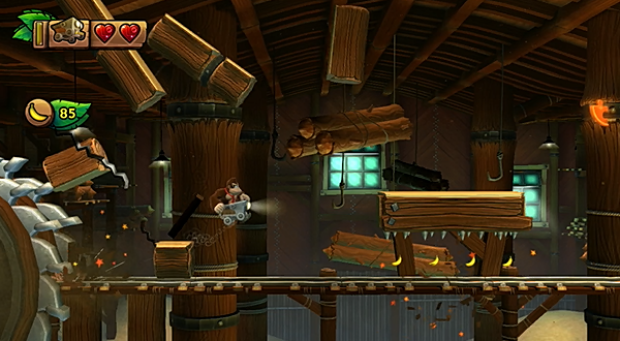
This one's a bit tricky. While running from the giant saw blade, you have to leap across the platforms it creates to reach this.
Letter G

At the end of the giant saw blade section, you'll be leaping across some loosely flying tracks. Jump from the last one at the last moment to grab this final KONG letter.
2-A: Crumble Cavern
To access this level, you must find the secret exit in 2-4: Sawmill Thrill. When riding down the large hill at the level's climax, do not jump. Instead, let yourself roll off onto an owl's head. Bounce from here to a lower track that leads to the secret exit.
Puzzle Piece #1
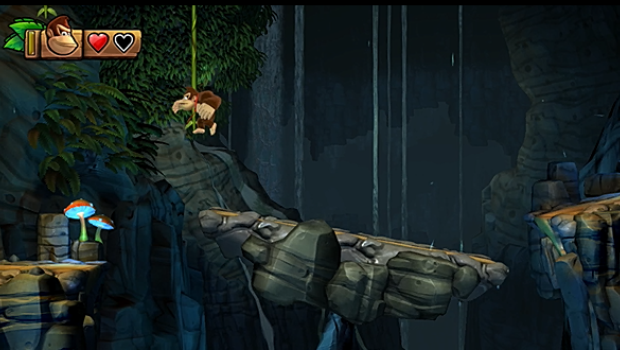
When you reach this tilting rock, jump back to the vine on the left. Swing across and use the owl's head to bounce to a ledge holding the puzzle piece.
Letter K
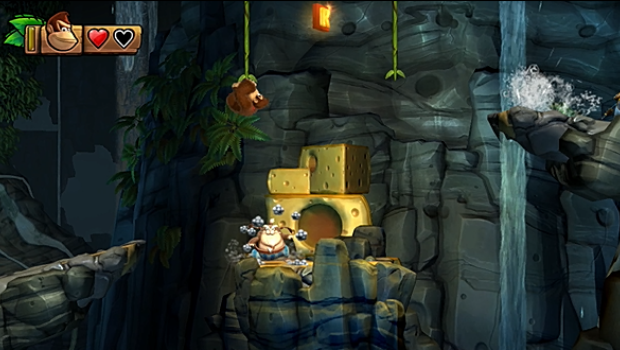
When you see the KONG letter above, use the enemy to bounce to the vines overhead. Now you can reach your prize.
Puzzle Piece #2

There's a cannon barrel under the right lip of the next platform. Drop to it to be sent to a bonus room. Collect the bananas within the time limit to earn a puzzle piece.
Puzzle Piece #3
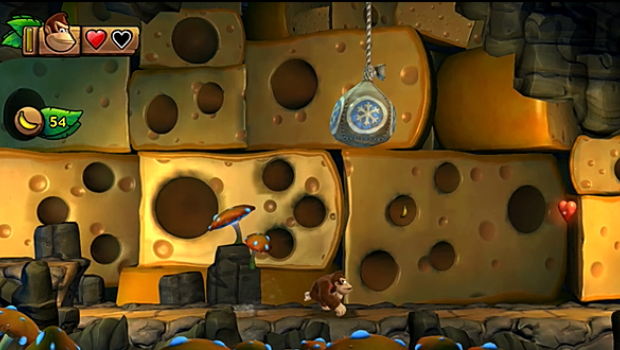
Just ahead is a hanging bag. Stun the helmeted penguin you just passed, then toss him into the bag to free a puzzle piece.
Puzzle Piece #4
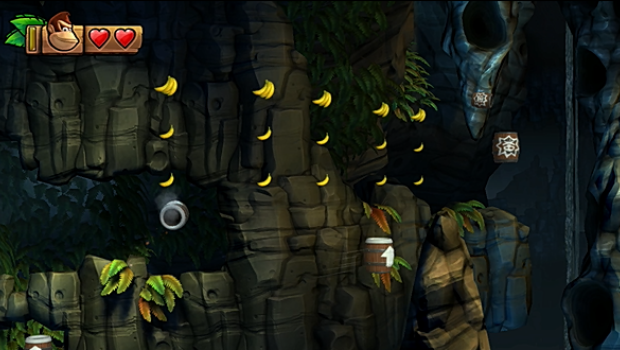
When you reach this moving cannon barrel, time your shots to grab all the bananas. This spawns a puzzle piece.
Letter O
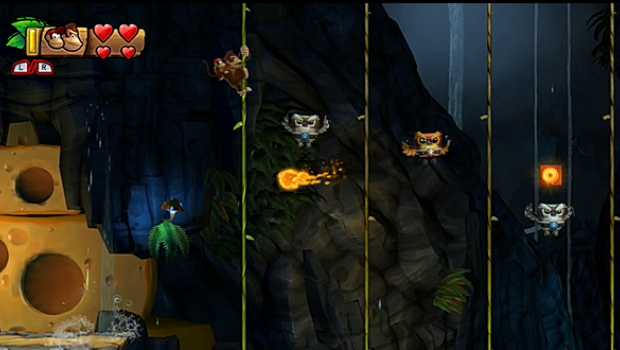
Past the checkpoint is a set of sturdy and rotting vines. Swing across them, and bounce off the owl to grab the KONG letter he's carrying.
Puzzle Piece #5
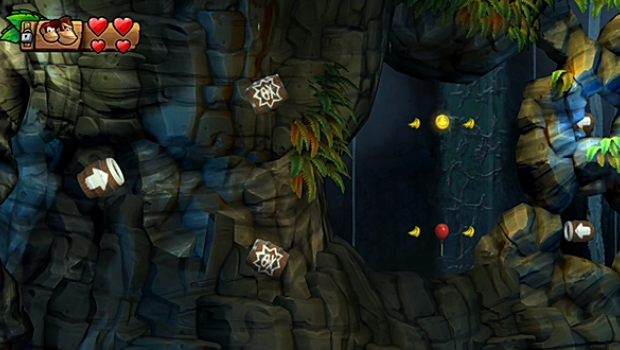
When the path splits via cannon barrels, take the upper path. When you reach the first barrel that moves left to right, time a shot to the high, left barrel. This takes you to a bonus room. Collect the bananas there before time runs out to earn another puzzle piece.
Puzzle Piece #6

After the next checkpoint you'll encounter some fire owls. Jump back to the left above the first one to spot a puzzle piece in the air. Leap from the vine to grab it
Puzzle Piece #7
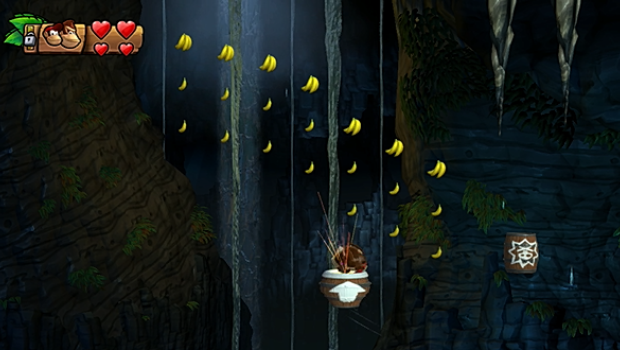
Immediately after, you'll reach another set of bananas above a moving cannon barrel. Just like before, grab them all to earn a puzzle piece.
Letter N
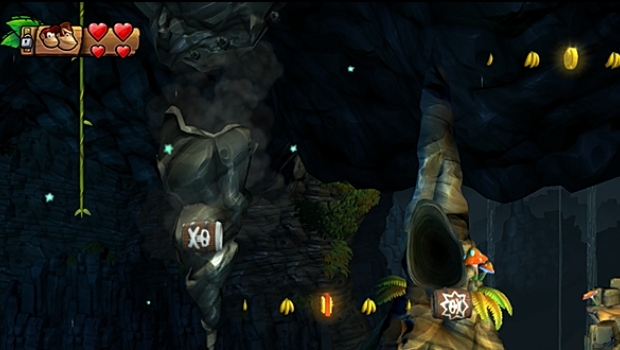
When inside the first barrel cannon that falls with the stalactite, fire at the last moment to grab the KONG letter out of the air.
Letter G
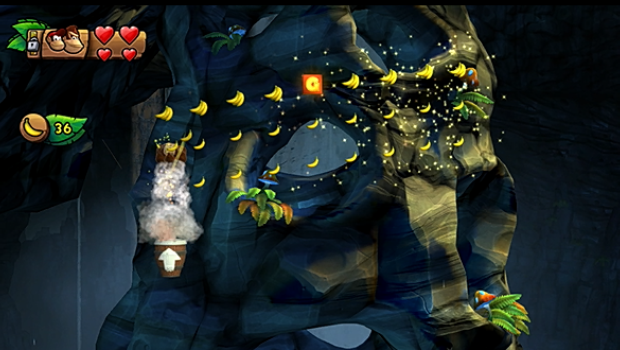
During the level's climax, you'll ride a barrel cannon as it spirals upwards. Time a shot to grab this KONG letter during the first pass.
2-B: Rodent Ruckus
To access this level, you need to complete the previous secret level 2-A: Crumble Cavern.
Puzzle Piece #1
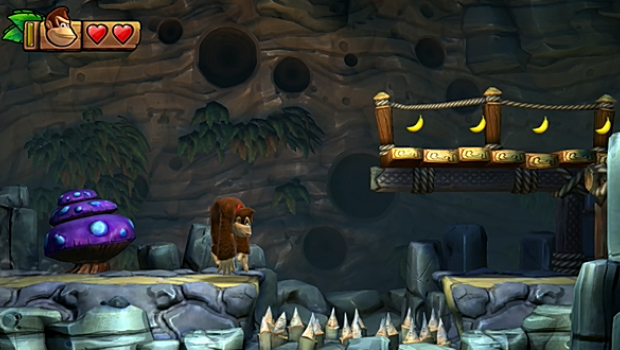
At the beginning of the level, use a short jump to reach the ledge under the walkway. This leads to a bonus room. Grab the bananas inside before time expires for a puzzle piece.
Letter K
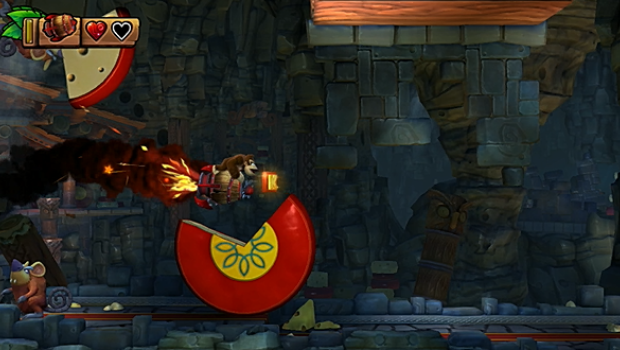
The first KONG letter appears by a cheese wheel. Time your descent to grab it from below.
Puzzle Piece #2
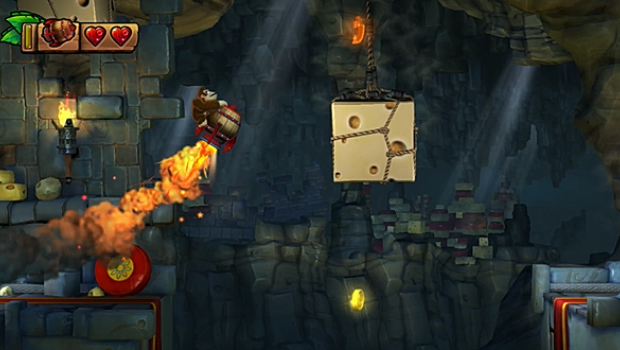
Soon after, some cheese blocks will descend on ropes. A puzzle piece trails behind a smaller one--fly up to grab it.
Letter O
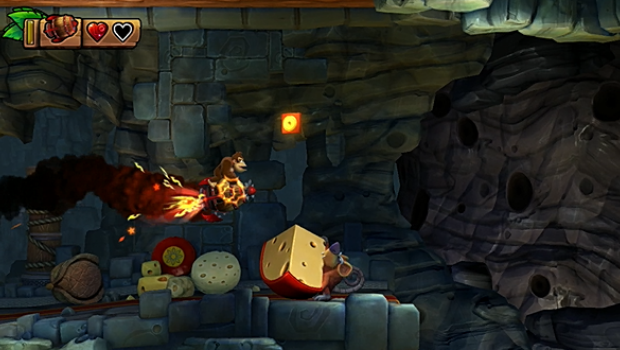
The next letter appears shortly after. Fly up to it after the rodents toss the block of cheese across your path.
Puzzle Piece #3
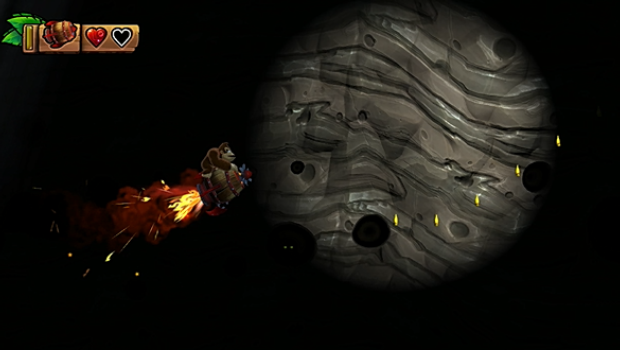
There's a trail of bananas when you start the dark area with spotlights. Grab them all to spawn a puzzle piece.
Letter N
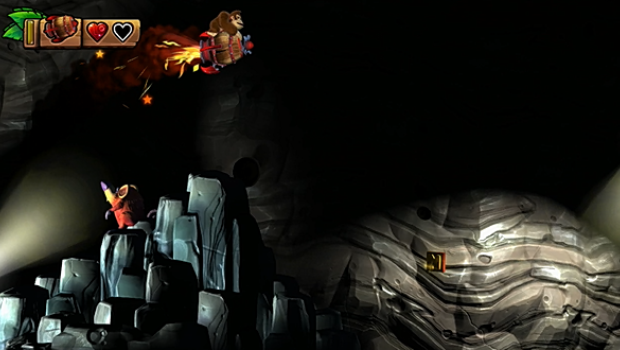
You'll catch a glimpse of this during the spotlight segment. After the light passes, you'll have to drop into the darkness to grab it.
Puzzle Piece #4
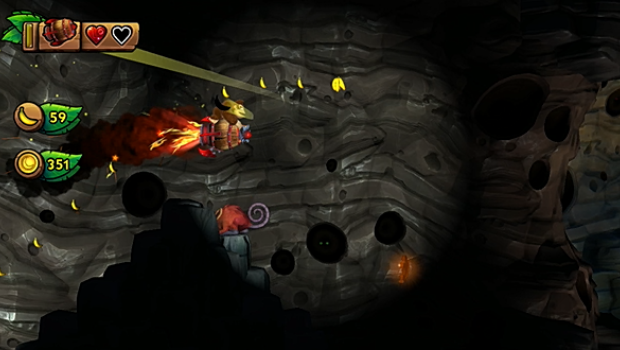
This one also appears briefly in the light. Dip into the darkness again to grab it.
Letter G
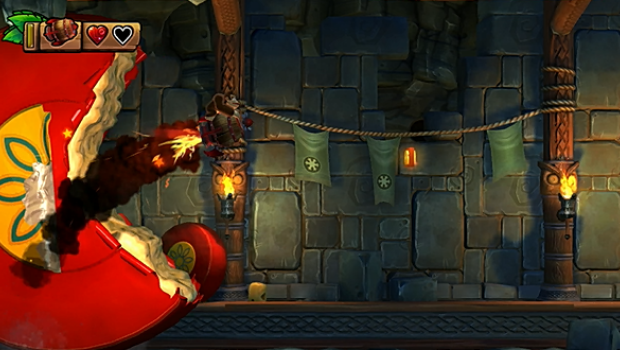
This one's tough--you have to grab it while the giant cheese wheel passes over you. Stay in the crevice to safely get it.
Puzzle Piece #5
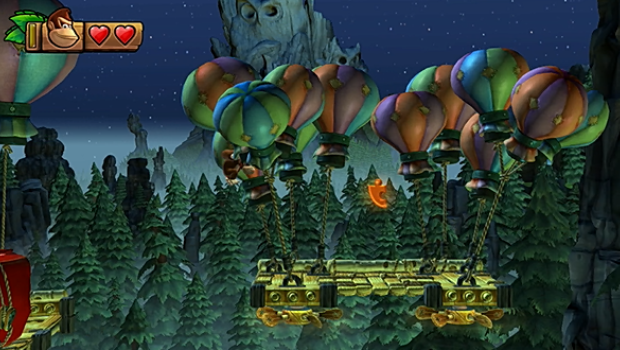
Before leaving the level, leap from the balloons to the right. There's a smaller platform over here that holds another puzzle piece.
2-5: Alpine Incline
Letter K
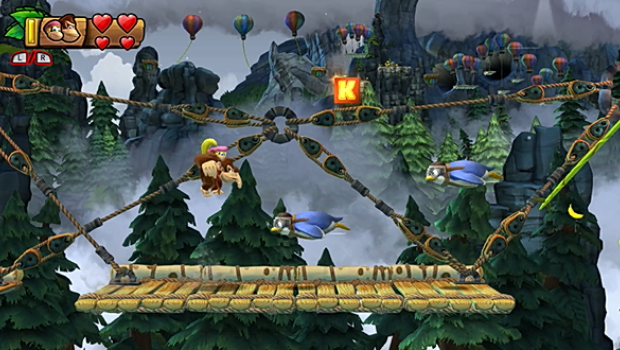
The first KONG letter appears shortly into the rope bridge. Bounce up the enemies or use Dixie's twirl to reach it.
Puzzle Piece #1
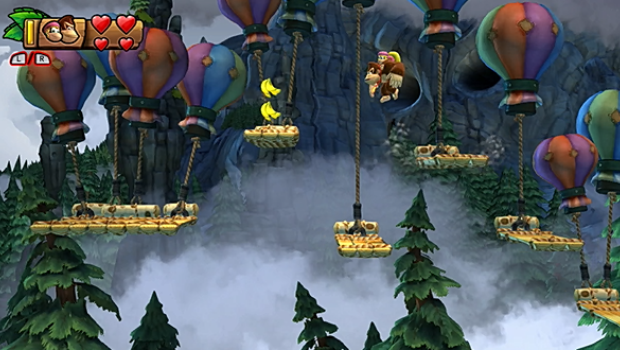
As you climb the balloon platforms past the checkpoint, collect each bunch of bananas that spawns. This generates a puzzle piece.
Puzzle Piece #2
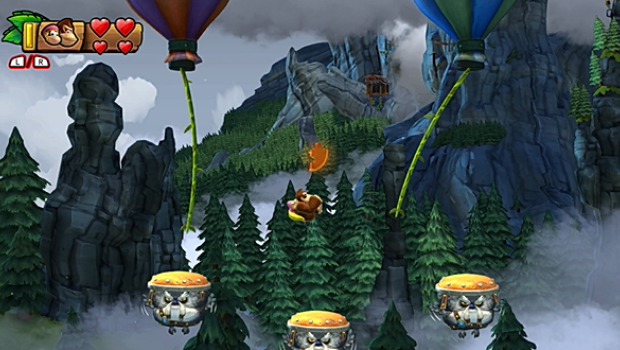
Soon after, you'll reach a trio of shielded owls. Bounce atop them to collect the three banana medals and earn a puzzle piece.
Letter O
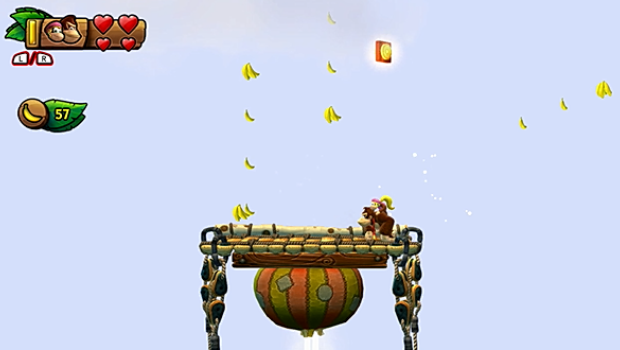
This appears when riding the balloon upwards. Simply jump to it before hopping into the nearby barrel cannon.
Puzzle Piece #3
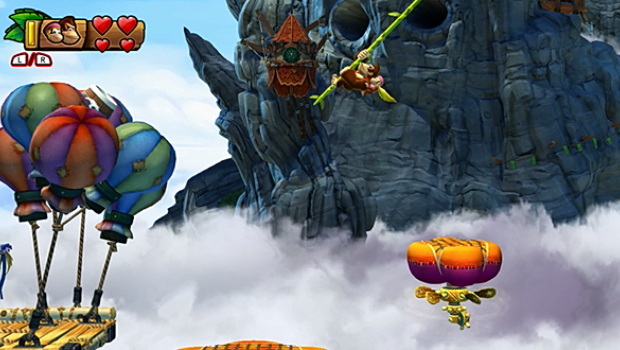
There's a well-hidden barrel in the balloons above the next checkpoint. Leap from the nearby vine and use Dixie's twirl to reach it, and you'll discover a bonus room. Collect the bananas here before time runs out to earn a puzzle piece.
Puzzle Piece #4
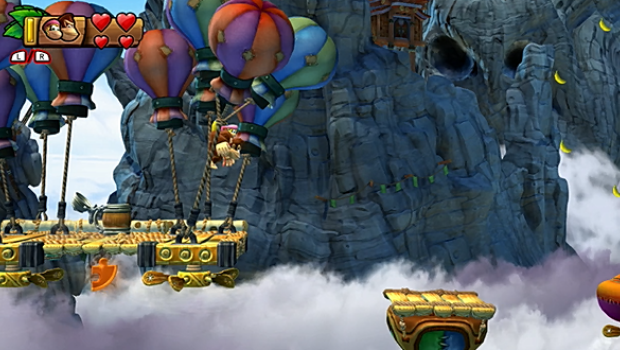
Soon after, you'll see the next puzzle piece under a platform. To get it, jump to the next moving platform--it will sink under your weight. Duck under the propellers to safely grab the piece.
Letter N
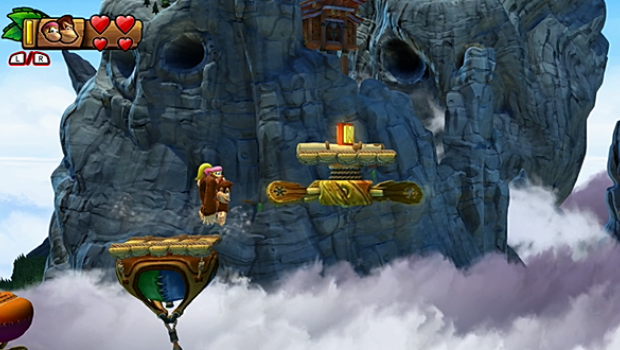
This appears atop another platform soon after. Use Dixie's twirl to reach it.
Letter G

The fourth KONG letter can be found during the segment with all the moving balloons. You'll have to bounce off of a balloon, then off of a flying penguin to reach it.
Puzzle Piece #5
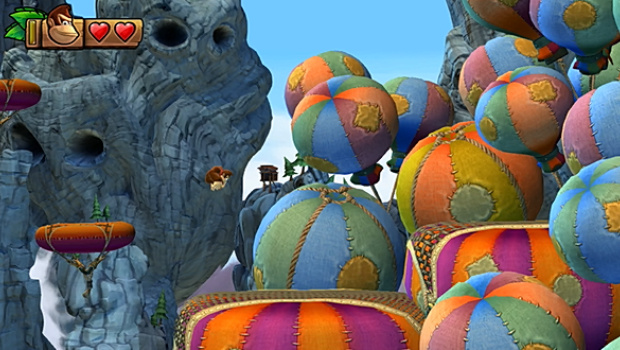
Bounce past the level exit to find another bonus room. Collect the bananas within the time limit once again for a final puzzle piece.
2-6: Wing Ding
Puzzle Piece #1
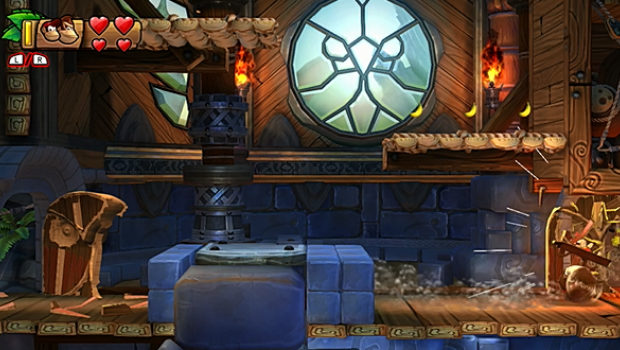
When you enter the first building, bust through the door on the lower level. Slam through the trap door on the other side to reveal a hidden tunnel containing a puzzle piece.
Letter K
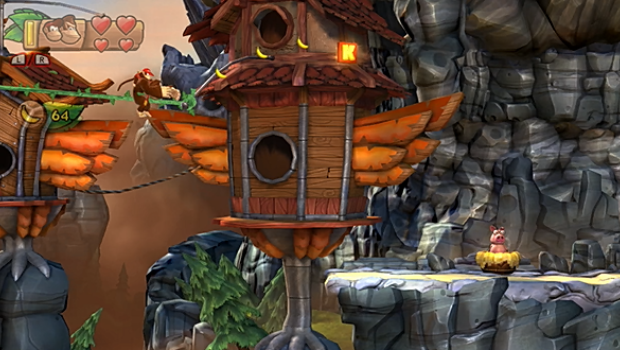
This is found at the end of the first vine section. Leap from the final vine to grab it.
Puzzle Piece #2
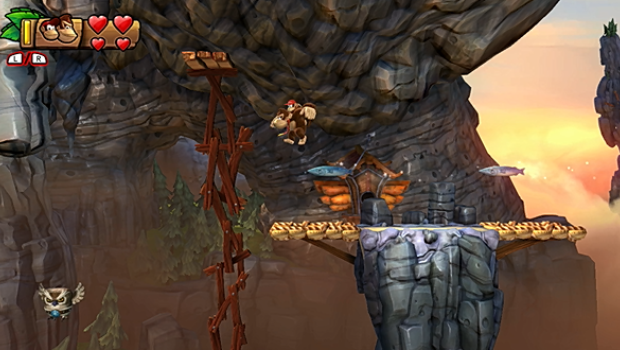
Just after the checkpoint is a fish-firing enemy. Use this ammo to bounce to the rickety platform above. From here, you can jump to a bonus room barrel. Collect all the bananas before time runs out to earn a second puzzle piece.
Letter O
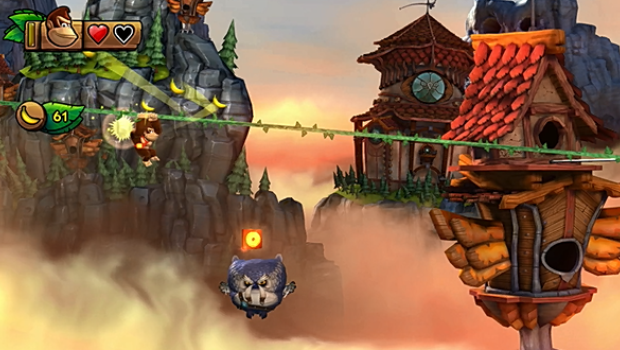
During the second vine section, you'll approach an owl with the KONG letter on its head. Time your release to bounce off him and return safely to the vine.
Puzzle Piece #3
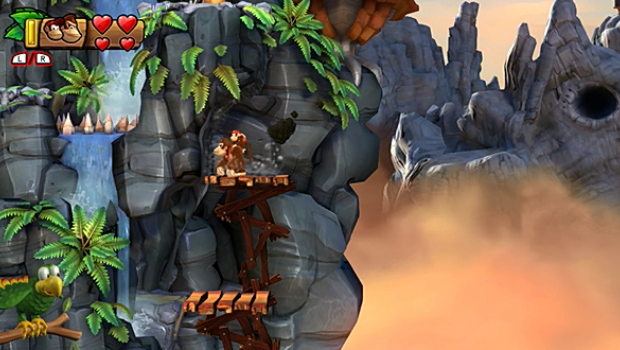
Before hopping to the third vine section, look to the bottom of the screen for a hard-to-spot platform. Drop down there to find a bonus room. Collect the bananas inside before time expires to earn a puzzle piece.
Letter N
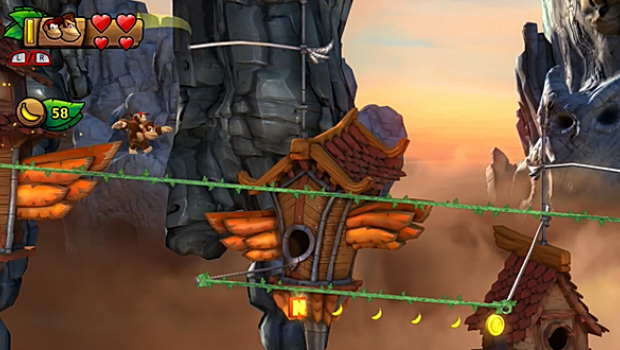
During the third vine section, this appears on a lower vine. Carefully drop down to grab it.
Puzzle Piece #4
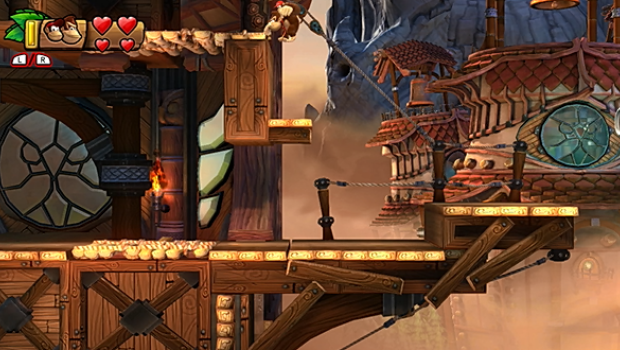
After passing the next checkpoint, move ahead then double back to jump to this ledge. Up here is a barrel cannon that blasts you into a hidden tunnel. Quickly grab the puzzle piece and get back up--the ground here collapses!
Puzzle Piece #5
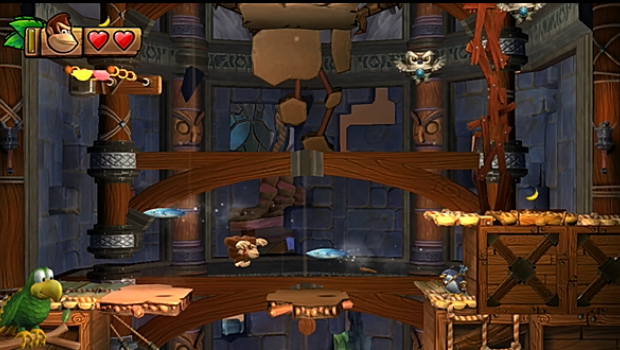
In the final area, the tower starts collapsing. Move to the ledge above the fish-firing penguin to find a trap door. Slam through to find a hidden area where the puzzle piece waits.
Letter G

Make your way to the upper right corner (directly above the trap door) to find the last KONG letter above a rickety platform.
2-K: Bopopolis
This level unlocks once you've collected every KONG letter in Autumn Heights.
Puzzle Piece #1
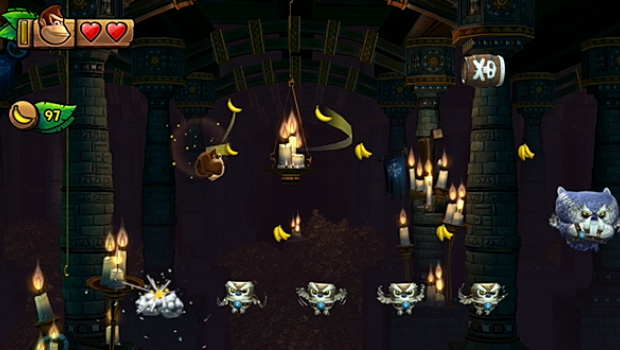
Near the level start is a cluster of owls and bananas. Collect all the fruit to spawn a puzzle piece.
Puzzle Piece #2
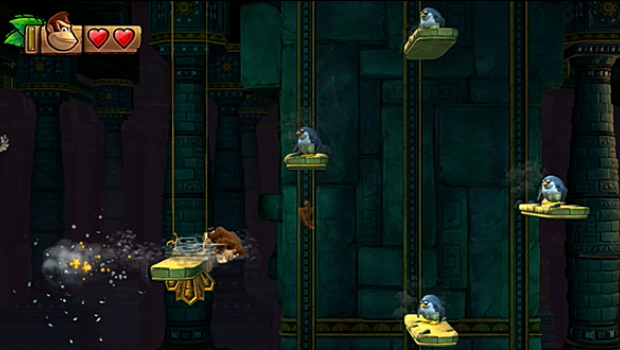
The next puzzle piece is very tricky to obtain. You'll have to quickly roll of the edge to grab it before it vanishes, then use your jump to bounce to safety. Alternatively, you can spend a life just leaping into the pit for it.
Puzzle Piece #3
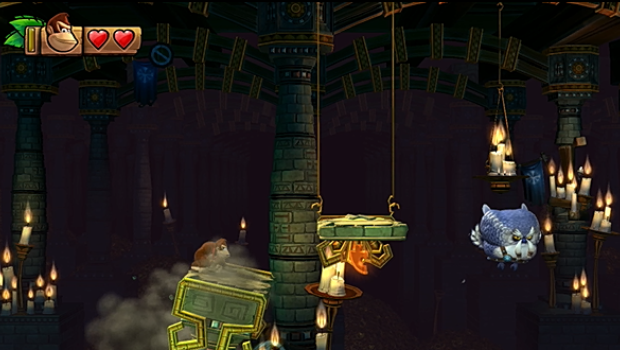
When you land on this pillar near the big owl, pause a moment. To get the puzzle piece under the next platform, you must roll forward and jump as the pillar you're standing one collapses forward. Alternatively, you can sacrifice another life for it.
Puzzle Piece #4
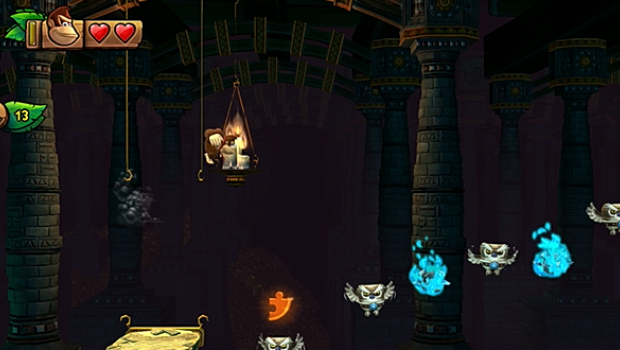
When you reach this trail of flames and owls, wait just a second longer to jump. An owl will rise from below carrying the next puzzle piece.
Puzzle Piece #5

When you reach this barrel cannon by the spinning wheel, quickly launch yourself upwards and get ready--the puzzle piece will appear very quickly, and only once. Drop down when it appears and use your bounces to get back to safety.
Jump to Section:
Current page: Donkey Kong Country: Tropical Freeze - Autumn Heights
Prev Page Donkey Kong Country: Tropical Freeze - Lost Mangroves Next Page Donkey Kong Country: Tropical Freeze - Bright Savannah
Tony lives in Maryland, where he writes about those good old-fashioned video games for GamesRadar+. His words have also appeared on GameSpot and G4, but he currently works for Framework Video, and runs Dungeons and Dragons streams.
 Join The Community


