How to solve the Hellblade 2 bridge puzzle with three runes
To pass through the ruined settlement in Hellblade 2, you need to solve the bridge puzzle involving three runes
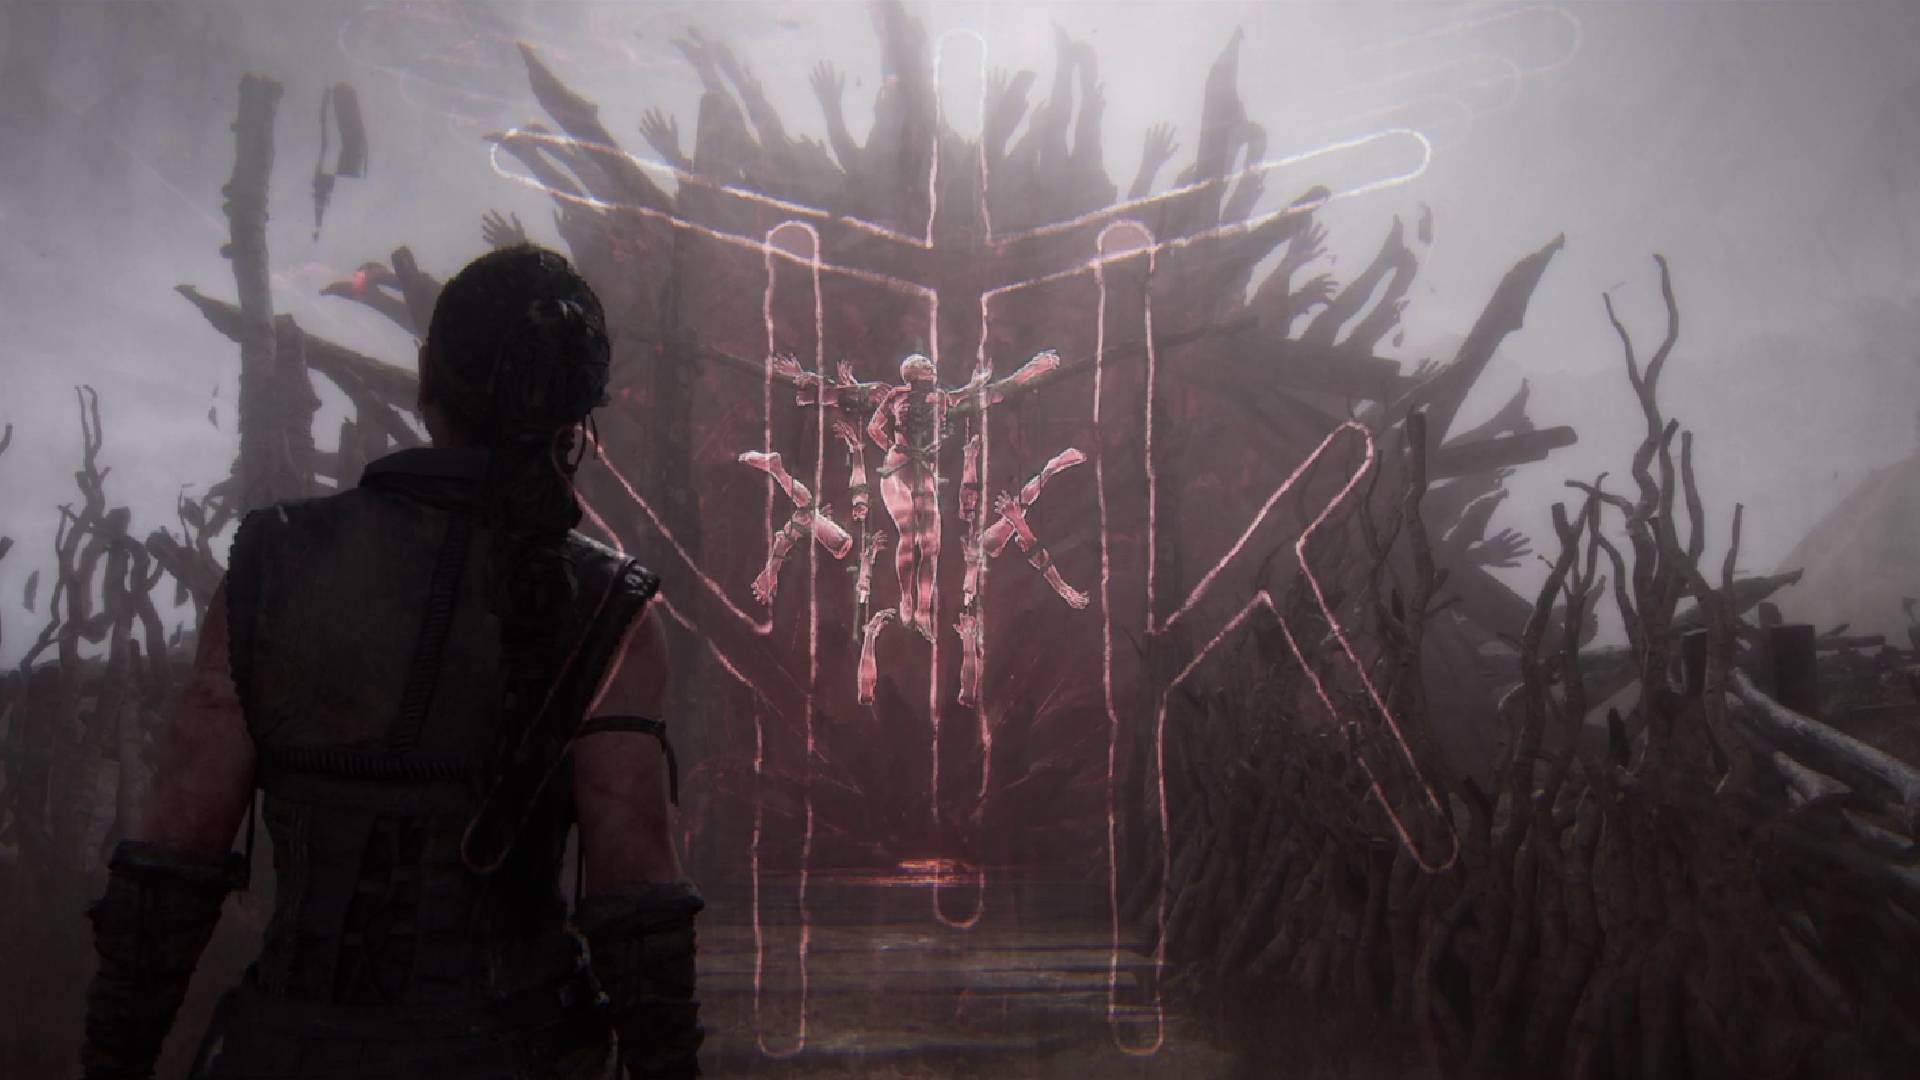
The Hellblade 2 bridge rune puzzle is another perspective-matching puzzle, but you need to find three separate runes around the ruined settlement. You'll come across this puzzle in the game's second chapter, having just left the slaver to investigate a village wrecked by Draugar. This bridge puzzle is one of the easier puzzles in Hellblade 2 but can be a bit confusing since some of the required runes are found through huts that don't look like they can be explored at first glance. To help you complete it quickly, I've laid out all the steps and rune locations for this Hellblade 2 bridge rune puzzle below.
Hellblade 2 bridge puzzle rune locations
When you approach the bridge in the ruined settlement, you'll see a grisly crucifix with body parts strung up around it and a barrier will form to block the bridge. Focus on the crucifix by holding RT or LT and three runes will be revealed that are needed to solve the puzzle and remove the barrier. As with the first Hellblade 2 rune puzzle, you need to find objects around the village to recreate the shape of these individual runes with perspective tricks, then Focus on them.
Hellblade 2 bridge rune 1
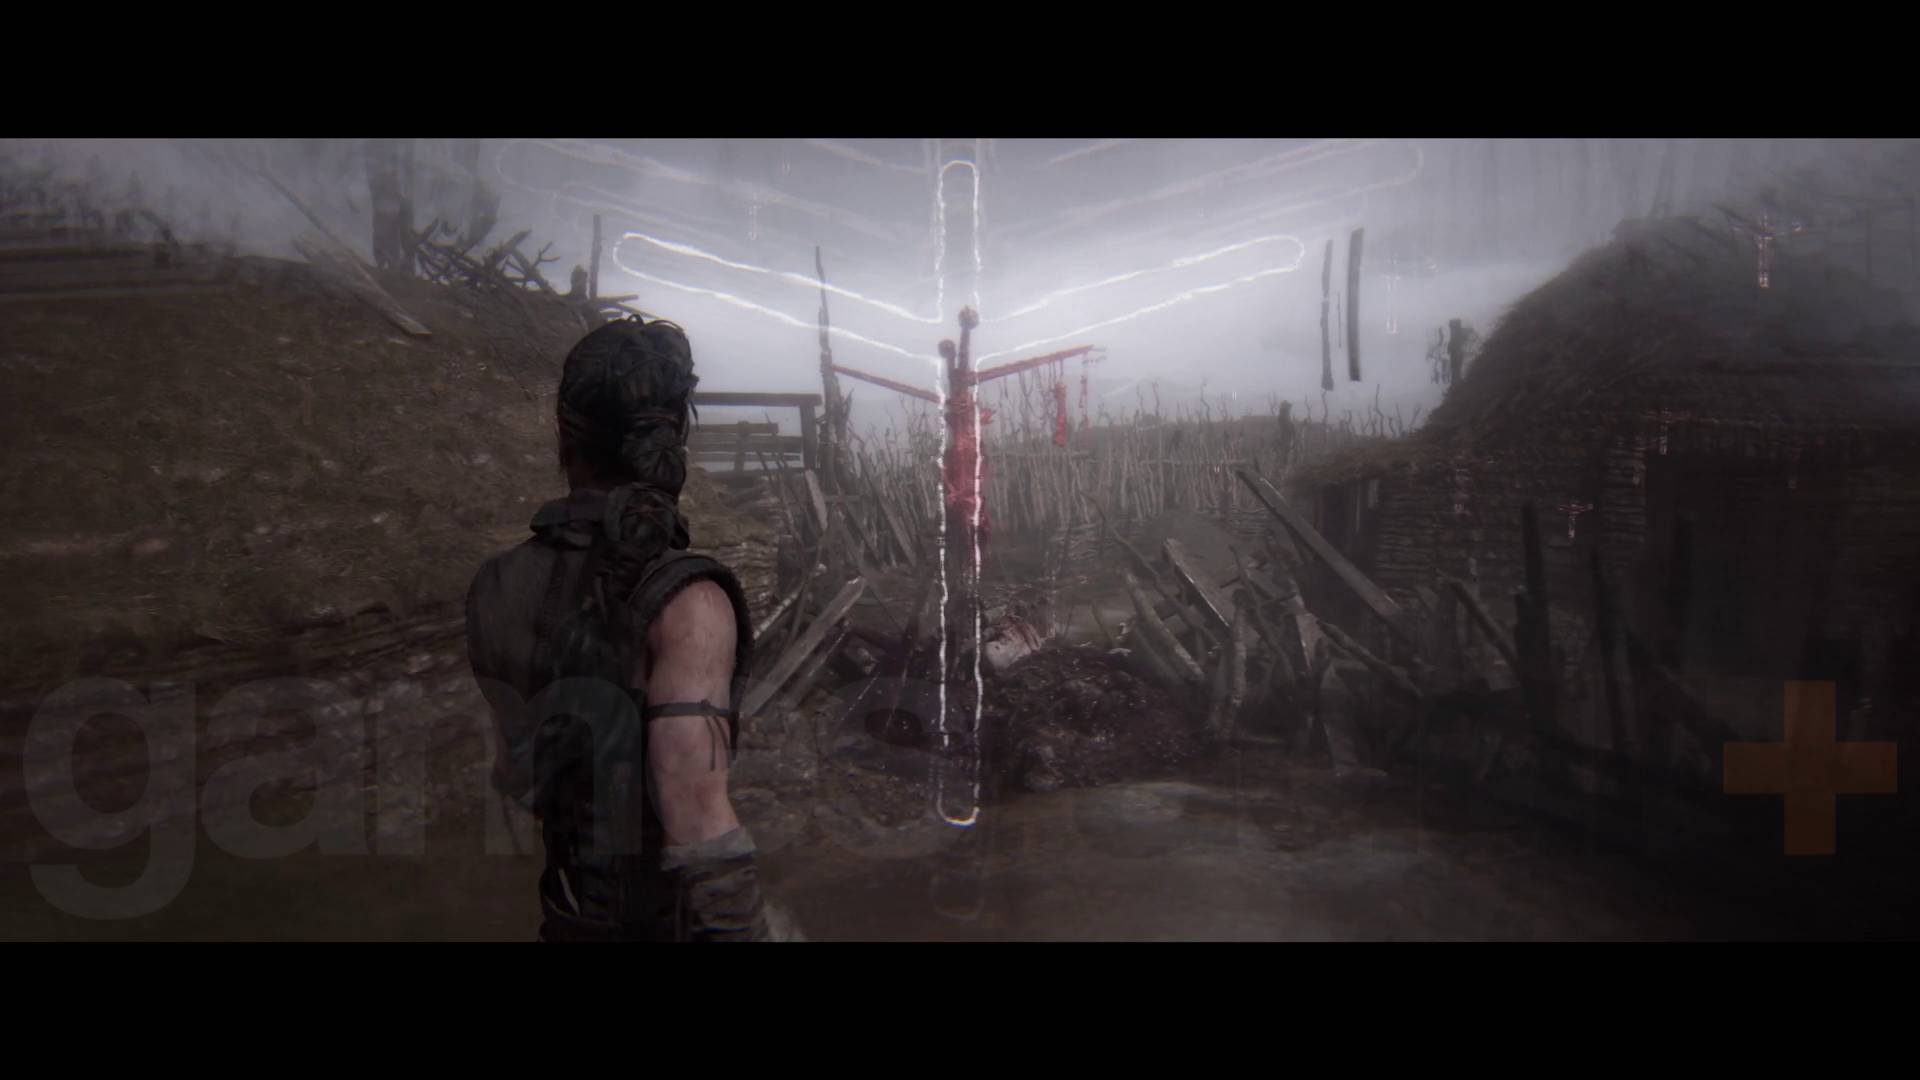
The first rune for the bridge is nice and easy:
- From the bridge rune, turn around and walk back the way you came through the village along the main path.
- You'll spot a red pole covered in gore with a branch sticking out one side and a different branch further back that matches the opposite side. Line these up as in the image above then Focus to unlock the rune.
Hellblade 2 bridge rune 2
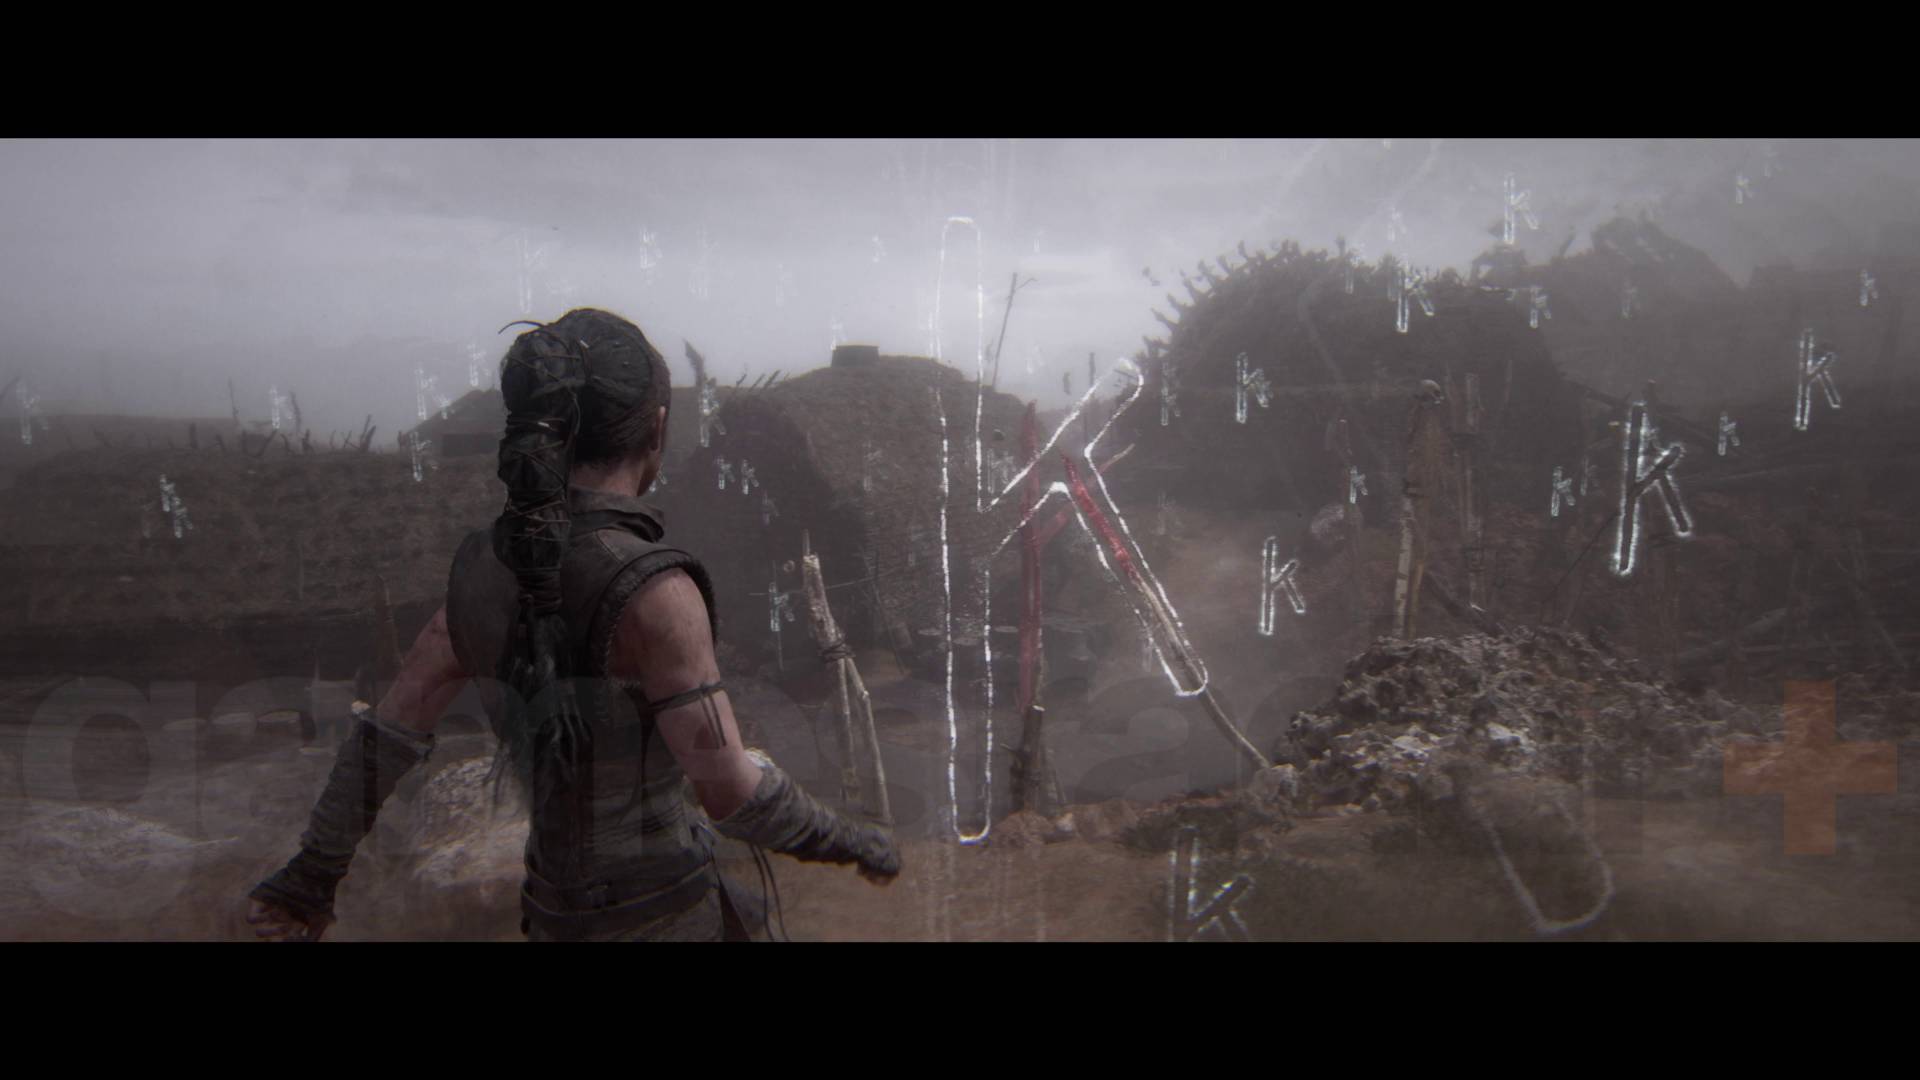
To reach the second rune from the first:
- Turn around and walk up the path, then open the door of the first hut on your right. It doesn't look like you can go inside but walk up to the door and press A to get in.
- Walk through and out the hut to a clearing. You'll find the red tree trunks and poles you need for the rune here, but you need to find the right vantage point to line them all up first.
- Go up the slope, head into the hut, then go out the hole in the destroyed wall to reach another path.
- Follow the path up the slope and around, then jump down the small ledge to another path.
- Stand roughly between the huts you went through to get here to line up the red objects to form the second rune.
- Carry on down the path and jump down to the first hut and go back through to rejoin the main path.
Hellblade 2 bridge rune 3
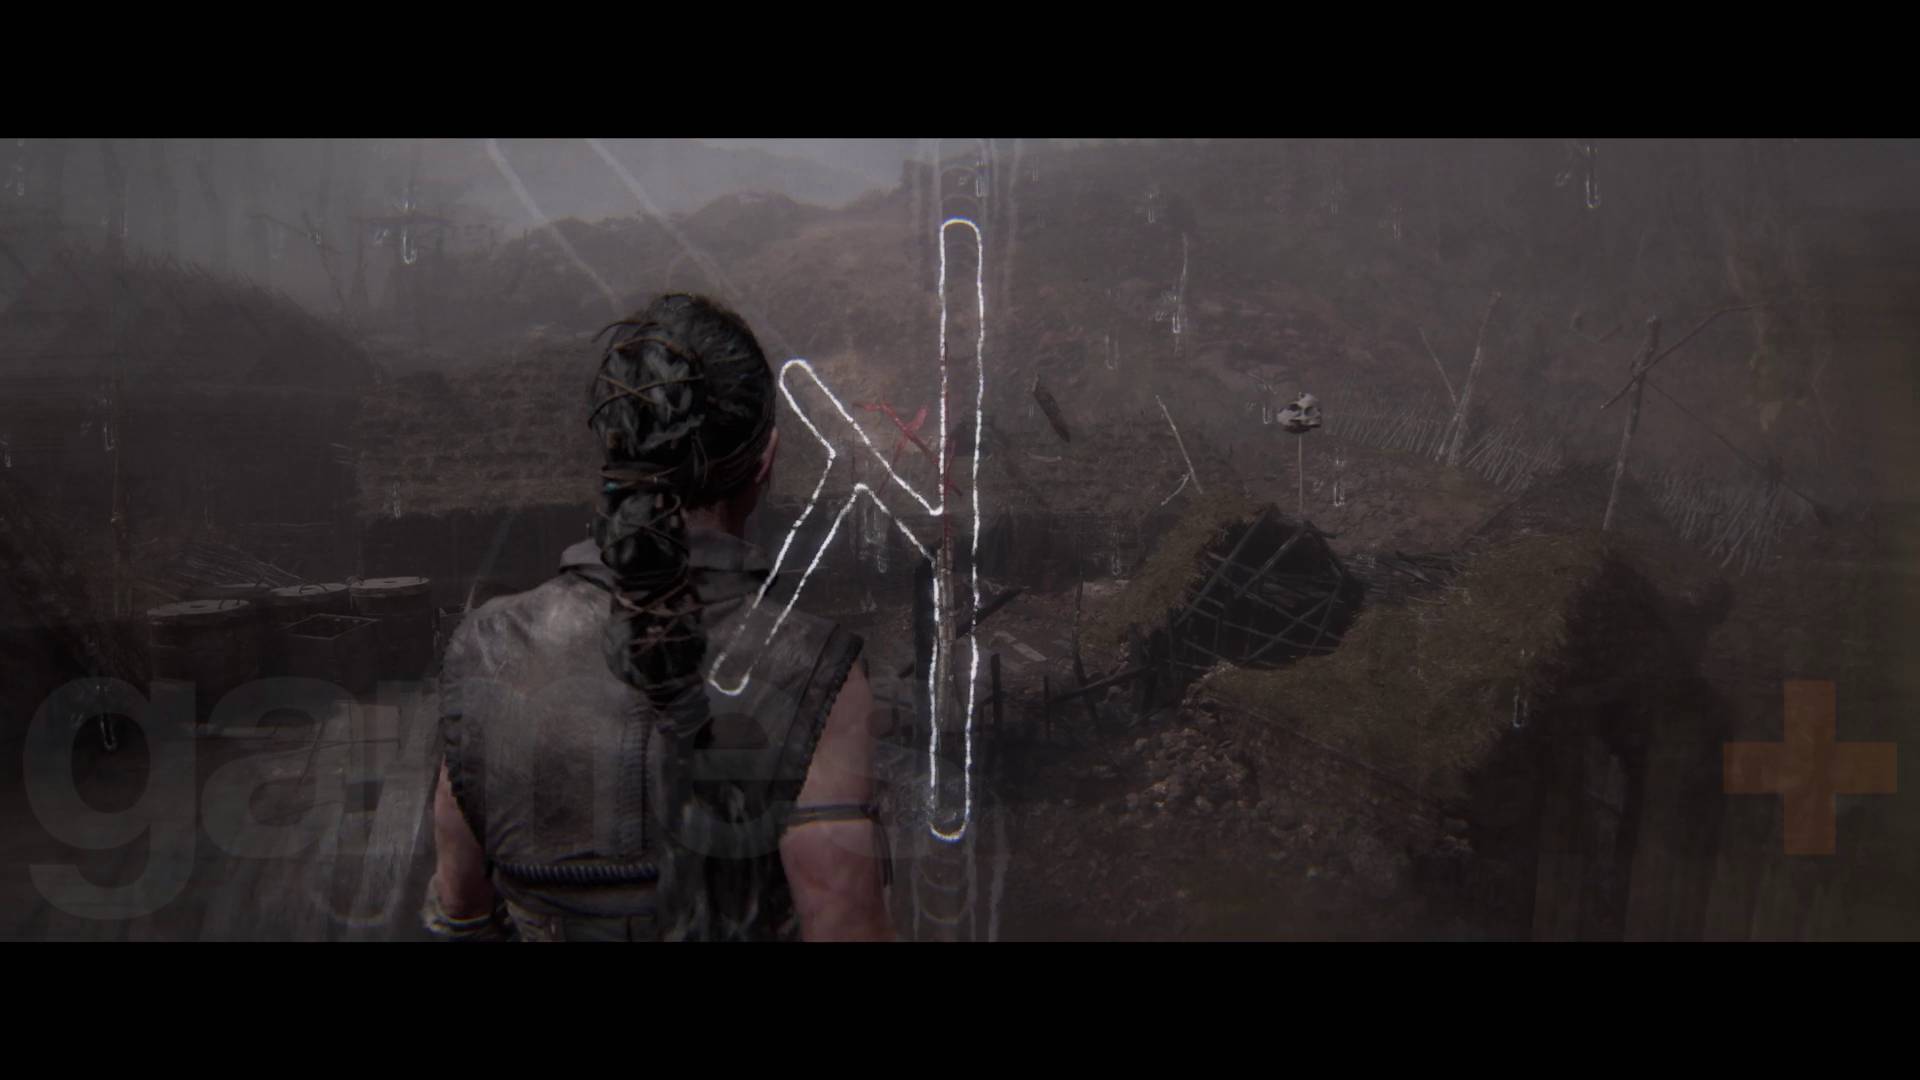
To find the final bridge rune:
- Head up the main path towards the bridge barrier rune, passing a large barn building on your left. As you walk past the burnt fence near this barn, you may have already noticed the necessary red objects, so you need to get to the right vantage point as before.
- Walk around the barn to find a hole in the wall. Head inside and climb up the ladder to reach the upper level.
- Go out to the balcony and look slightly to the left and you can easily line up the red branches and poles and hold the Focus button to recreate the final rune.
- Now you can jump off the balcony and rejoin the main path.
With all the runes found and focused, go over to the bridge to trigger a new sequence that leads Senua to unlock the ability to use Focus in combat. This is followed by lots of fighting, so be prepared for combat with these Hellblade 2 tips.
© GamesRadar+. Not to be reproduced without permission.
Sign up to the GamesRadar+ Newsletter
Weekly digests, tales from the communities you love, and more

Will Sawyer is a guides writer at GamesRadar+ who works with the rest of the guides team to give readers great information and advice on the best items, how to complete a particular challenge, or where to go in some of the biggest video games. Will joined the GameRadar+ team in August 2021 and has written about service titles, including Fortnite, Destiny 2, and Warzone, as well as some of the biggest releases like Halo Infinite, Elden Ring, and God of War Ragnarok.
