Genshin Impact Dirge of Bilqis walkthrough
How to complete every Dirge of Bilqis puzzle in Genshin Impact

If you need some help with the Genshin Impact Dirge of Bilqis World Quest, then we're here to provide the assist. Added in version 3.4, The Dirge of Bilqis is the most important questline in the new Desert of Hadramaveth region. It will unlock many new parts of the map, thereby uncovering several hidden Genshin Impact Dendroculus locations. Naturally, the Genshin Impact Dirge of Bilqis quest is full of tricky puzzles, so if you don’t want to get stuck in some underground desert dwelling, here’s a full quest walkthrough to help you out.
If you're exploring other new areas, we also have a Genshin Impact Fane of Panjvahe walkthrough, along with a guide to the Genshin Impact Wenut Tunnels and City of the Deceased Domain where you can find some Genshin Impact Sand Grease Pupa to add to your materials.
Genshin Impact Dirge of Bilqis quest requirements
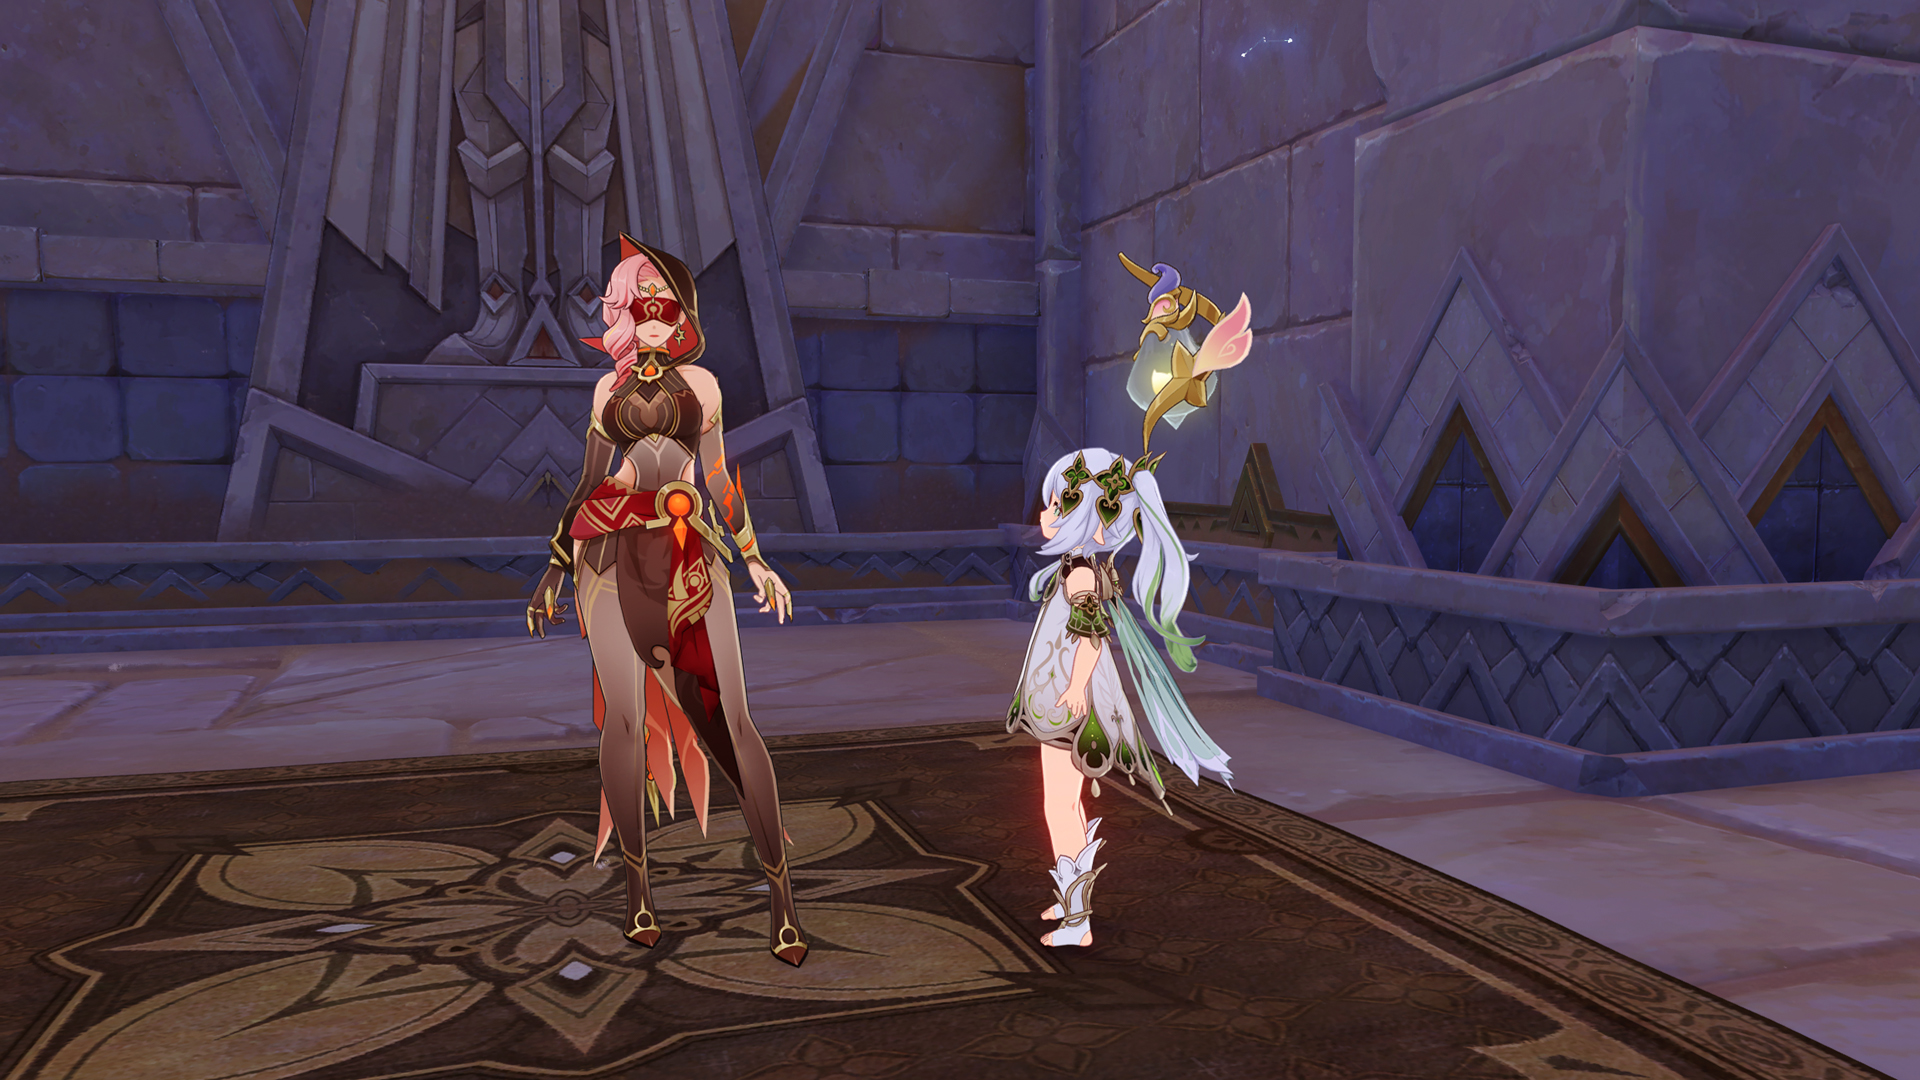
The Dirge of Bilqis starts automatically after completing the Golden Slumber World Quest, which takes place in the Hypostyle Desert. If you haven’t done so yet, and you need a Genshin Impact Golden Slumber walkthrough, use our guide to finish the many puzzles and combat challenges with ease.
Part 1: How to start The Dirge of Bilqis in Genshin Impact

As usual, this World Quest starts at the local Adventurers’ Guild, in Sumeru City. Speak to Katheryne, and then head off to the Tanit Camps. This first part of the Dirge of Bilqis World Quest goes by the long subquest title of “Wisdom Has Built Her House, She Has Hewn Out Her Seven Pillars”.
- Speak to a bunch of NPCs inside the camp.
- Feed the crocodiles. You actually don’t need to do anything other than stand on the yellow spots near the river.
- Speak to some NPCs again, then go to Jeht’s dwelling to complete the first part of The Dirge of Bilqis.
The Dirge of Bilqis part 2: The Temple Where Sand Flows Like Tears
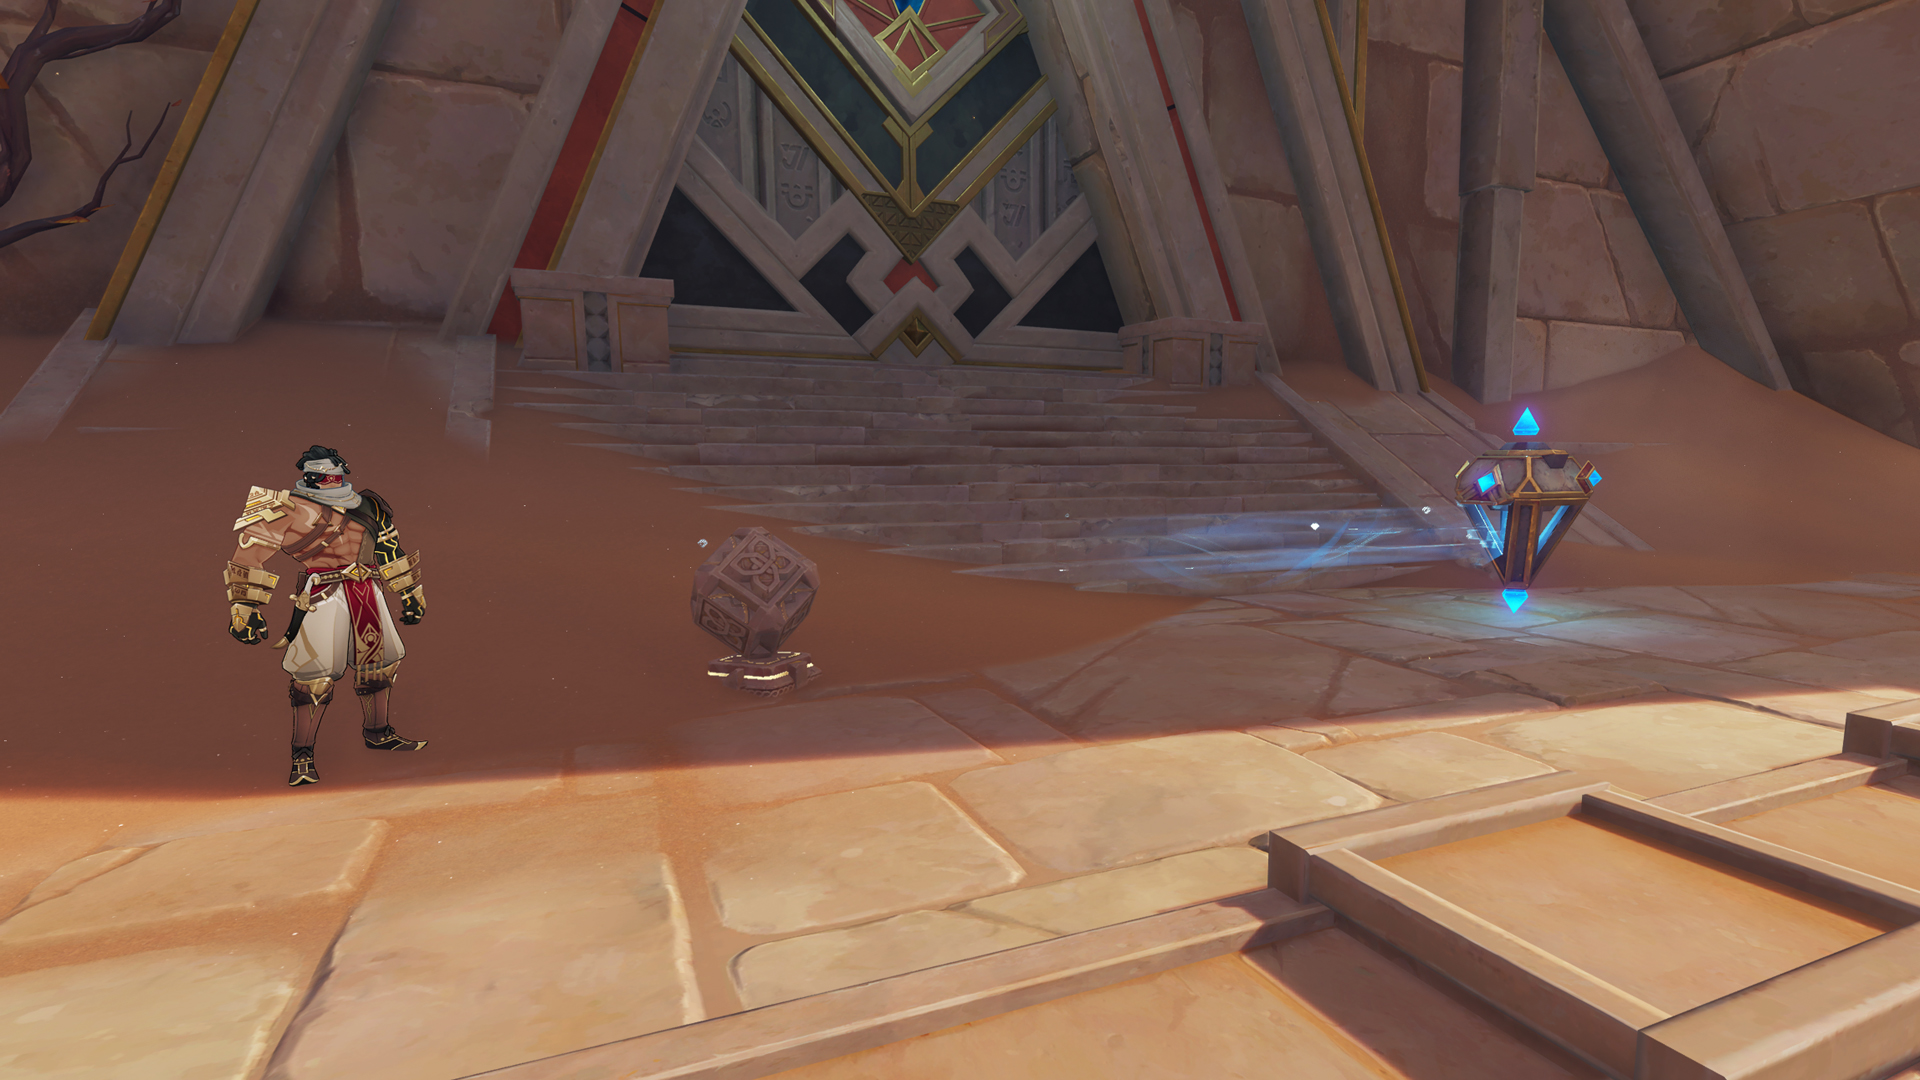
For the second part of The Dirge of Bilqis, go further to the west, to an area called The Temples Forsaken. Follow the steps below:
- Walk up to the large temple entrance and speak to Azariq.
- To unlock the temple, you need to hit the Rune Mechanism (the large blue pillar) three times. This will aim the wind current at the sand-covered square mechanism as shown in the picture above, thereby allowing you to use it.
- Head inside the temple and use the device as instructed, which brings you to the second Dirge of Bilqis puzzle.
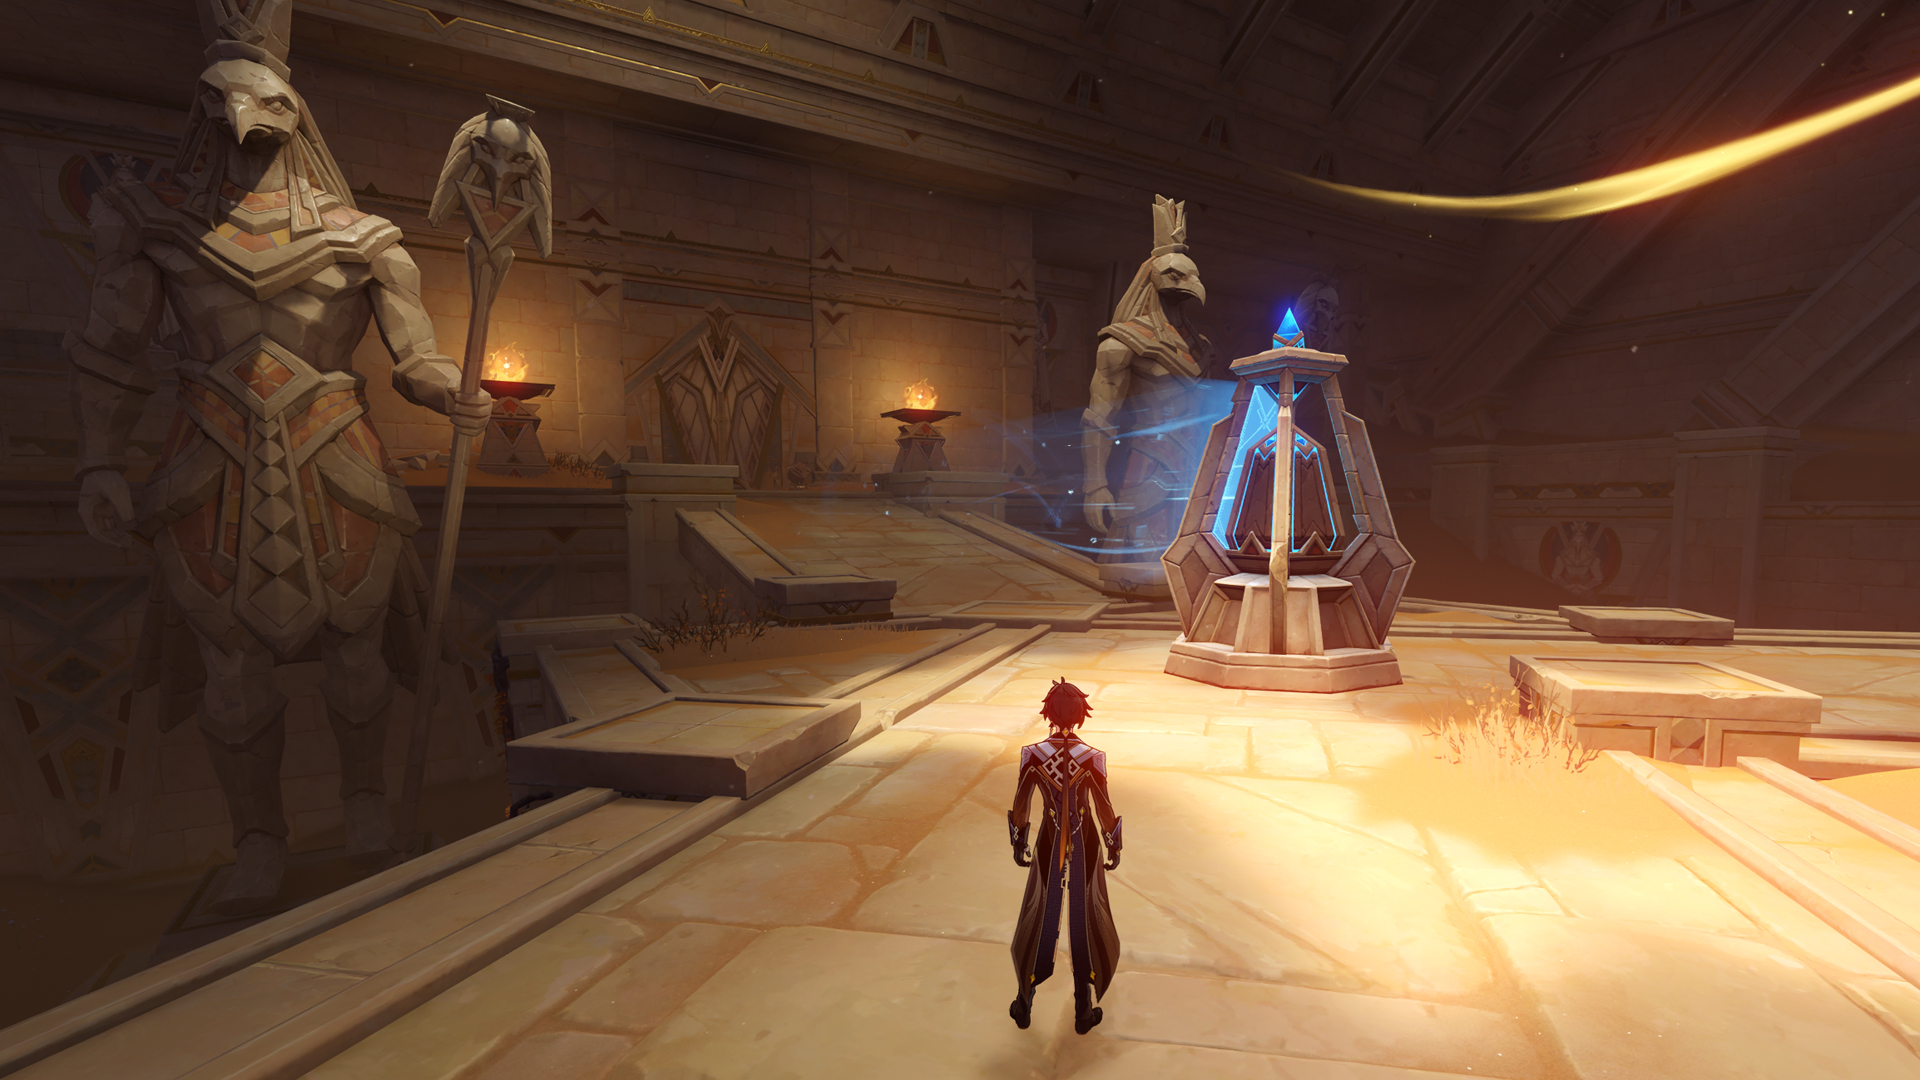
- You need to do the same thing as before: hit the Rune Mechanism (twice this time) until it aims at the sand-covered door mechanism.
- Go through the door. If you want to obtain the Common Chest, use the Runic Pane Switch lever and then hit the Rune Mechanism once.
- In the large room with the Teleport Waypoint, go right to find a smaller room with a Rune Mechanism (see picture below). Hit it twice, then use the Runic Pane Switch, then hit the Rune Mechanism twice again.
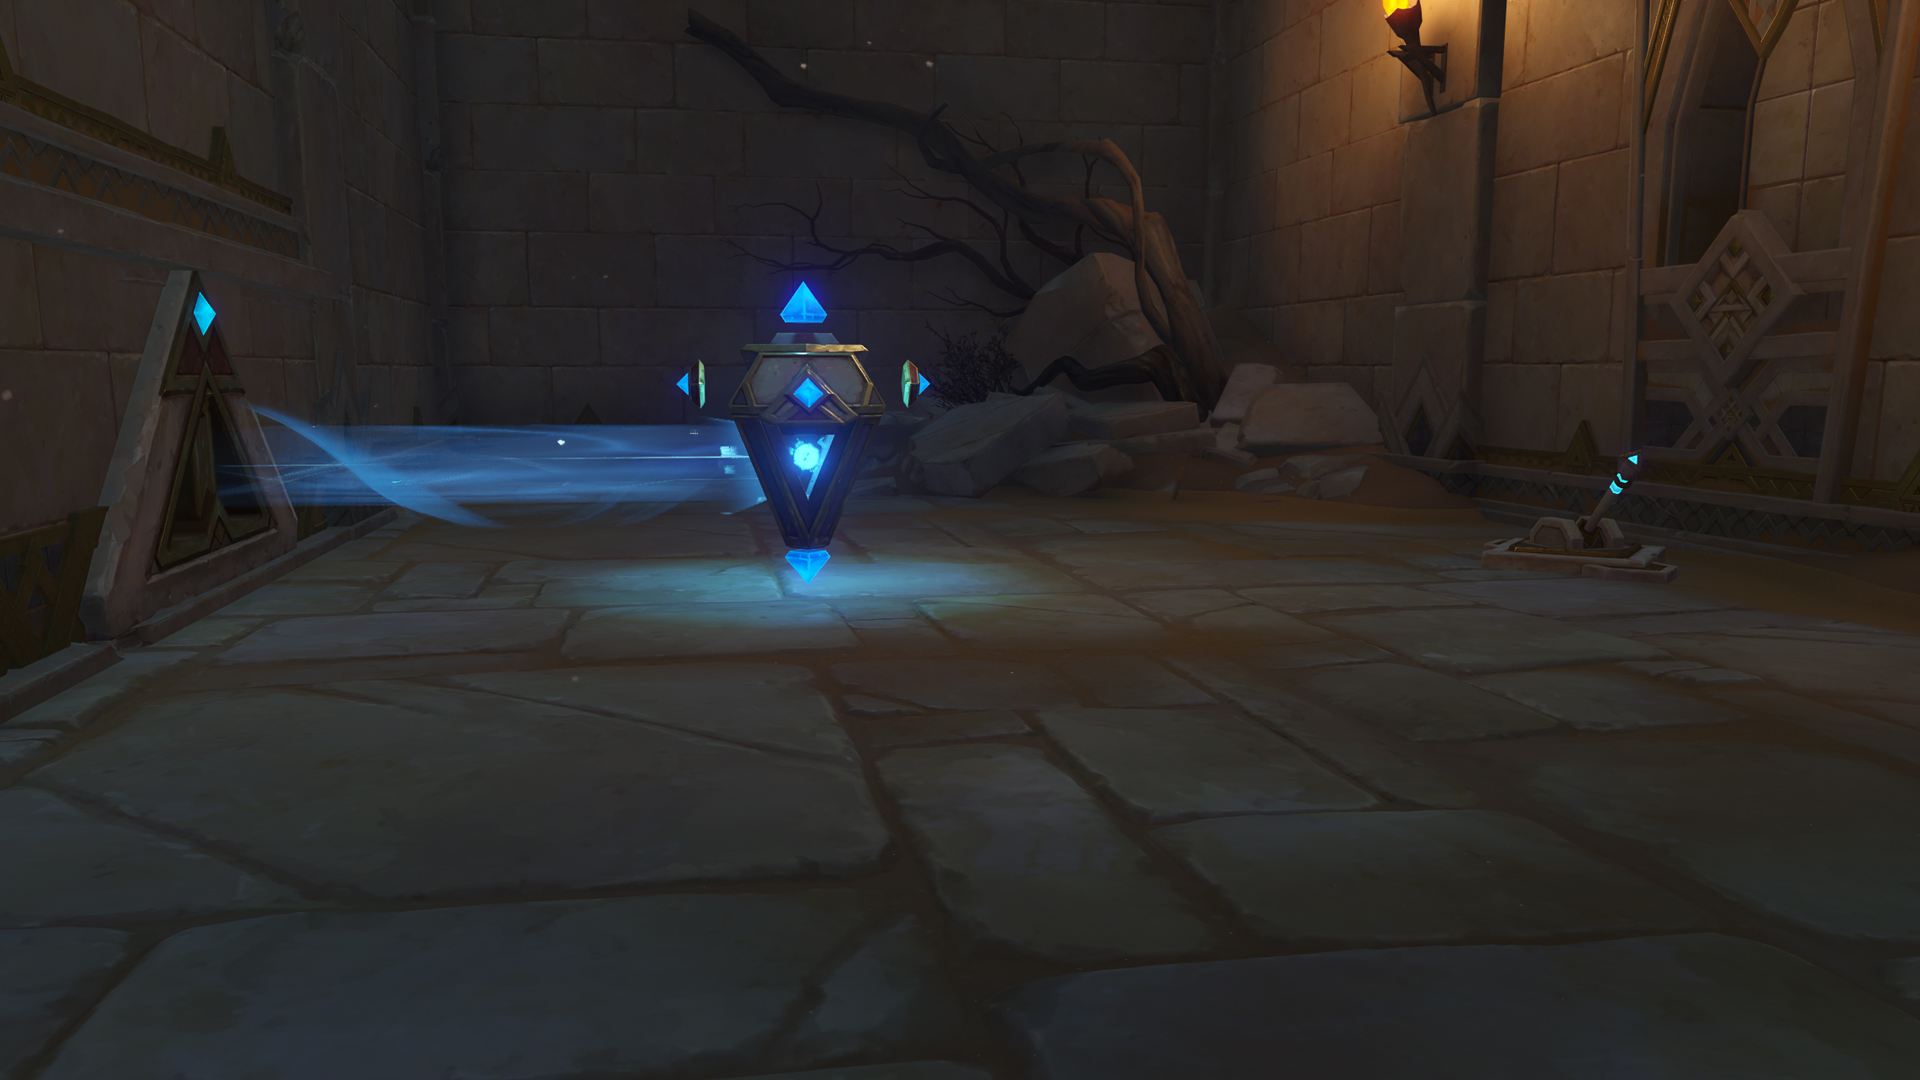
- Use the blue pillar mechanism in the centre of the larger room.
- Follow the path to the east. Hit another Rune Mechanism twice to proceed.
- Go down through the crack in the ground, then keep following the path to the north/northwest until you find another blocked door and Rune Mechanism. Hit it twice, and you’ll find yourself back at the main temple.
- Go through the dialogue and open the next temple door. This part of The Dirge of Bilqis is almost the exact same as the steps you just took, so simply repeat the Rune Mechanism puzzles as before.
- For the third run (starting from the main temple again), follow the path until you can go no further, then unlock the door to your left. This will take you to a room with a more complex Dirge of Bilqis puzzle, as shown in the picture below.
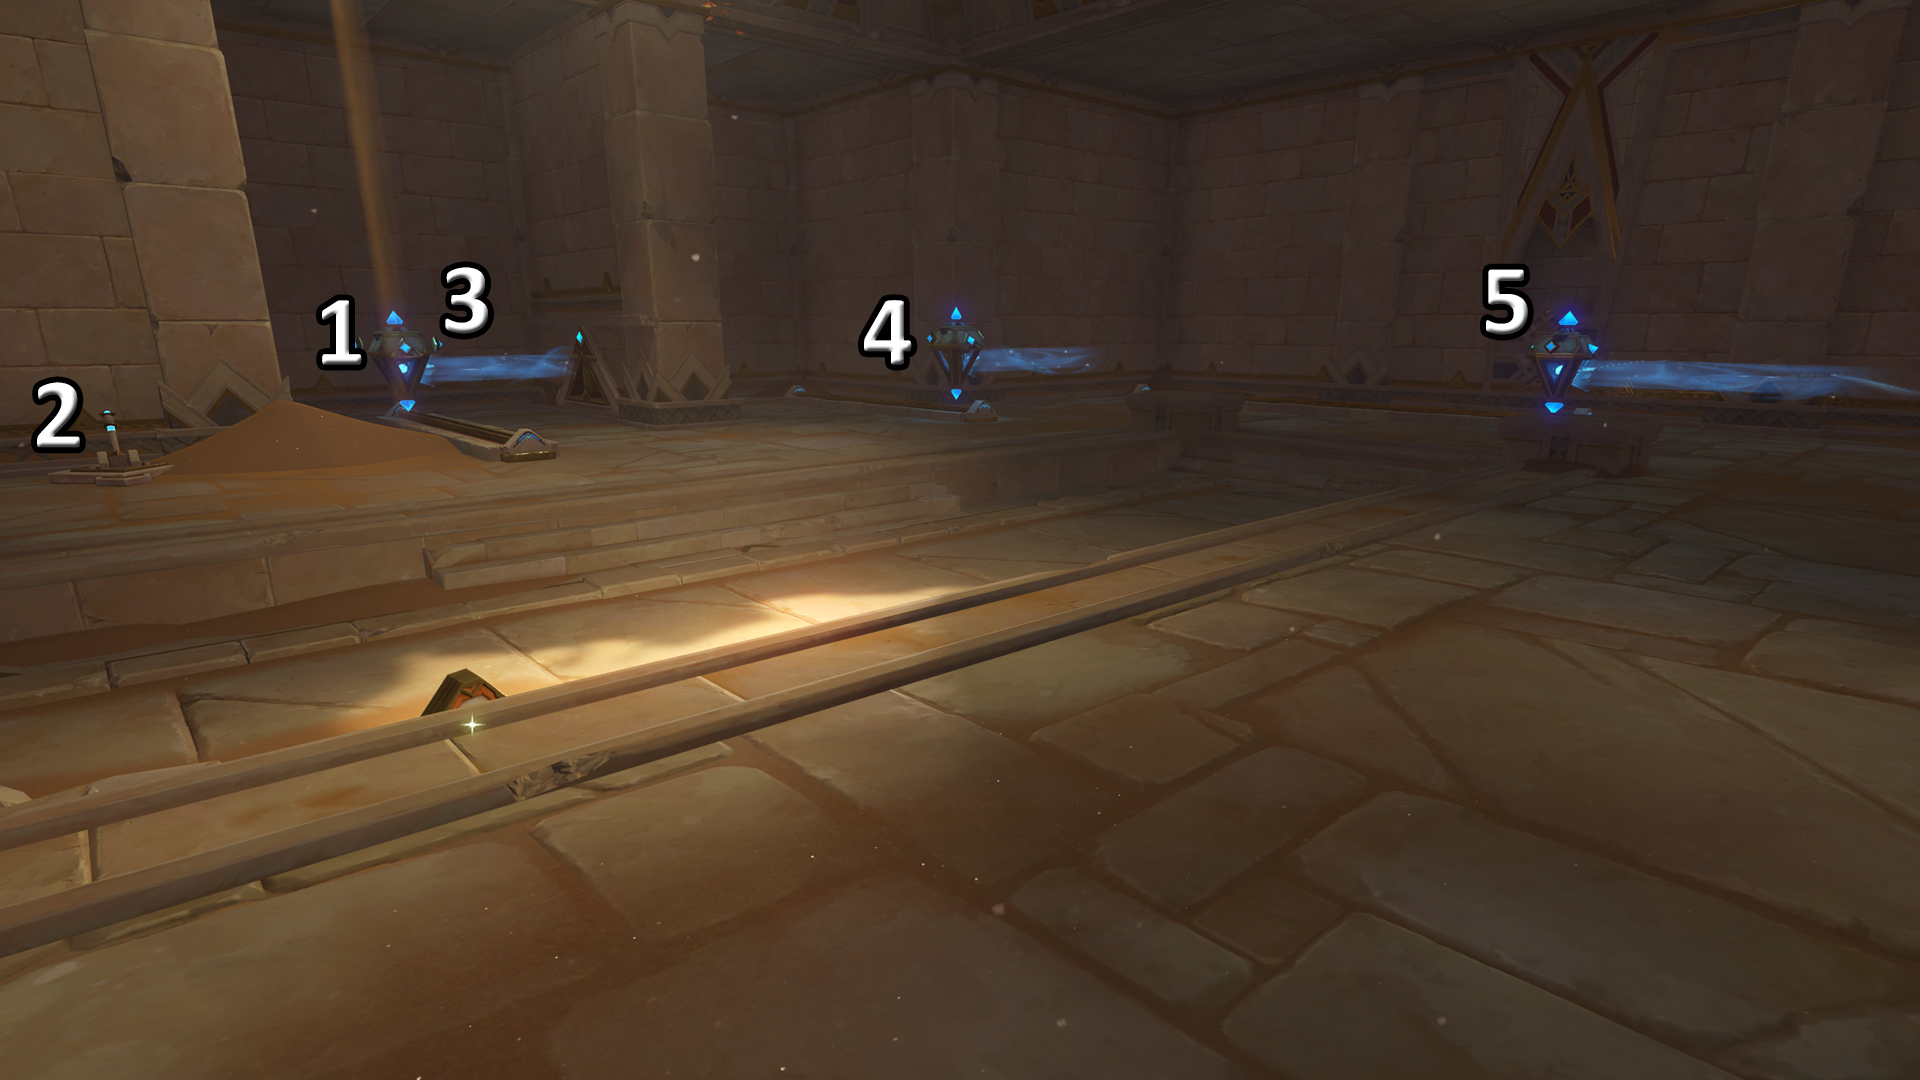
- Move the Rune Mechanism to reveal the Punic Pane Switch. After using the Switch, move the Rune Mechanism back and aim it at its neighbour, through the vent. Keep aiming for the next Rune Mechanism until the door is unlocked.
- You’ll find another Teleport Waypoint in the next area. Here, go up to the higher platform and use the Rune Mechanism to open the floor tile. This will activate another Rune Mechanism, allowing you to continue onwards until you’re back at the main temple.
- Activate the large pyramid in the middle of the room, then collect the Luxurious Chest below.
- Return to the temple’s entrance. After the cutscene, enter the temple on the opposite side of the gorge. Be prepared to fight a massive Primal Construct inside this temple, called Anoushbord. Use teammates who can trigger Catalyze reactions, as this will end the boss’ invisibility state.
- Collect the shiny object, which grants you the ‘Jinni in the Bottle - Liloupar’ Gadget.
- Follow the path until you reach the Eremite camp. Search the camp, then return to the Tanit Camp where The Dirge of Bilqis quest started.
- Speak to the NPCs. You can play a card game with Azariq before the quest ends, but this is optional.
The Dirge of Bilqis part 3: Dune-Entombed Fecundity 1
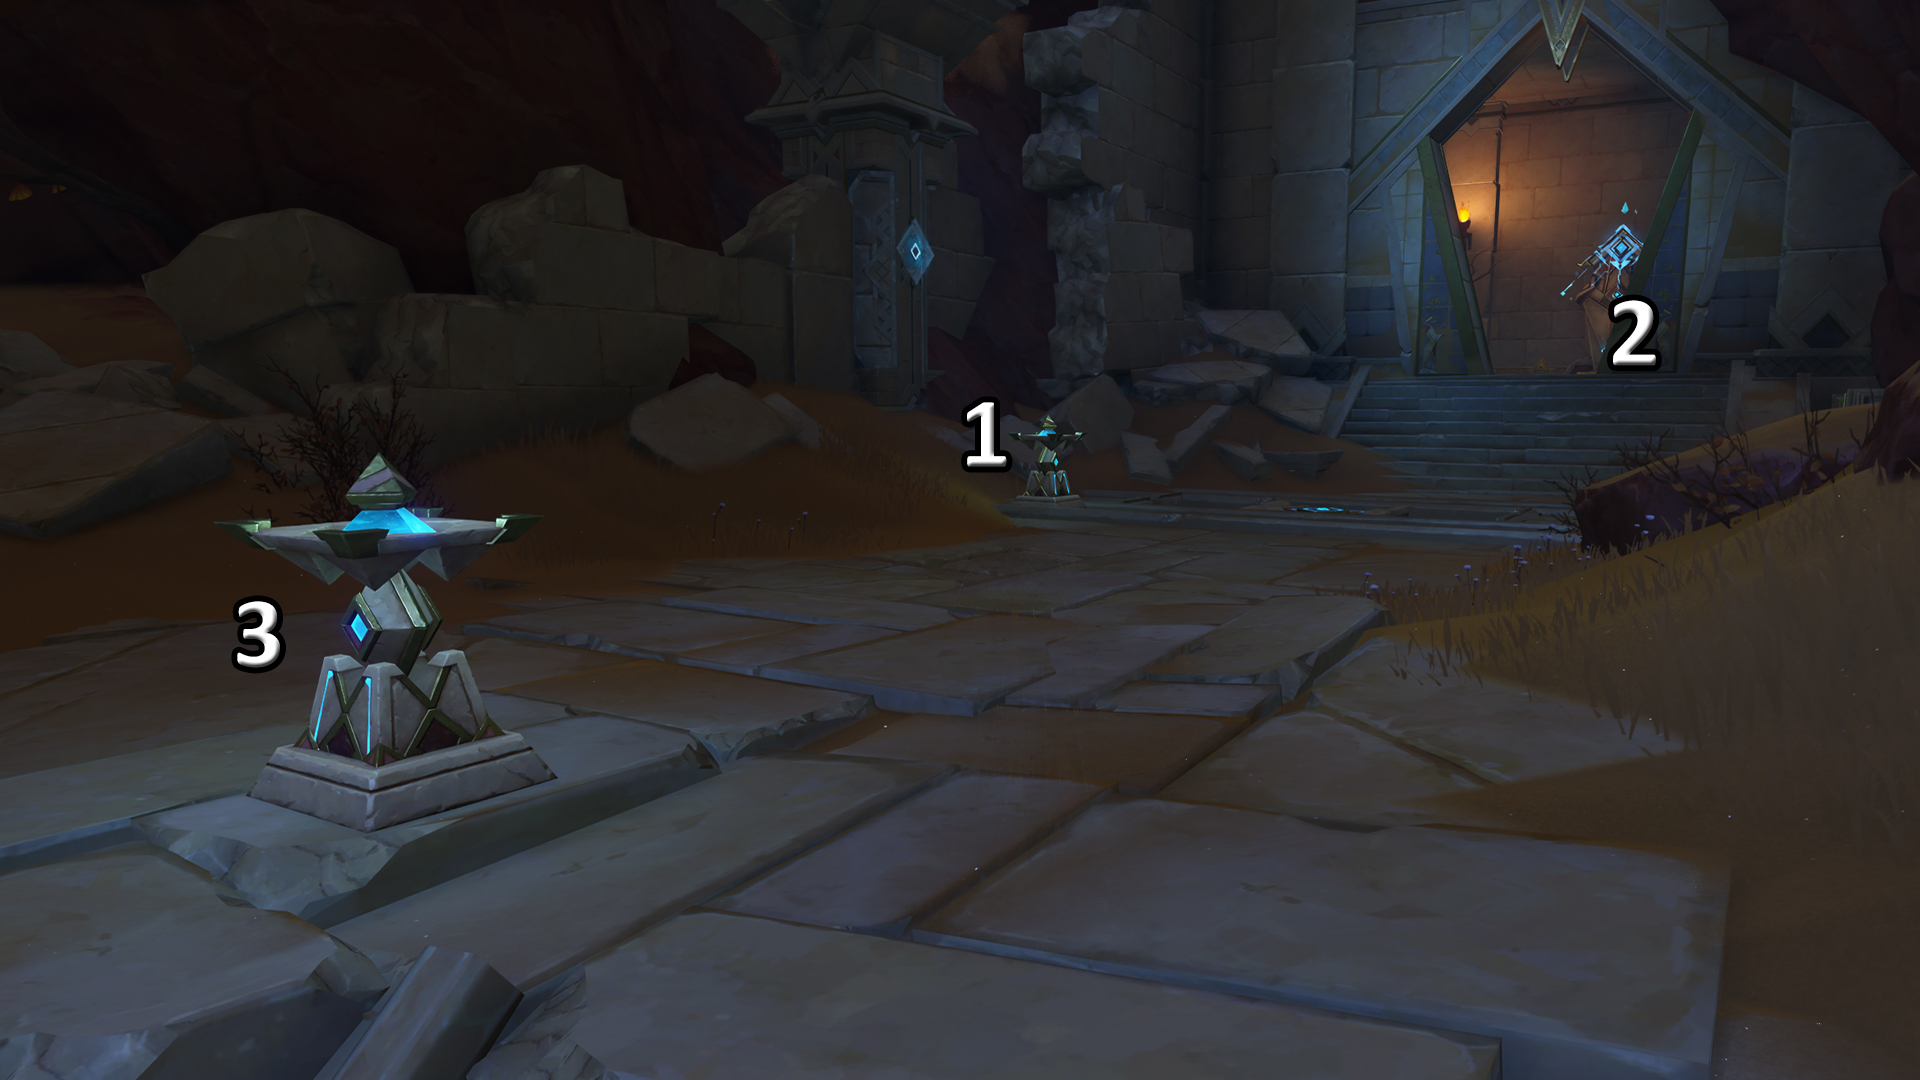
The third part of the Genshin Impact Dirge of Bilqis quest starts at the Tanit Camp again. Speak to Babel, then head north to the Passage of Ghouls.
- Go to the bottom of the ravine to trigger a cutscene. After fighting some enemies, proceed deeper into the ravine.
- Interact with the blue pillar mechanisms until you reach the area shown in the picture above. Use the pillar in the middle, then the one inside (corner on the right), and then the one on the left.
- Follow the objective until you reach the large room with the crack in the ground. Don’t go through the crack, but cross to the other side and interact with the blue pillar.
- This allows you to reach the area shown in the picture below. To proceed, interact with the mechanisms in the correct order.
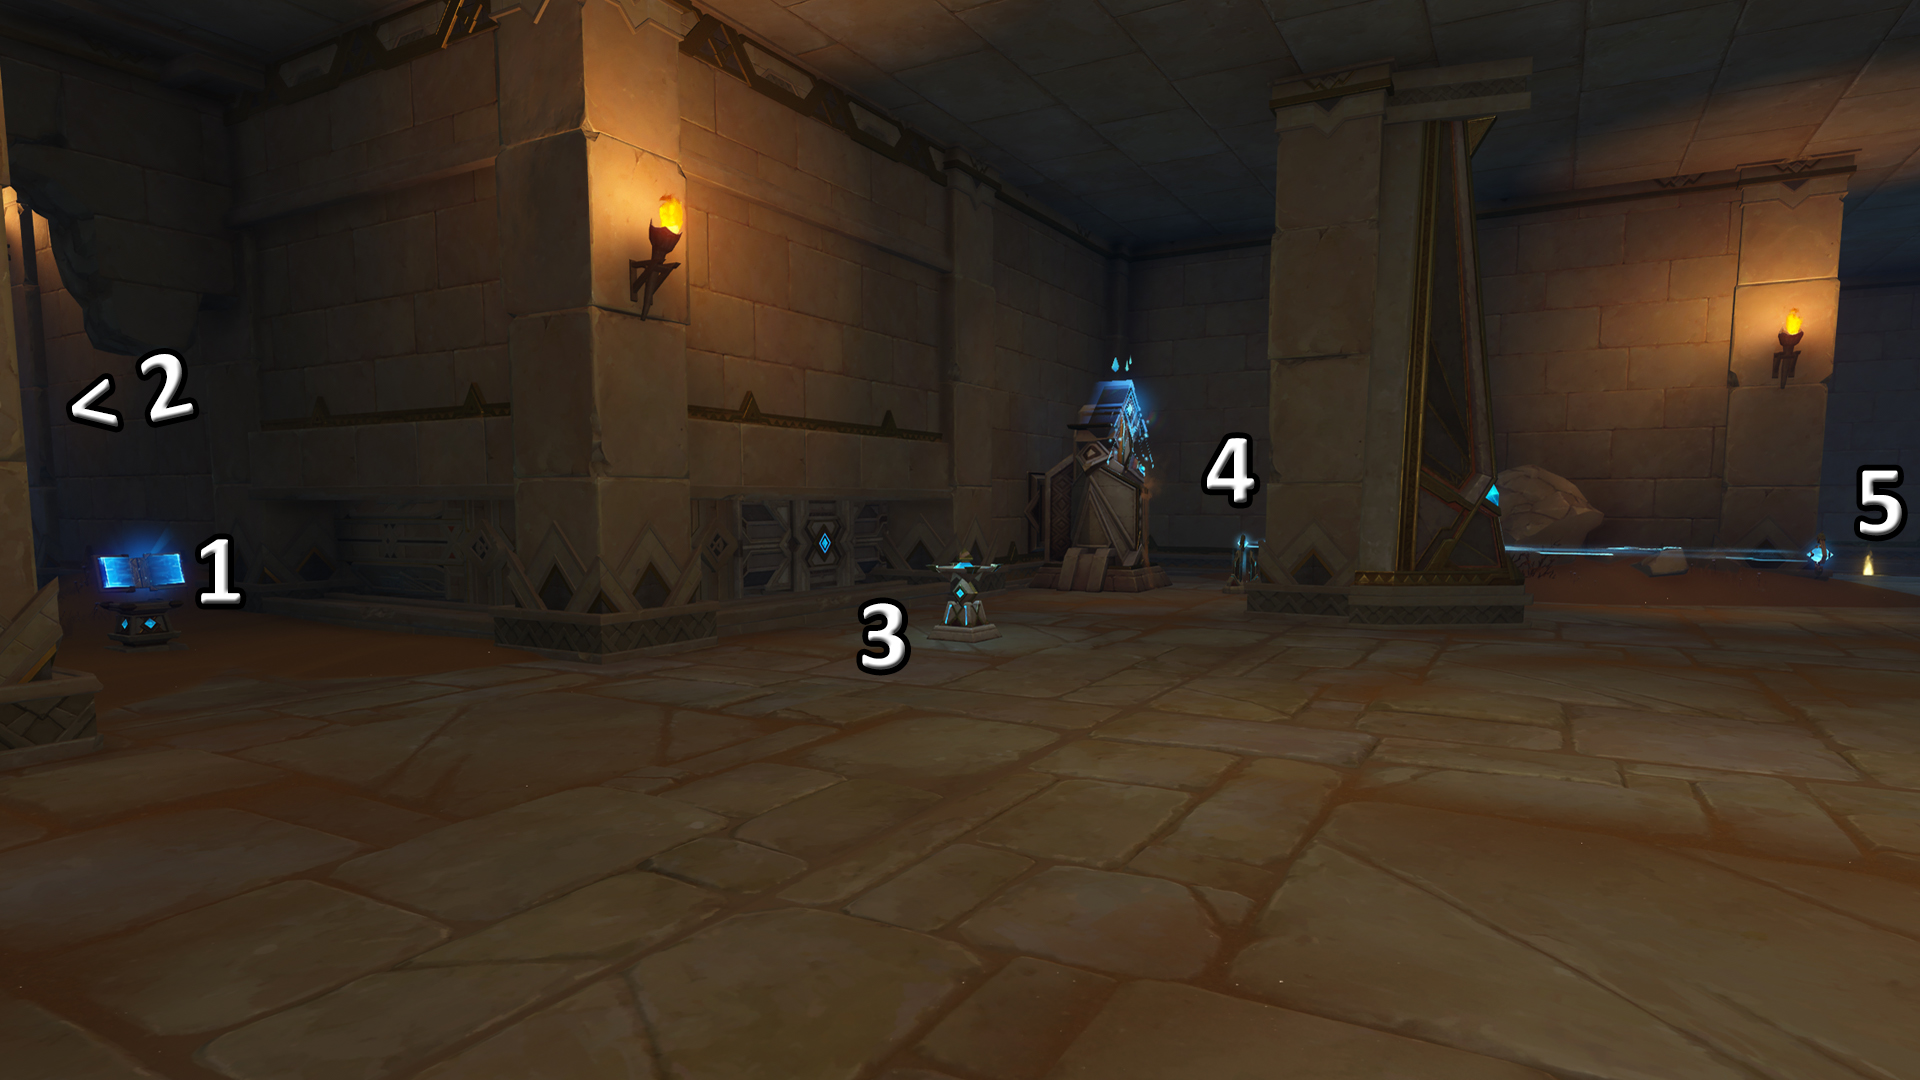
- To solve the puzzle in the next room, interact with the mechanisms in the same order as shown below.
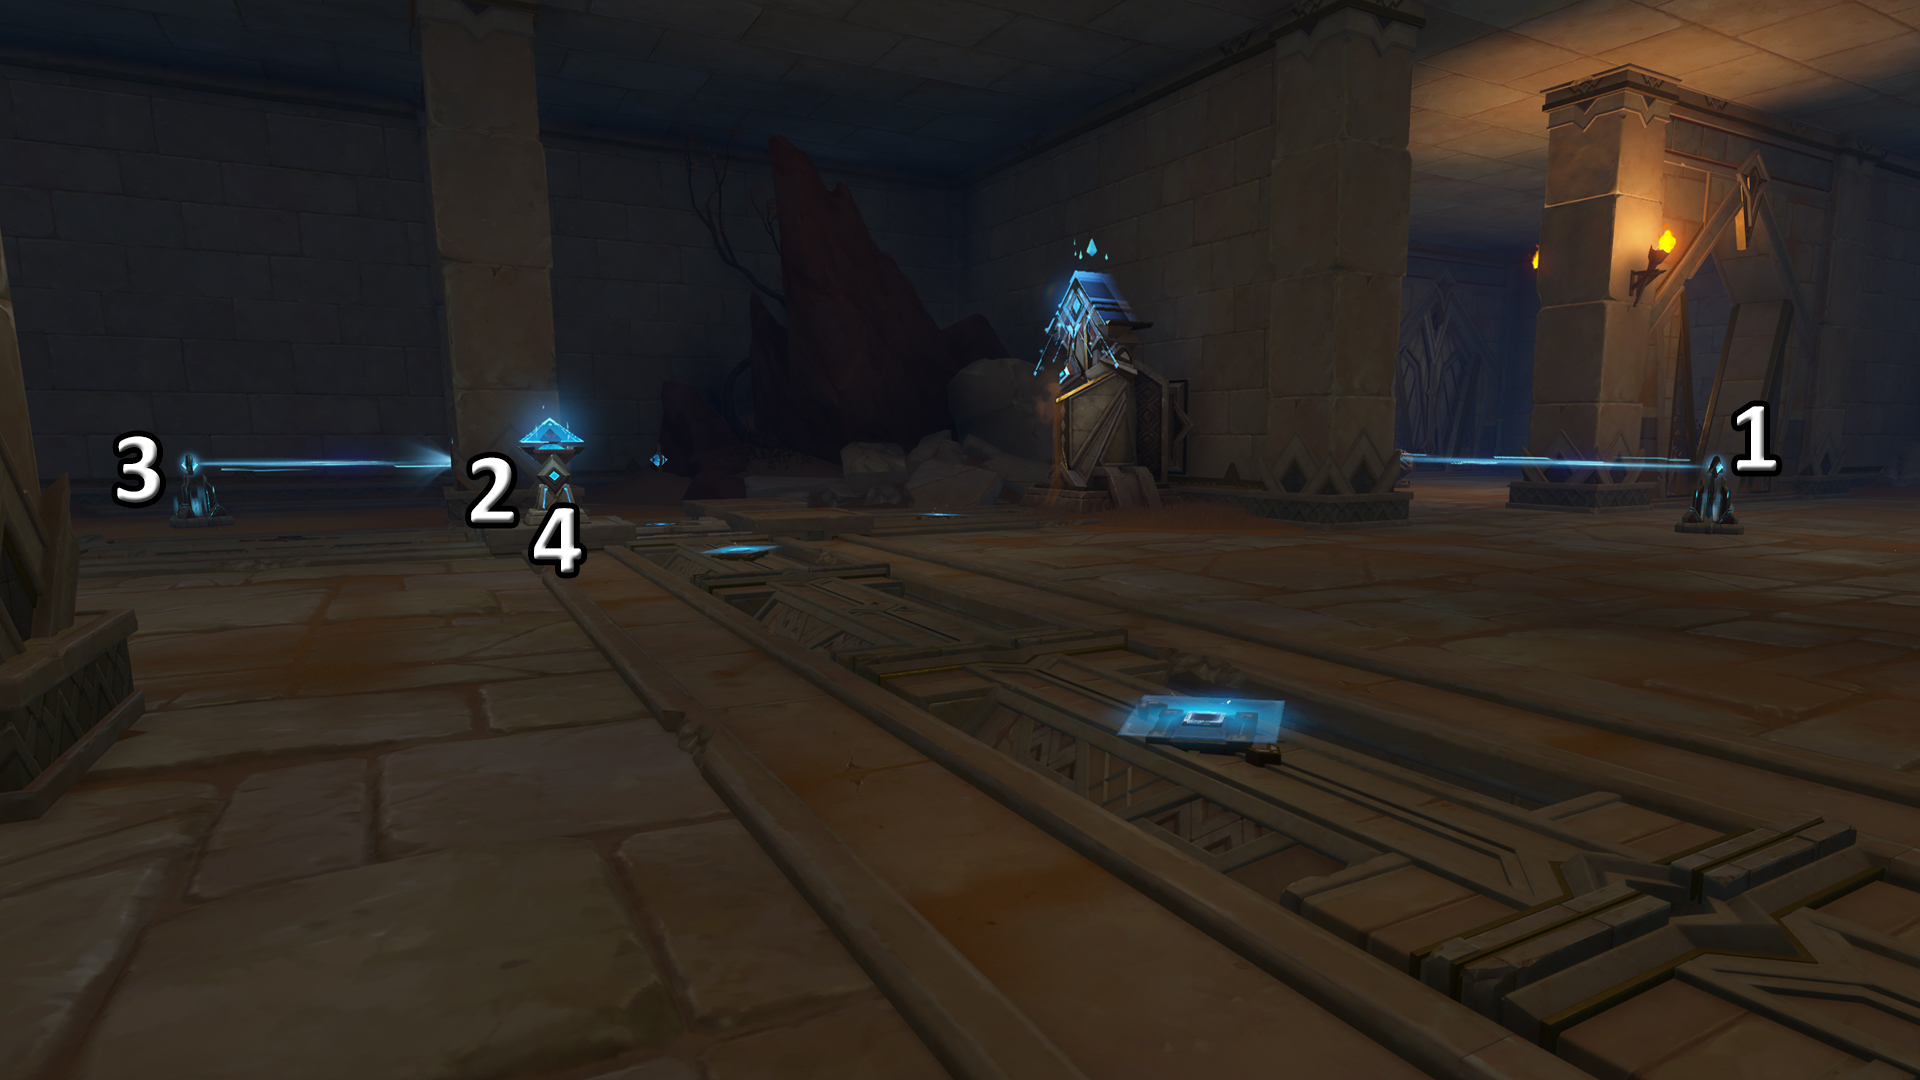
- Drop down through the crack in the ground. Follow the path and stick to the left.
- Defeat the two Primal Constructs to open the large door.
- Collect the Liloupar shard.
- Follow the quest objectives further down the tunnel. Be ready to fight a large Electro Scorpion to unlock one of the mechanisms along the way.
- Activate the mechanism in the large stone square, then defeat four Primal Constructs.
- Go to the exit and follow the dialogue to complete this part of the Genshin Impact Dirge of Bilqis questline.
The Dirge of Bilqis part 4: Dune-Entombed Fecundity 2
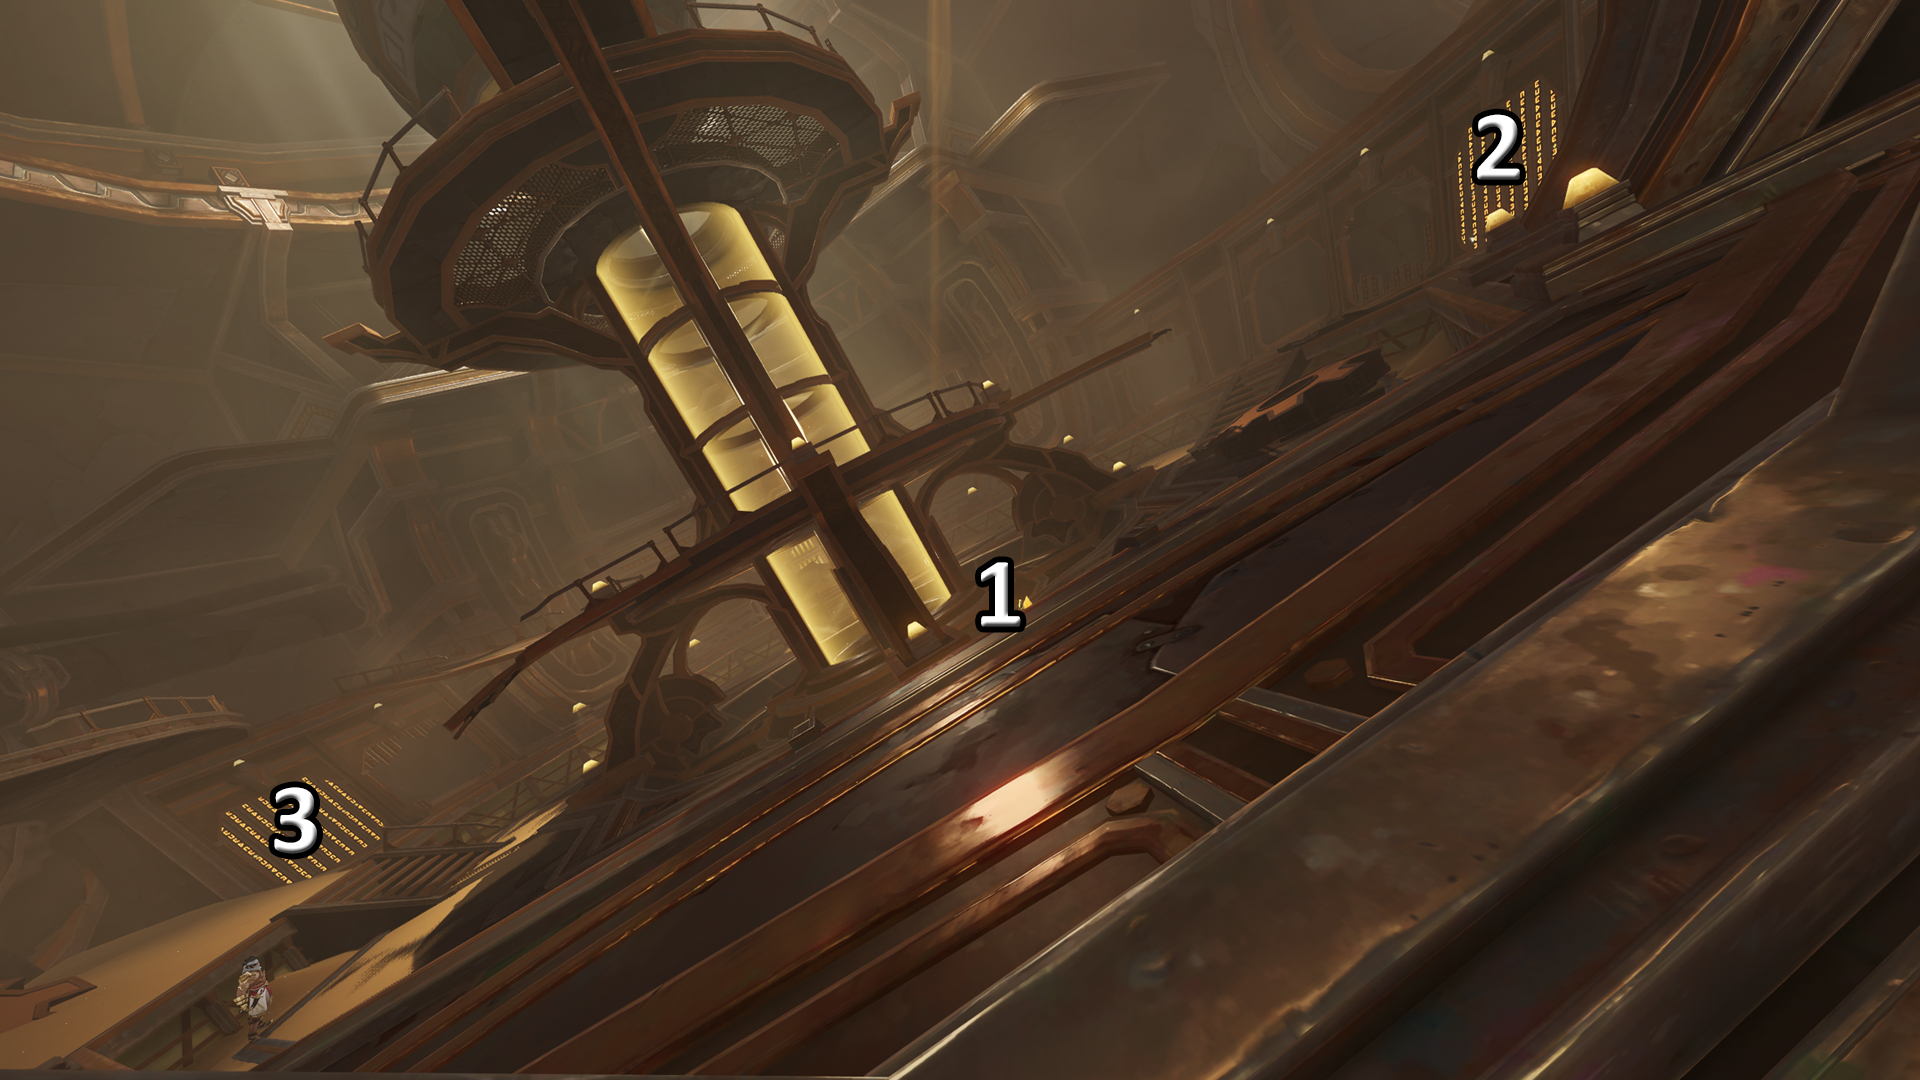
For the fourth part of The Dirge of Bilqis quest, go to the massive Ruin Golem in the Dunes of Steel.
- Fly up the Golem’s arm, using the Four-Leaf Sigils. Use the three little glowing stones near the locked door, the Energy Blocks, to open it.
- In the next room, you need to collect three Energy Blocks again. The first one is in front of you (see picture above). Use it to open the door to the second one, then pick the first one up afterwards. Use both energy Blocks to open the door on the left side as well.
- Jump down through the tube in the middle of the room, then place the Energy Blocks on the pillars in the area below.
- Take the elevator upstairs. There’s a button on the ground.
- After the cutscene, go west to find two more Energy Blocks. Attach one of them to the pillar, then go to the east to find a second room with a pillar. Activate this one as well.
- Head back to the control room.
- After the cutscene, glide down to the northeast and proceed through the Golem’s arm.
- Once outside, head down the tunnel with the bright purple flowers. You’ll unlock a large door, after which Azariq asks you to “keep your eyes peeled”.
- Head upstairs to solve the puzzle. As the picture below shows, start by hitting the Rune Mechanism, use the revealed blue pillar, then use the second blue pillar. Go downstairs again, where you’ll find a new room on your left hand. Interact with the blue pillar inside, and this will unlock the sealed door mechanism. All the other mechanics (including the blue orb) are for optional rewards.
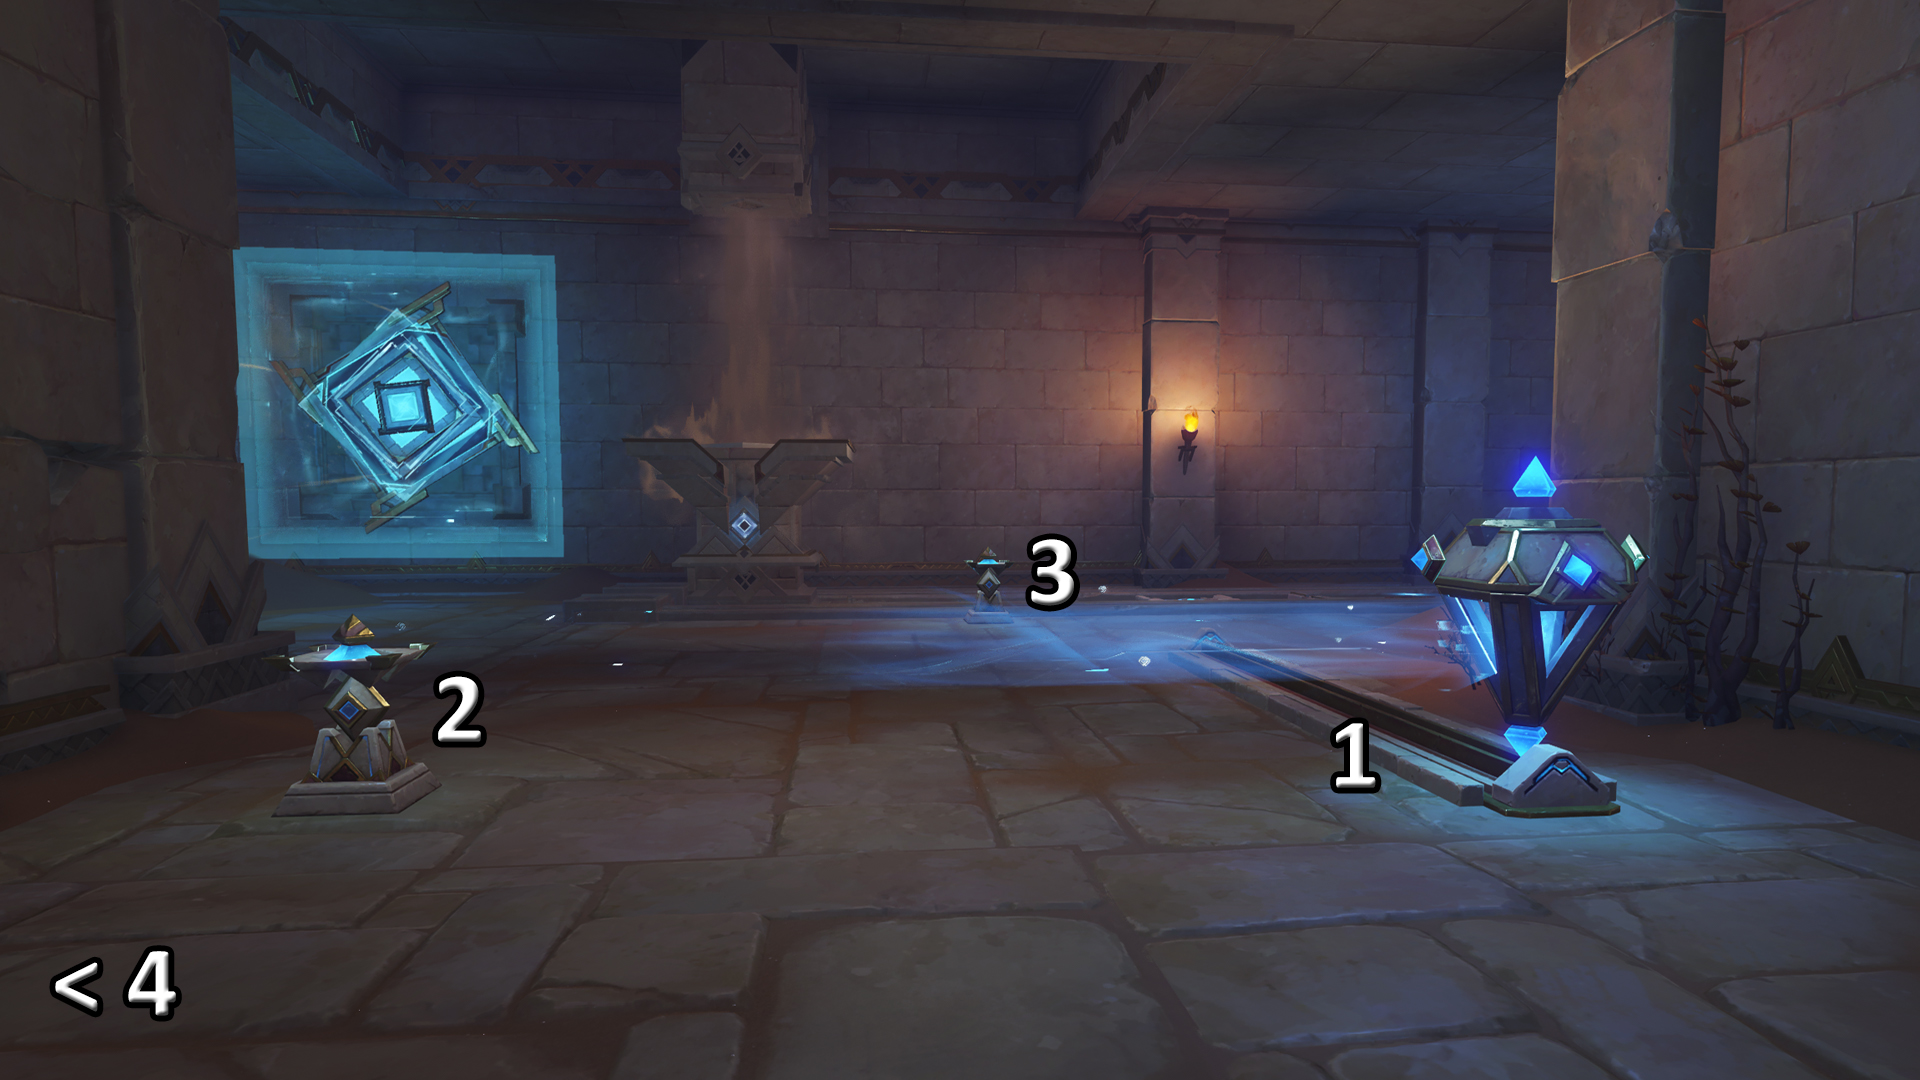
- When you reach the broken blue pillar, take the doorway to the north. Solve a simple Rune Mechanism puzzle to gain entry to a second room. Use the Rune Mechanisms here as well, then head downstairs in the first room and guide the blue orb back to the broken pillar. The picture below shows the right order.
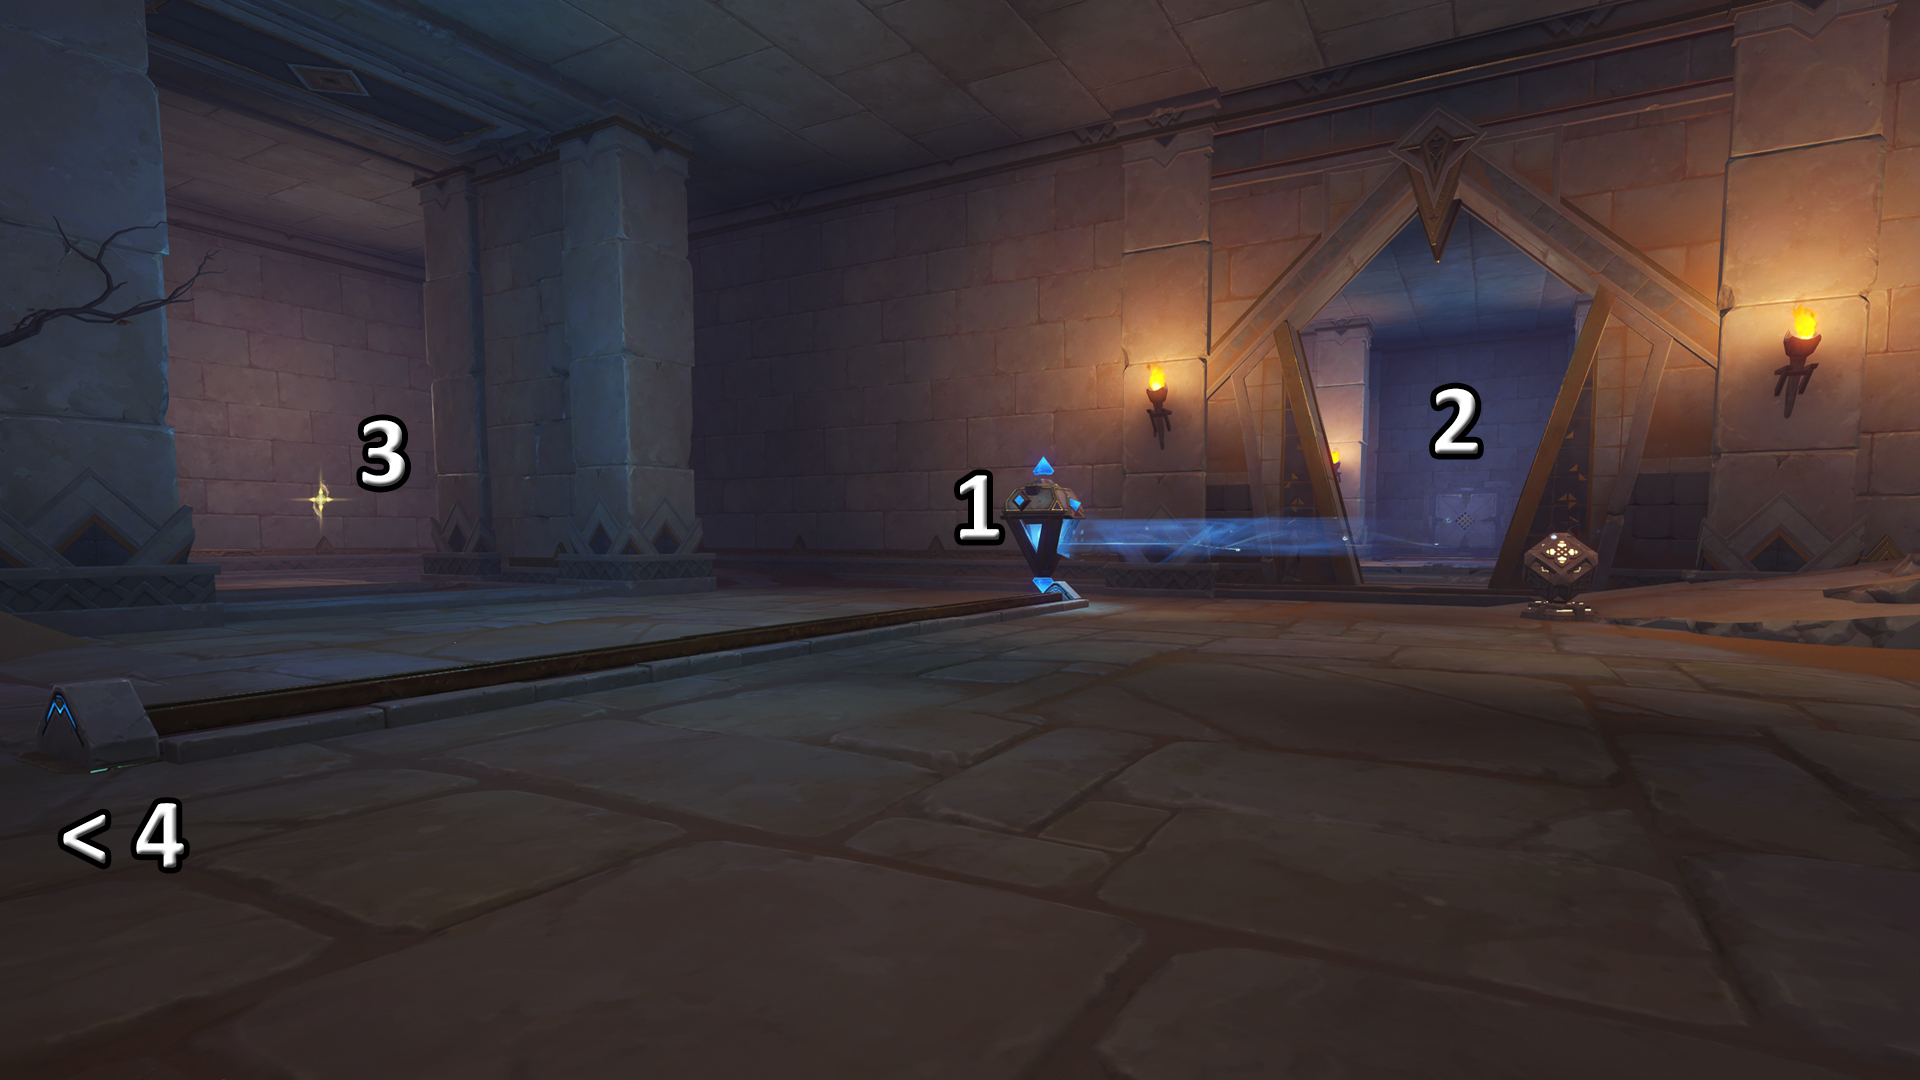
- Go up the stairs and through the large door.
- Guide the blue orb to the large stone pillar.
- Go downstairs and collect the Liloupar shard.
- Proceed through the door to find the second blue orb. It’s locked behind the puzzle: rotate the beam in the middle, release the orb on the left. Rotate the beam again to stop the fan, then guide the blue orb upwards.
- Doing so will unlock a door leading to a very, very deep tunnel. Keep going down until you reach the stone square again.
- Activate the mechanism on the square and defeat two Primal Constructs, plus a bunch of Fungi and Shroom enemies.
- Head to the surface to complete this part of The Dirge of Bilqis.
The Dirge of Bilqis part 5: Dune-Entombed Fecundity 3
- Go through the Ruin Golem scenes.
- Use the Golem to shoot the rocks as instructed, then leave the cabin and glide down.
- After a cutscene, be ready to fight some Eremites.
- Once outside, you’ll have to face another fight. This time, it’s against the Fatui.
- Follow the path through the Ruin Golem (use the Four-Leaf Sigils).
- Keep going down, interact with the blue pillar on the path, and activate the Teleport Waypoint. Right after finding the Waypoint, use the Four-Leave Sigils to cross the large gap, to the other side of the room.
- Solve the first puzzle: go to the room on the left and use the blue pillar, then use the blue pillar in the central, large room. Now you can go downstairs.
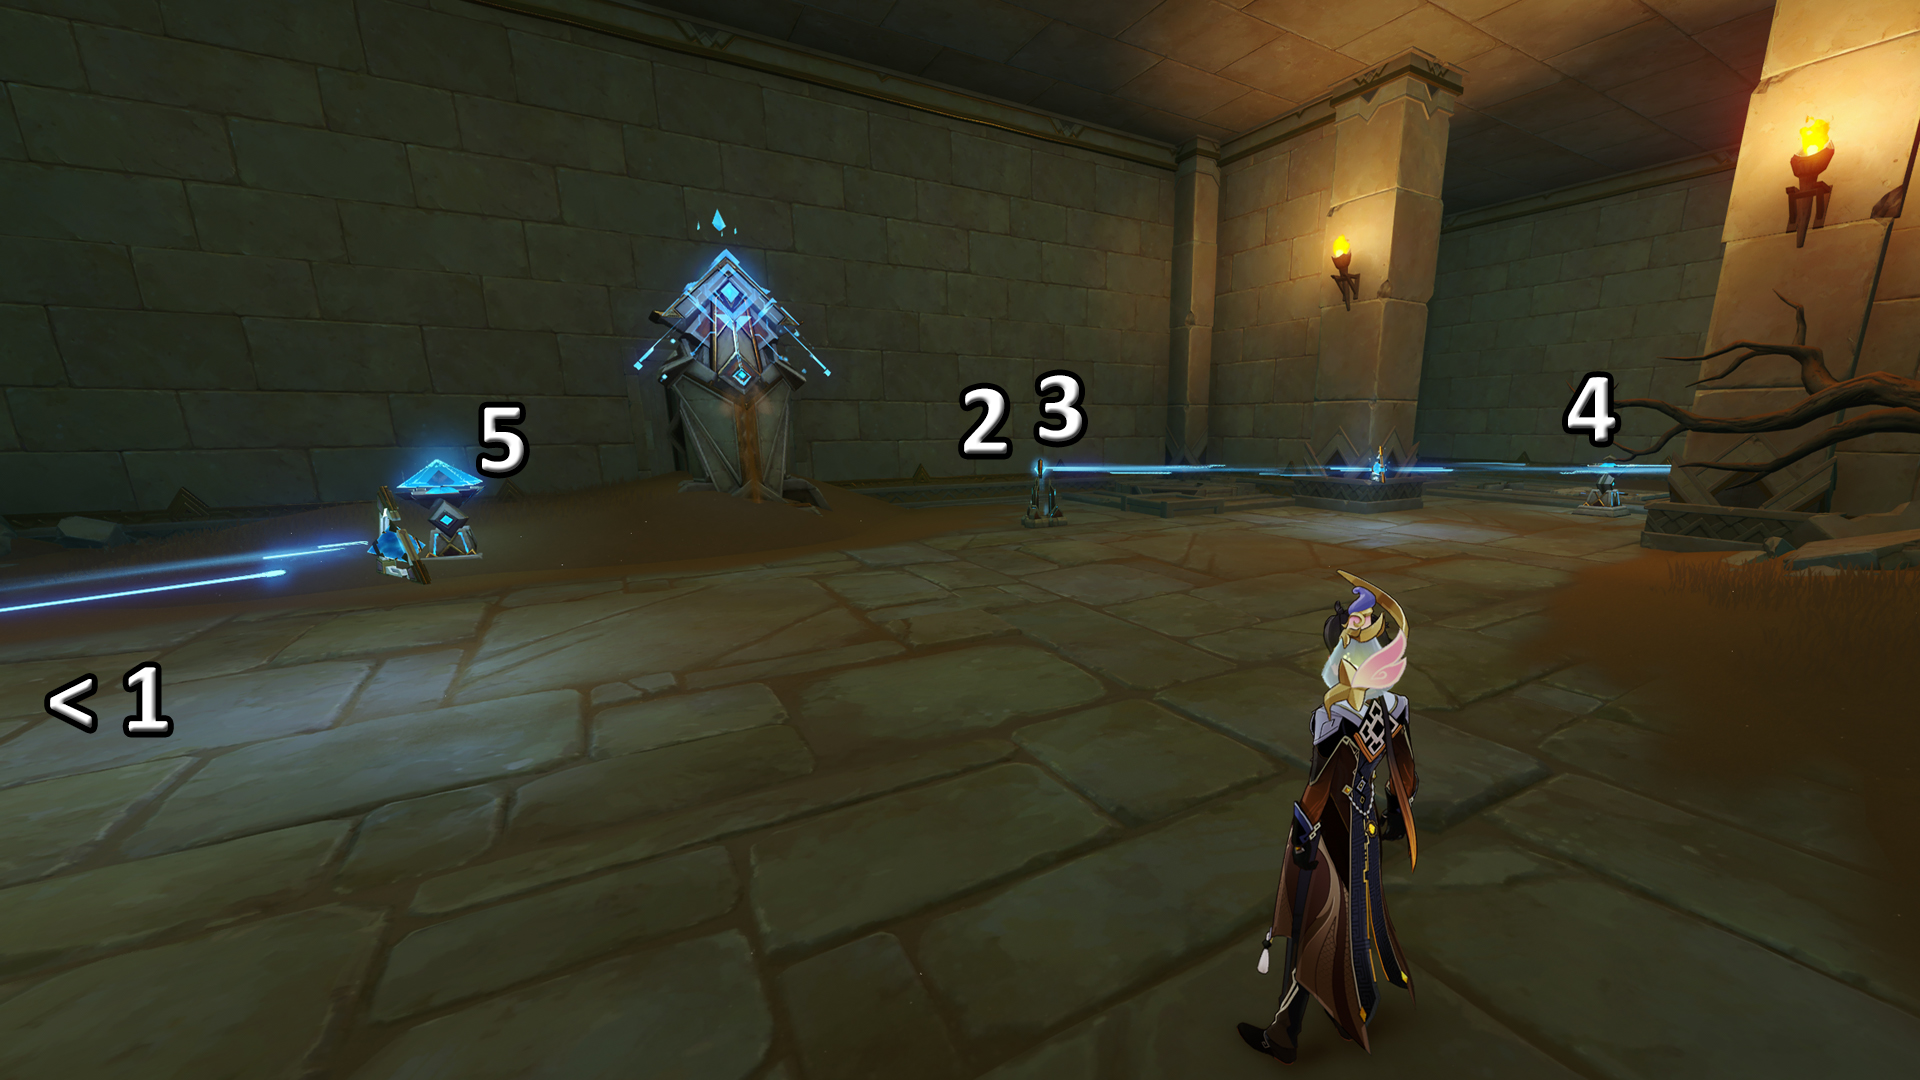
- There’s another puzzle here (see picture above). Rotate the beam on the left, then rotate the beam on the right. This will spawn a Common Chest. Use the beam on the right again to open the sealed door, then interact with the blue pillar behind it. Finally, interact with the blue pillar that spawns in the main room.
- Go upstairs and defeat the two Primal Constructs. Use the door mechanism, and the blue pillar behind it.
- Keep following the path forward, as it will lead you back to the start of this puzzle area. When you reach the room you’ve been to before, you can open the doorway in front of you.
- When you reach the staircase, drop down and turn around. There’s a tiny room below the stairs, which contains the Liloupar shard you need.
- Complete another combat challenge at the large stone square. It starts with two Primal Constructs again, and then throws a large Flying Serpent at you.
- Head outside to find an elevator platform. You need to fight off several waves of Primal Constructs before you can use it.
- After taking the elevator, follow the tunnel until you reach the Eternal Oasis. This will complete this section of the Genshin Impact Dirge of Bilqis World Quest.
The Dirge of Bilqis part 6: The Eternal Dream, Ever Lush
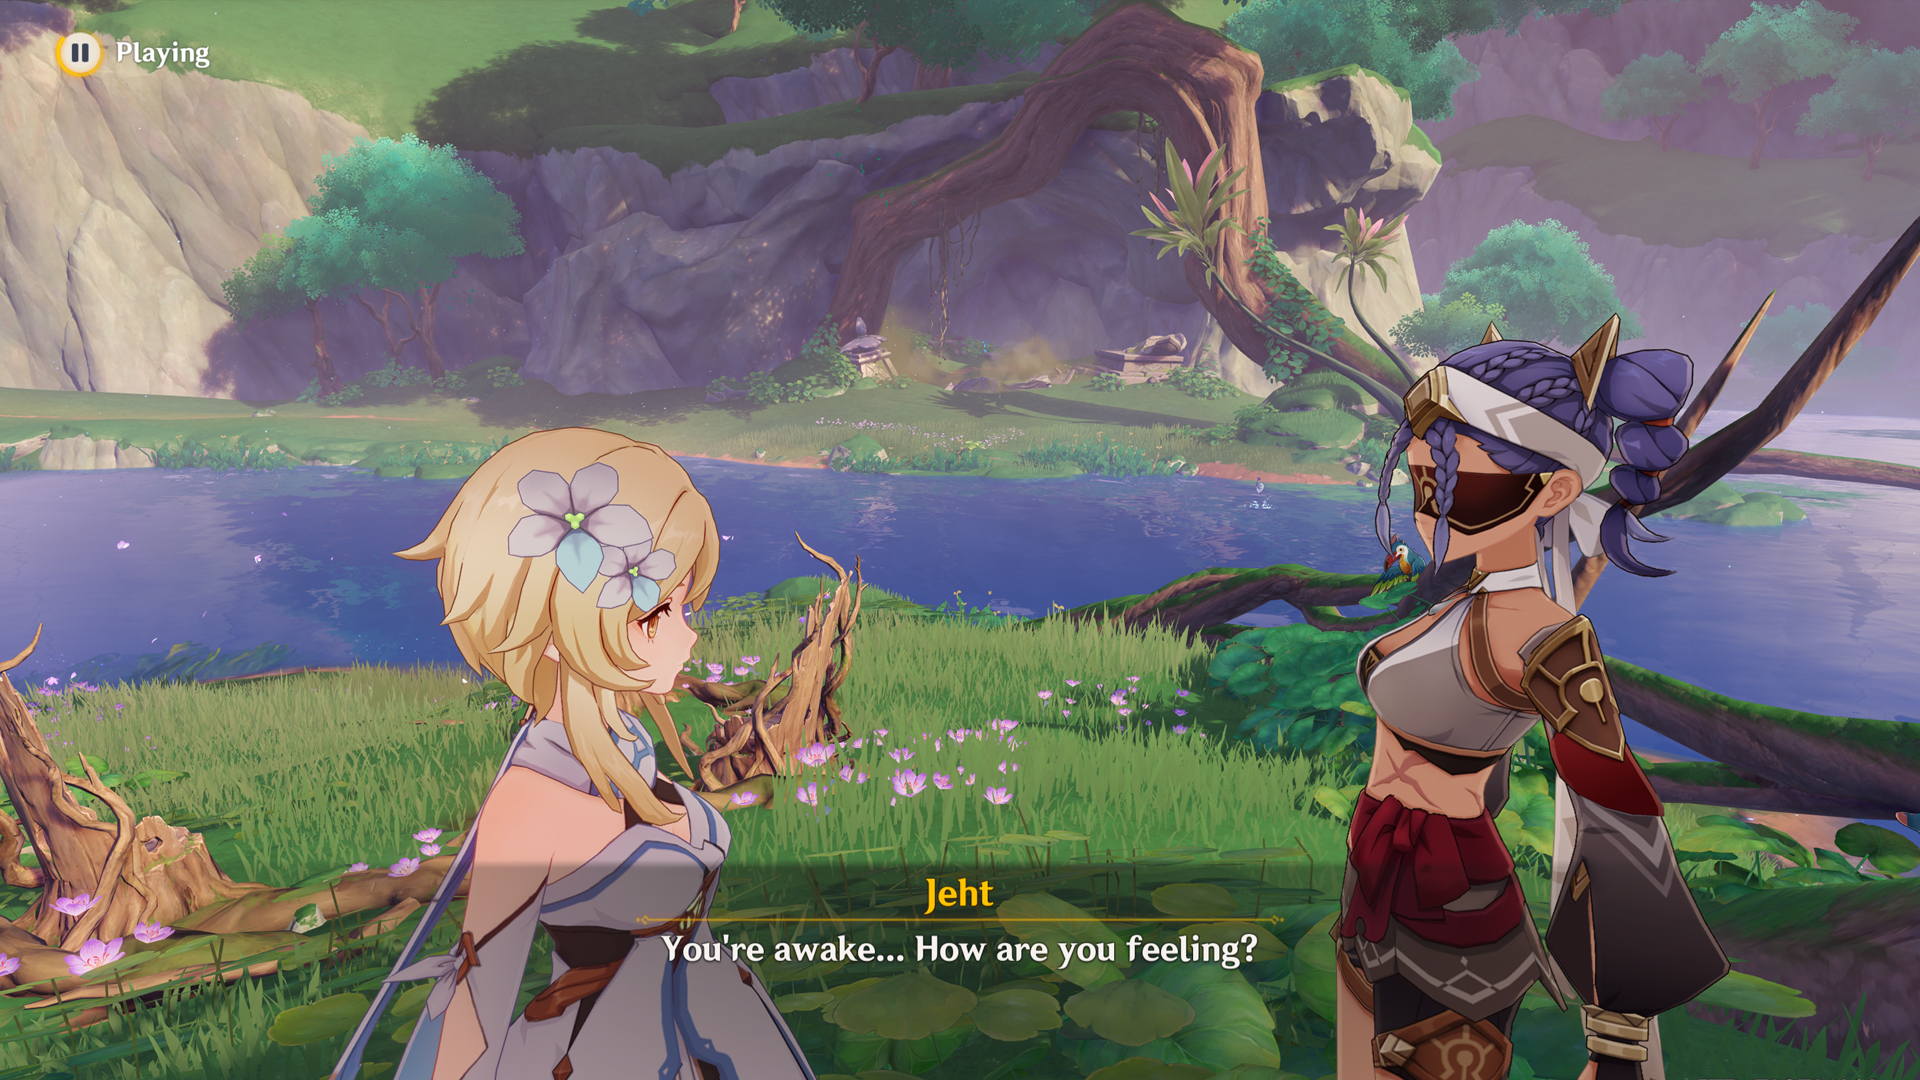
Once you’ve reached the Eternal Oasis, head over to the island in the middle of the lake and collect the final Liloupar shard. After this, all there’s left to do is accompany Jeht as she pays her respects to her parents. If you wish to read it, you can find her mother’s notebook on the ground. You might need a few tissues though!
Finally, return to Tanit Camps and speak to Babel. Congratulations, you’ve completed the Genshin Impact Dirge of Bilqis World Quest!
Sign up to the GamesRadar+ Newsletter
Weekly digests, tales from the communities you love, and more
I’m a freelance journalist who (surprise!) kind of has a thing for videogames. When I’m not working on guides for GamesRadar, you can probably find me somewhere in Teyvat, Novigrad, or Whiterun. Unless I’m feeling competitive, in which case you should try Erangel. You can also find my words on PCGamesN, Fanbyte, PCGamer, Polygon, Esports Insider, and Game Rant.

