Genshin Impact Minacious Isle puzzle Starlight Coalescence locations
Find enough Starlight Coalescence to solve the Minacious Isle puzzle

Looking for Genshin Impact Starlight Coalescence locations to solve the Minacious Isle puzzle? If you’ve been to the top of Minacious Isle, you’ve undoubtedly spotted the large constellation that’s pictured on one of the walls. To operate the nearby device, however, you need to collect the hidden pieces of Starlight Coalescence.
We’ll explain this further below, but it’s important to know that only eight Starlight Coalescence is required to solve the Minacious Isle puzzle. It’s possible that the other ten pieces may become part of other Golden Apple Archipelago puzzles, but that’s not the case at the moment of writing.
How to collect Starlight Coalescence in Genshin Impact
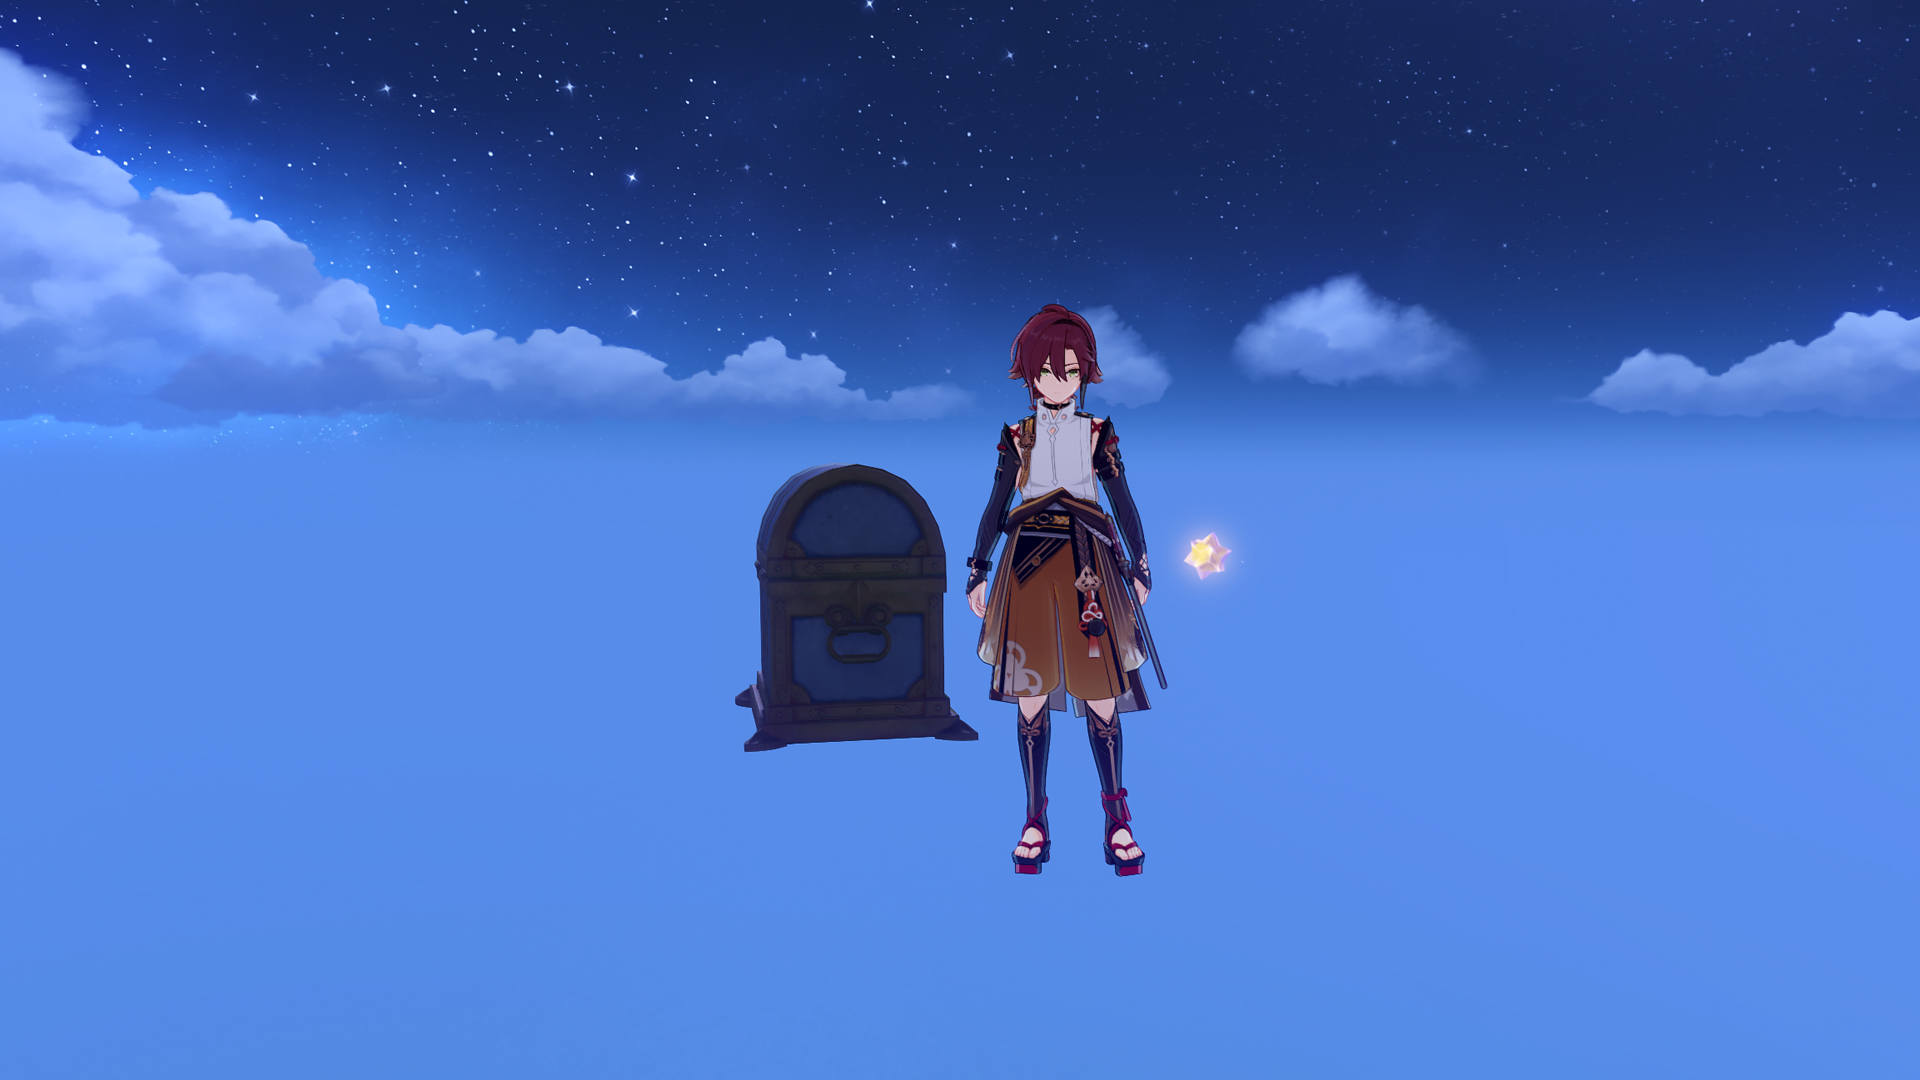
The Starlight Coalescence puzzle is located at Minacious Isle’s highest point, on top of the circular ruins. As you can see, there’s a constellation with eight stars pictured on the wall. If you can light up all the stars, you will be rewarded with no less than three Luxurious Chests.
It requires one Starlight Coalescence to light up a star. Since there are eight stars in the constellation, this means that you need to find eight of these sparkly floating orbs in total. The Starlight Coalescence is usually hidden in a cave, in the air, or behind a puzzle. To make the hunt a bit easier, we’ve listed every Starlight Coalescence location below.
Remember: although there are 18 locations in total, you only need eight Starlight to solve the Minacious Isle puzzle. It’s recommended to save location eight for last, as you will have to visit this place anyway. Locations nine and ten are only obtainable after solving the Minacious Isle puzzle, so they don’t serve much purpose at this point.
Genshin Impact Starlight Coalescence locations, map without ruins
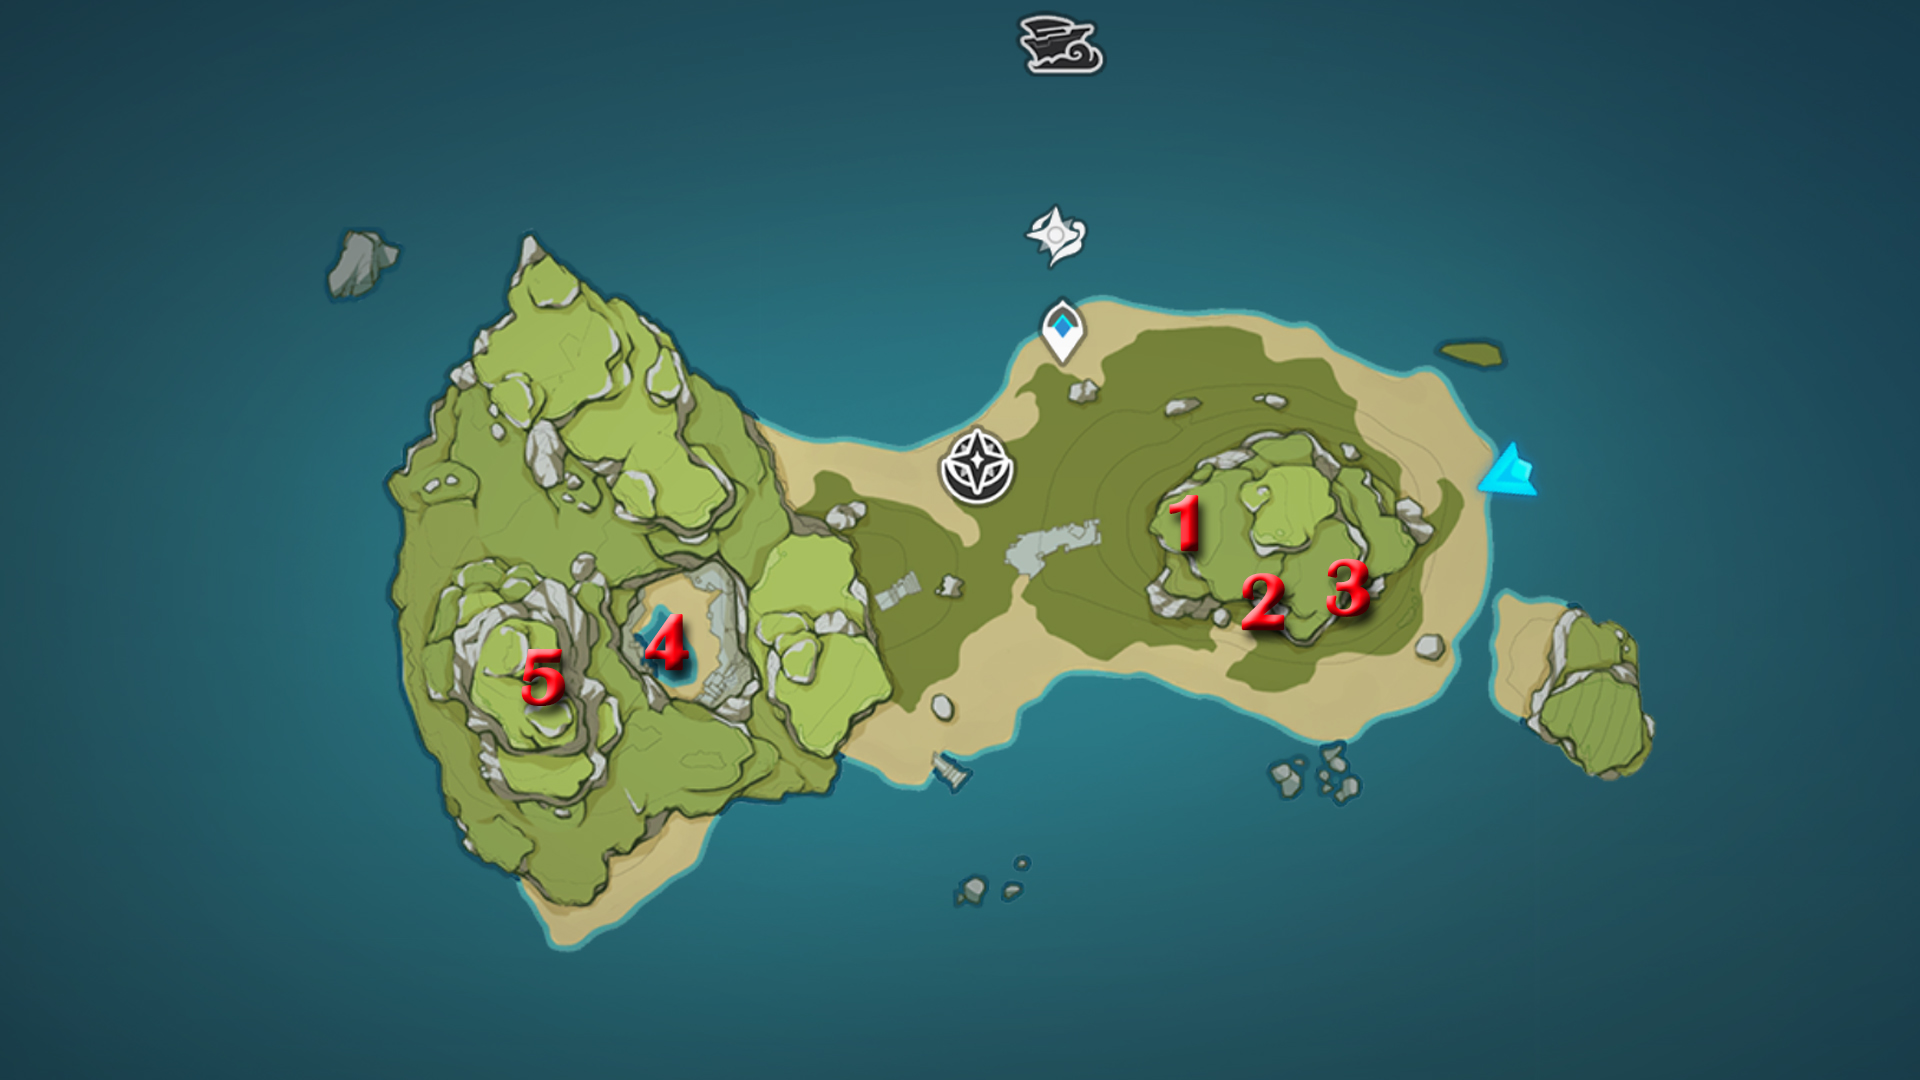
As you may have noticed, there are two versions of the Minacious Isle. You can switch between the maps using the Hydro portals that are scattered across the beach. We’ll start with the Starlight Coalescence locations on the smaller map, without the large ruins:
- Starlight Coalescence 1: walk up to the mountain from the west. You’ll see the image of a star drawn on the stone wall below the overhanging rocks. Interact with it to make the Starlight Coalescence appear. Chase it through a Hydro portal (changing the island) before you can pick it up.
- Starlight Coalescence 2: on a stone ledge, near the peak.
- Starlight Coalescence 3: walk up to the mountain from the southeastern corner, then break the pile of loose rocks. The Starlight Coalescence is beneath them. Follow the Starlight as it flies upwards.
- Starlight Coalescence 4 (three in total): solve the Elemental mechanisms puzzle near the pool (sea level, below the mountain). The correct order is: Pyro, Anemo, Cryo, Hydro. Hit the Anemo mechanism again to float upwards through the portal. You will find yourself on an invisible floor with a Luxurious Chest and three Starlight Coalescence.
- Starlight Coalescence 5: use the wind current again, but this time, glide towards the top of the large cave opening in the west. The starlight Coalescence is on a stone ridge.
Genshin Impact Starlight Coalescence locations, map with ruins
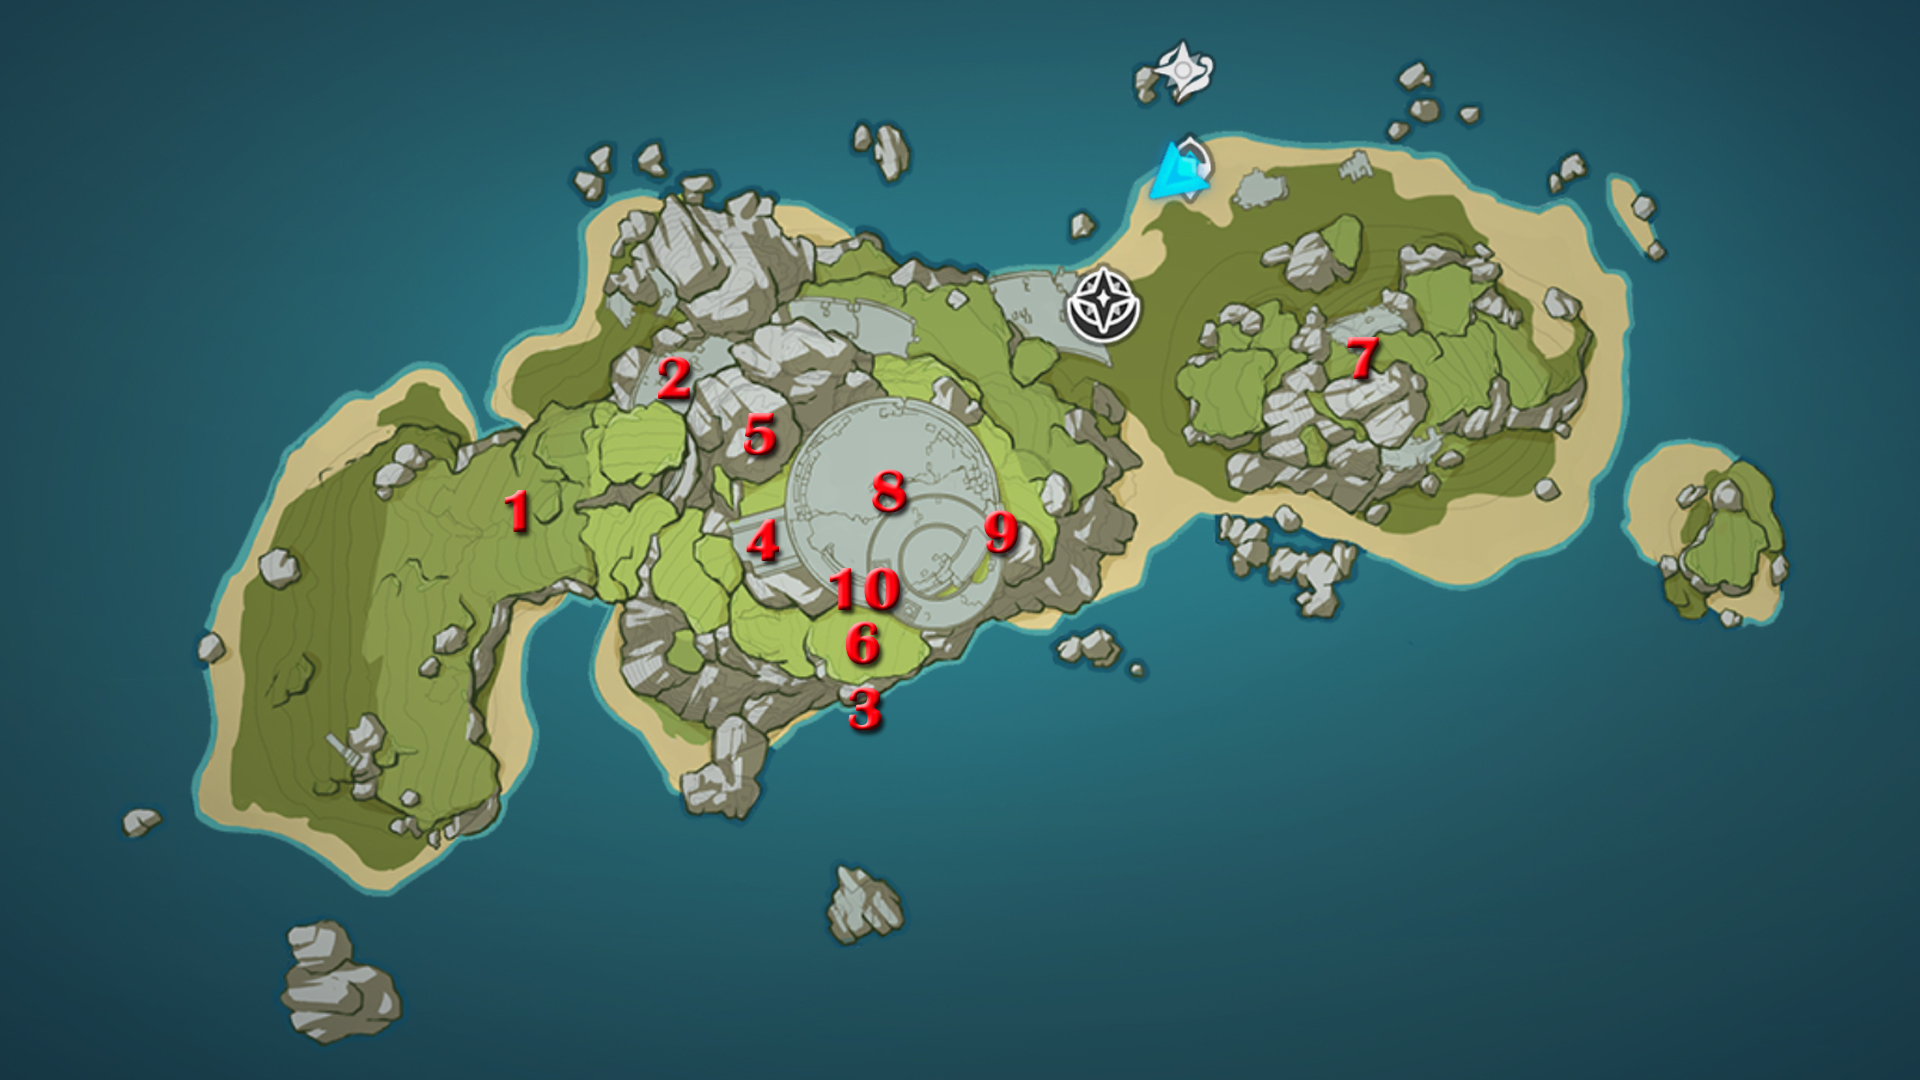
For these Starlight Coalescence locations, make sure you’ve activated the map with the large ruins. Here’s where to go:
- Starlight Coalescence 1: in the cave beneath the grassy slope. Go down to the beach to find an opening (either on the north or south side).
- Starlight Coalescence 2: inside a tiny cave filled with Hilichurls. The cave opening is not far above sea level; behind the wind current and right underneath the path that leads to the mountain peak.
- Starlight Coalescence 3: floating in the air. The best way to reach this Starlight Coalescence location is by gliding down from the nearby mountain.
- Starlight Coalescence 4: starting from the peak, jump down towards the west and pick up the floating Starlight Coalescence a little below the stone ruins.
- Starlight Coalescence 5: Go inside the mountain and touch the constellation on the wall. Follow it until it reaches the pressure plate.
- Starlight Coalescence 6 (two in total): Use the Hydro pool at the base of the circular stone ruins to teleport to the small island in the west. Fair warning: this is far from the easiest Starlight Coalescence location. If you’re set on finding the two stars in this location though, you should start by finding the Sea Salt Crusted Key inside the ruins, and then return to Minacious Isle to open a cage door inside the mountain.
- Starlight Coalescence 7: floating in the air. If you glide down from the higher peak in the west, you can land on an invisible floor (as seen in Mona’s Domain). Simply walk up to the Starlight Coalescence and grab it.
- Starlight Coalescence 8: solve the orb puzzle as shown in the picture below. You need two lines in the middle and four separate lines connecting from the outside. The Starlight Coalescence is inside the Chest.
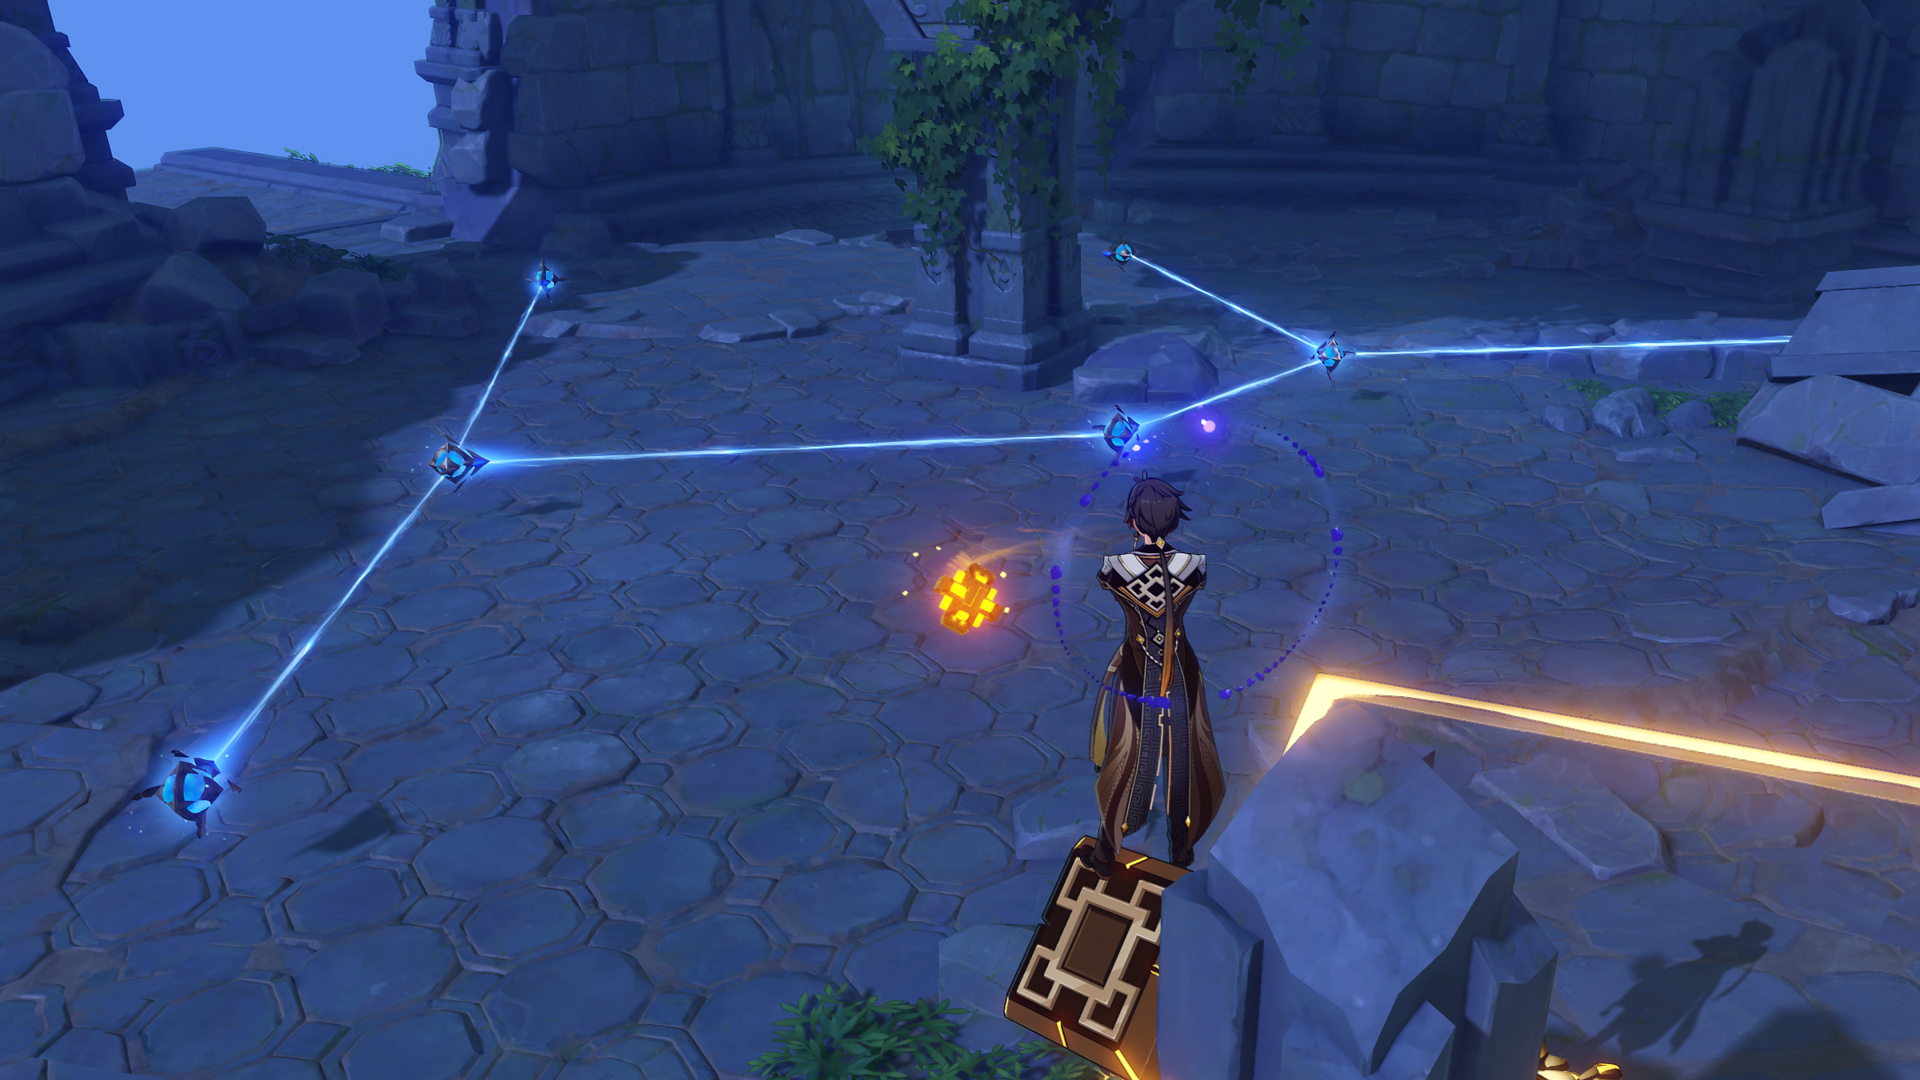
Bonus Starlight Coalescence, only obtainable after solving the Minacious Isle puzzle:
- Starlight Coalescence 9: on the broken, floating ruins opposite to the Minacious Isle Constellation puzzle.
- Starlight Coalescence 10: on top of a broken pillar, on the circular floating ruins above Minacious Isle’s peak.
How to solve the Minacious Isle puzzle
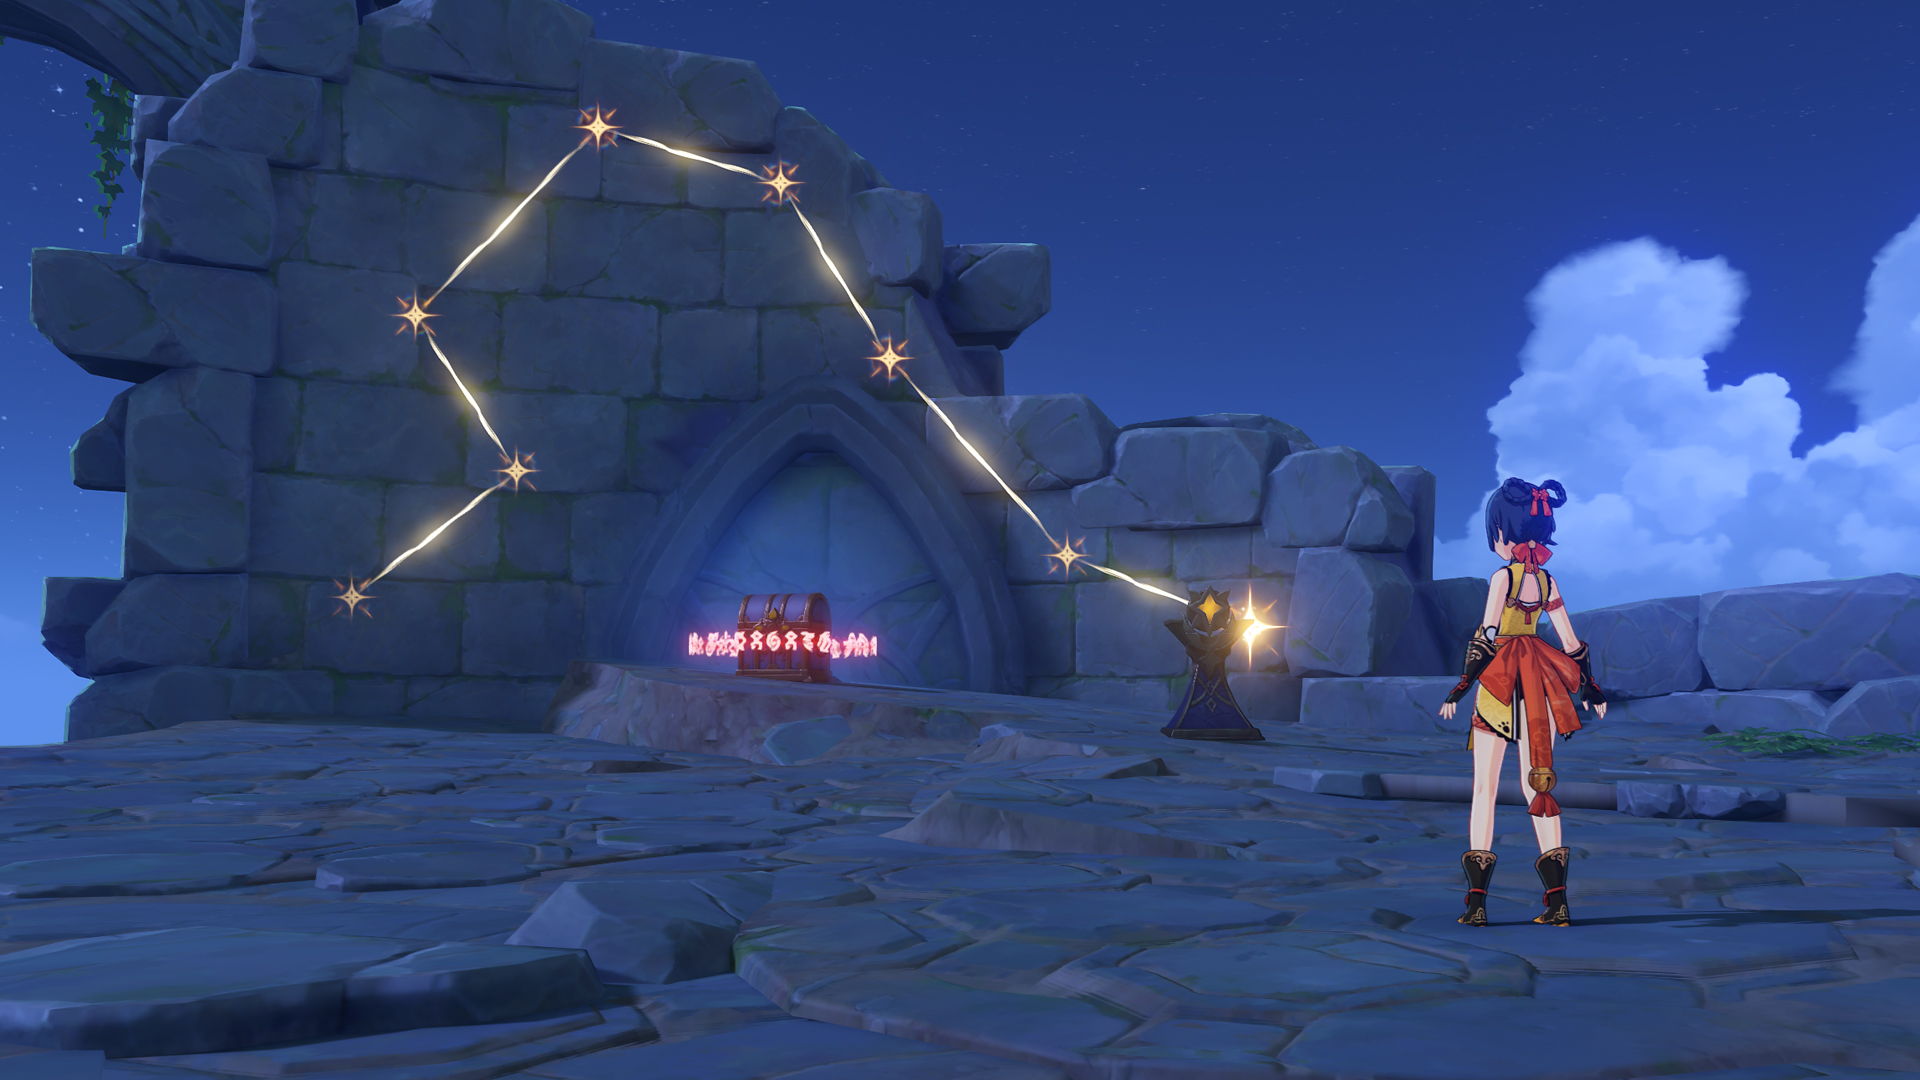
When you’re done collecting Starlight Coalescence, solve the Minacious Isle puzzle by inserting the stars using the nearby mechanism. Then collect the Luxurious Chest rewards. A new Starlight Coalescence will spawn from that same chest; follow it upwards using the transparent, glittery road (don’t follow it blindly though; make sure you stay on the path).
When you reach the circular stone ruins, open the second Luxurious Chest. Walk to the other side and follow the Star again. Be careful, as it will suddenly stop moving. Touch the Coalescent Star to transport to a new location, where you’ll find the third and final Luxurious Chest. As the Chest is still sealed, chase the Starlight Coalescence one more time to break the seal.
Congratulations, you’ve solved Genshin Impact Minacious Isle puzzle!
Sign up to the GamesRadar+ Newsletter
Weekly digests, tales from the communities you love, and more
I’m a freelance journalist who (surprise!) kind of has a thing for videogames. When I’m not working on guides for GamesRadar, you can probably find me somewhere in Teyvat, Novigrad, or Whiterun. Unless I’m feeling competitive, in which case you should try Erangel. You can also find my words on PCGamesN, Fanbyte, PCGamer, Polygon, Esports Insider, and Game Rant.
