How to use the Fortnite replay mode
Capture all your best sides, and best moments, with our guide on how to use the Fortnite replay mode
Have you ever wanted to share your awesome Fortnite killstreak with your friends? Well, thanks to the extensive Fortnite replay mode, now you can. Here’s a quick Fortnite replay mode guide on how to bring your footage from zero to hero.
How to find the Fortnite replay mode
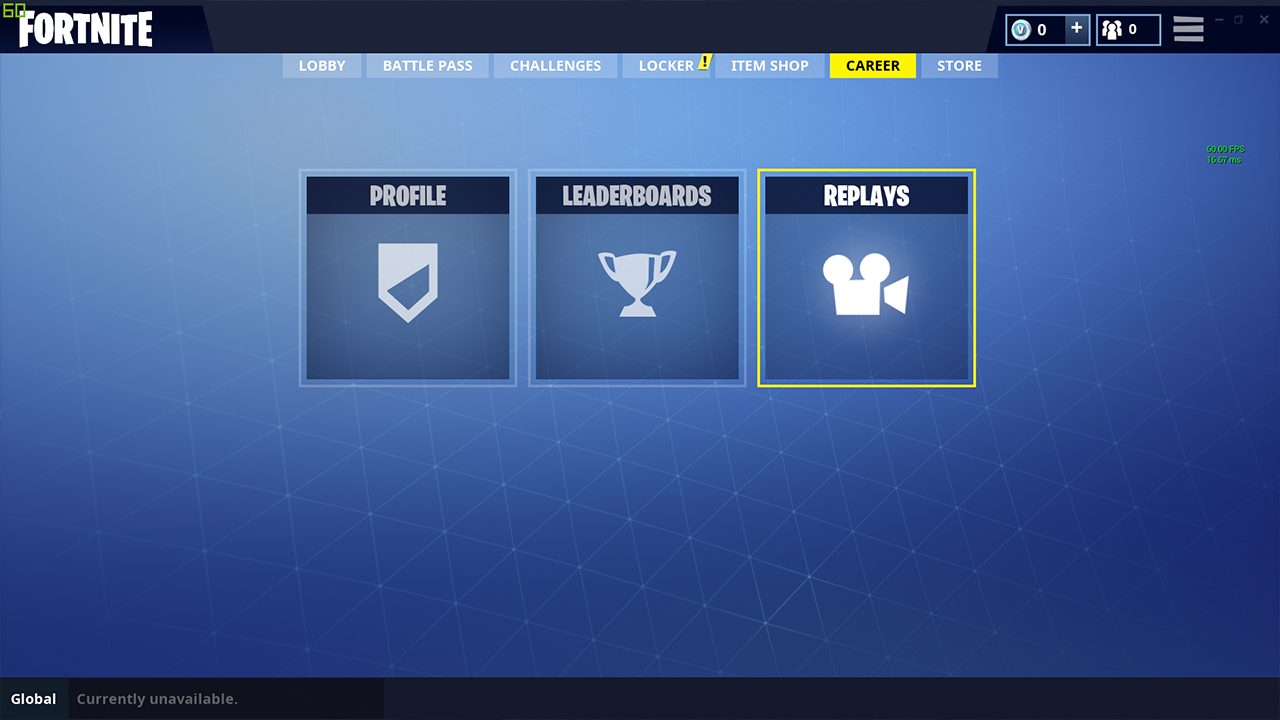
First off, let’s make sure you’re actually in the right screen. To access the game’s replay mode, from the Battle Royale menu, go to the Career tab, then choose the Replays option on the right. You’ll then see your list of unsaved replays. Not exactly the most straightforward option, but it’s there, hidden away. Within the Fortnite replay mode, you’ll see a buffet of options - though most are intuitive, we’re going to go over all of them.
How to manipulate your footage in Fortnite replay mode
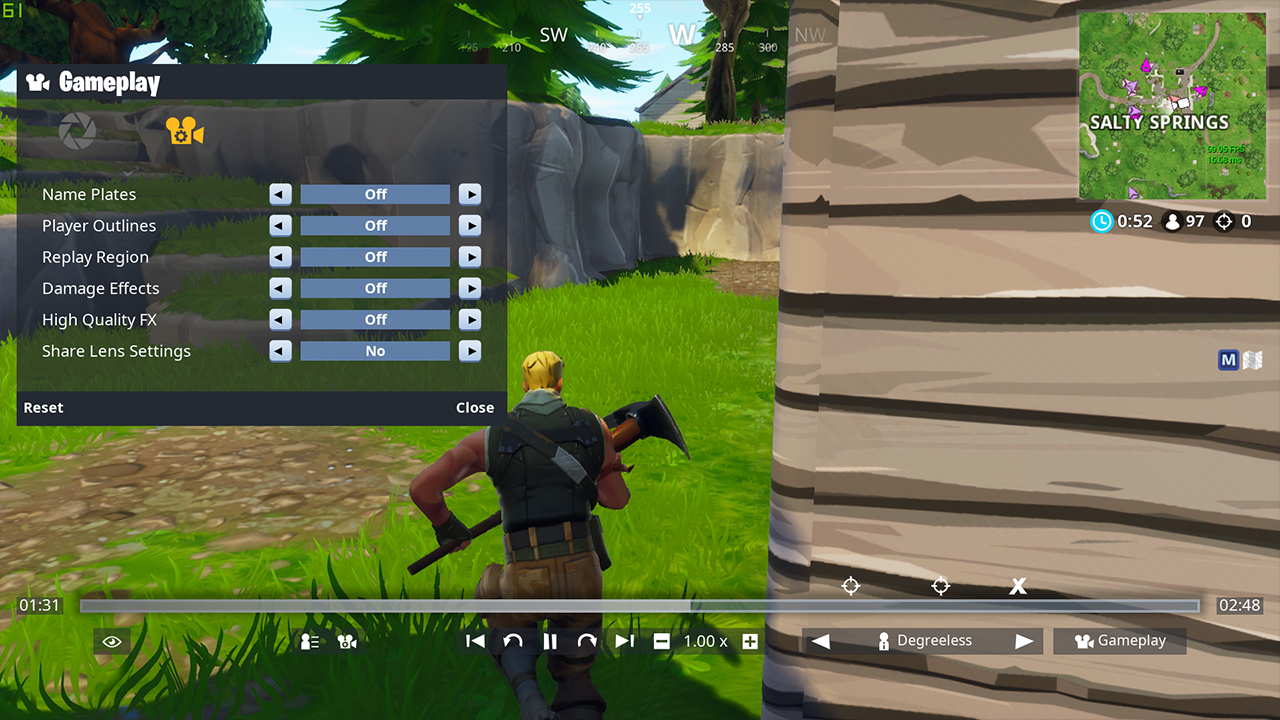
The eye allows you to hide the HUD, which gives you a better sense of what your final replay will look like; pressing H lets you cycle through the different options. The tiny person brings up a list of players that includes their data, including their health and shields - clicking on one of them allows you to make them your subject and follow their perspective. The camera is two-pronged - it lets you adjust some visual goodies, including nameplates, but it also lets you adjust finer aspects of the image, such as focal length. These might sound like cinema-speak to you, but if you mess with them enough, you can get a lot of mileage from a little fiddling.
Next, we come up to the playback bar. The arrows on each end pull you to the beginning and end of the footage, or between milestones, such as an elimination or death. These are marked on the bar that shows the length of the footage - for example, a crosshair indicates a kill. Going inward a bit, the curved arrows jump backward or forward 15 seconds. You can also pause or play the footage, or slow it down or speed it up with the minus/plus buttons.
- Fortnite tips
- Fortnite building guide - How to build the best defences
- Fortnite leaks: All the rumours in one place
How to find the best camera angle in Fortnite replay mode to show off your achievements
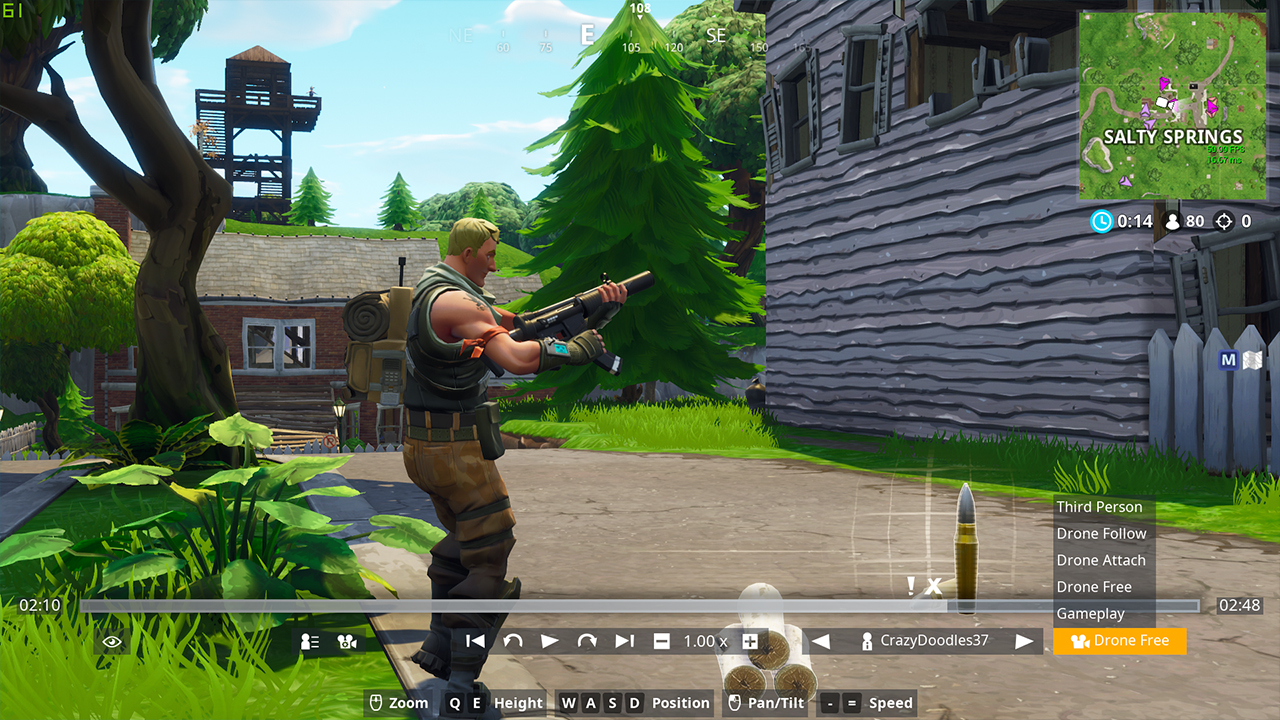
Most important, however, is the subject you’re choosing to view the footage from. You can cycle through that with the player indicator to the right of the playback bar, and you can shift the perspective with the camera options to the right of that.
These camera angles contribute more than anything to the look and feel of your replay, so it’s best to get to know them well. Third Person follows your subject at an easy, flat, close-on angle, suitable for inside buildings or tight-quarters encounters between shotgunners.
The Drone angles allow you to get more cinematic angles with a bit of fiddling, but they can be more difficult to use. Drone Follow traces your subject’s movement from a static position as you fly the camera to keep up. Drone Attach tries its best to follow your subject in an over-the-shoulder view that you can adjust with your controls. And Drone Free gives you the full reins, taking away all of the automatic compensators.
The final one, Gameplay, is the most self-explanatory - it follows the over-the-shoulder view that the player actually had in-game, which is a good “default” to go back to if your subject runs out of frame. If you want to feel like Steven Spielberg, using keyboard shortcuts to switch between the angles on-the-fly produces the most cinematic results.
The best Fortnite replay mode shortcuts on PC
Speaking of keyboard shortcuts, here are a few useful ones. C cycles through camera angles - as do the number keys 1-5 - and R resets the camera behind your subject. When controlling the drone, your typical WASD controls the position in horizontal space, Q and E adjust the height, the mouse pans up or down, and minus/plus controls the speed. Comma and period cycle through players. If you’re looking for some easy cinematography, using your mouse-wheel to adjust focal-length on the fly is a great way to bring character to a firefight - the shorter you go, the more wonky and “fisheye” the scene will get, so it’s best used close-on. (You can also adjust them with X and Z).
Sign up to the GamesRadar+ Newsletter
Weekly digests, tales from the communities you love, and more
