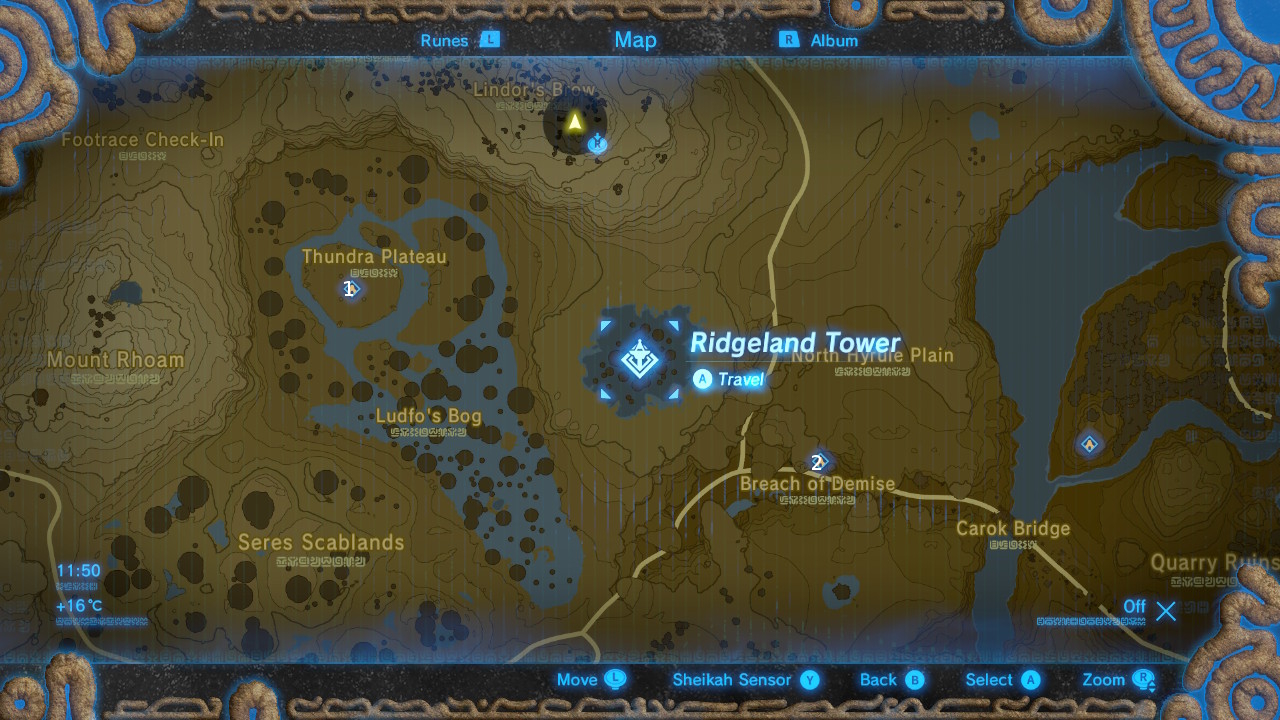
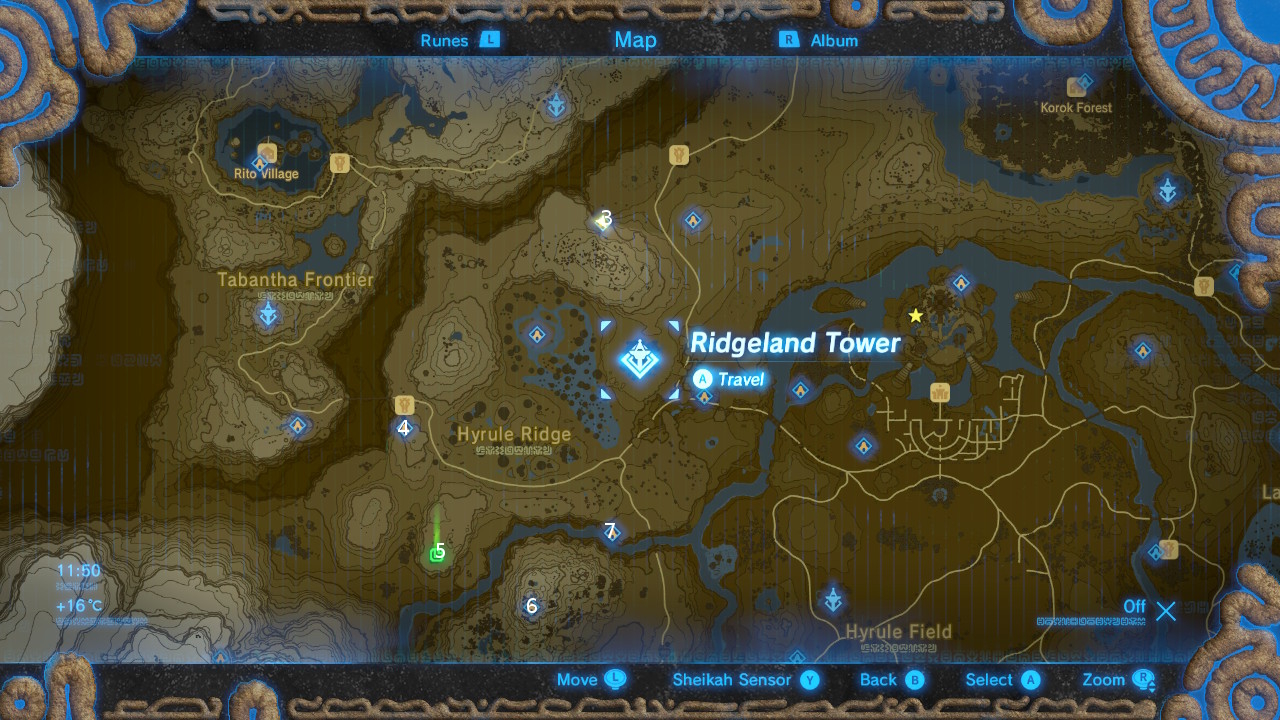
Ridgeland Tower
#1 - Toh Yahsa Shrine

The shrine quest will begin as soon as you set foot on the main part of Thundra Plateau.
The aim is to climb to the central section - made all the more difficult because of the rain - and pop the four orbs onto the pedestals with the matching symbols.
Two orbs are on top of statues outside it the central ring. You can shoot them off with arrows, or climb up using the offset rocks to recharge stamina as you scale their slipper sides.
You can use Stasis to knock the orbs into the central area.

If you're struggling there's a raised grassy area close to the shorter statue with the orb on that you can use to drop the orbs on before you use Stasis to hit them into the middle.

Once you've knocked them in, climb into the central area making the most of jutting rocks to recharge your stamina for the big jumps you need to make to counteract the effect of the perpetual rain.
You'll need to get third orb down from the top of a pillar here.
Once you've done that, it's easy enough to match the colour coded orbs with the symbols on the pillars and get them into their pedestals to reveal the shrine.
Enter the shrine and use bombs to blow up the destructible rocks to find a chest directly underneath the shrine entrance, a floor switch, and a metal cube.
Use Magnesis on the cube to nudge a second chest from the top of the column on the right.
With your treasure snuffled up, move the metal cube into the gap between the small platform and the larger one so that you can hop over to the first level of the large one.
If you can do manage it, move the cube onto the floor switch from here to lift th gate to the altar, scoot up the firt ladder, get rid of the rocks, and climb up the next ladder to the altar.
If you struggle, climb up the first ladder before moving the cube onto the floor switch.
#2 - Zalta Wa Shrine

Jump off Ridgeland Tower facing southeast and glide down into the Breach of Demise. You'll get eyes on the shrine as you descend.
Enter the shrine and look to the right to see an orb on a pedestal. You can shoot it down and into its hole with an arrow, or use a bomb to displace it onto the floor of the main room and lob it.
Pick up the newly-revealed second orb and stand on the floor switch to the left. This will raise the gate allowing you to throw the orb through to the hole on the other side.
Stand on the launcher next to the crystal. To get into the middle of the platform, hit the crystal as the platform moves towards you and glide into it.
Head to the top of the moving platform and up the ramp to the left. Look down to see a chest on top of the room where you threw the second orb into. You can glide down to open it, then repeat the process to get back up here, and continue on to the altar.
#3 - Maag No'Rah Shrine

The quickest way to get here is to jump off Hebra Tower and glide southeast. You'll spot an outpost with a high lookout long before you reach ground level. That's where we're headed.
Otherwise, it's on the northern lower edge of Lindor's Brow.

Look up at the rock face and you'll see some dark destructible rocks.

Climb up to the ledge just above them and throw down a bomb. Detonate it next to the rocks to reveal a cave with the shrine inside.
You can head straight to the altar when you enter.
#4 - Shae Loya Shrine
This shrine is directly to the south of Tabantha Bridge Stable, overlooking it from a nearby cliff.
The stable is on the east side of the bridge spanning Tanagar Canyon, connecting Tabantha Frontier and Hyrule Ridge.
Once inside, stand on the launcher and freeze the large orb with Stasis. Hit it with a couple of arrows and when it unfreezes, it'll be pushed back, rolling down into its groove, and activating the launcher.
When you're launched into the air, look to the right to see a chest on a platform. Aim your bow to enter slow motion and shoot through the ropes holding the wooden platform up to drop the chest.
To get the second chest, when you're sent skyward, glide straight ahead to the launcher the orb was on. The chest is on a small ledge behind it.
Finally, get back on the launcher and this time, look to left while you're airborne to get eyes on a crystal in an alcove in the wall. Shoot it to open the gate to the altar.
#5 - Mijah Rokee Shrine

Make your way to Washa's Bluff, southeast of Ridgeland Tower.
Talk to Kass, at the top of tallest mushroom rock to start the Under a Red Moon shrine quest.

There's a pedestal below him. The objective is to stand on it during a Blood Moon - which is anytime between 9PM and 1AM - with no armour on and nothing whatsoever equipped.
If you don't want to wait for a Blood Moon to occur, you can pass time by a campfire in an attempt to prompt its appearance. To save on supplies, this is much easier if you have a flame weapon to hand. Wait until nightfall (9PM) and if the pedestal isn't glowing, rinse and repeat.
There's a Guardian Scout III inside with 1500 HP and two '+' melee weapons.
#6 - Mogg Latan Shrine

Mogg Latan shine is out in the open, to the southwest of Ridgeland Tower. It's across the river, on the south side of the top of Satori Mountain.
Enter the shrine and cross the first gap by hopping across the swinging platform. Use Magnesis on the next platform to make it start swinging and jump across.
Shoot the ropes holding the bridge in place to lower it. Nip over to the right to open the chest, then head to the left side of the room.
Use Magnesis to move the spike metal boulders out of the way, being careful not to set them swinging. You don't want to get knocked into the abyss below. There's a second chest at the end of this walkway.
Now use Magnesis to draw the metal platform close enough for you to get on. It'll slide back to the left once you stop using Magnesis.
Use Magnesis again to pull the stack of metal platforms towards you, forming stairs. There's a chest on a platform just behind them, so glide over and open it. You can rearrange the metal platforms from here to make steps up back up, so that you can jump over to the next part of the level.
You need to burn the ivy to reveal the altar, so either hit the crystal to drop hanging lanterns, or shoot a fire arrow into it.
Use Magnesis one last tie to open the double doors and get to the altar.
#7 - Sheem Dagoze Shrine

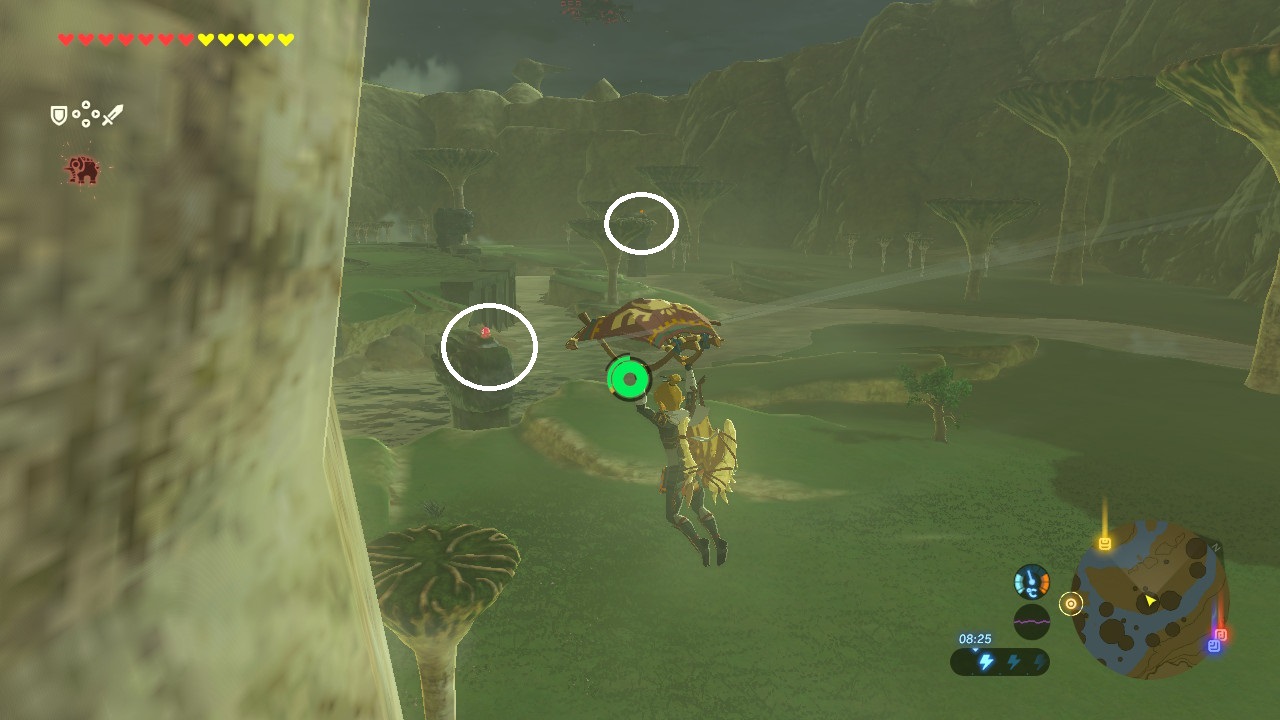
Find Kass on the north side of Jeddo Bridge, south of Ridgeland Tower, and talk to him to kick off The Two Rings shrine quest. He'll explain that you need to shoot an arrow so that it goes through the holes of two rocks.
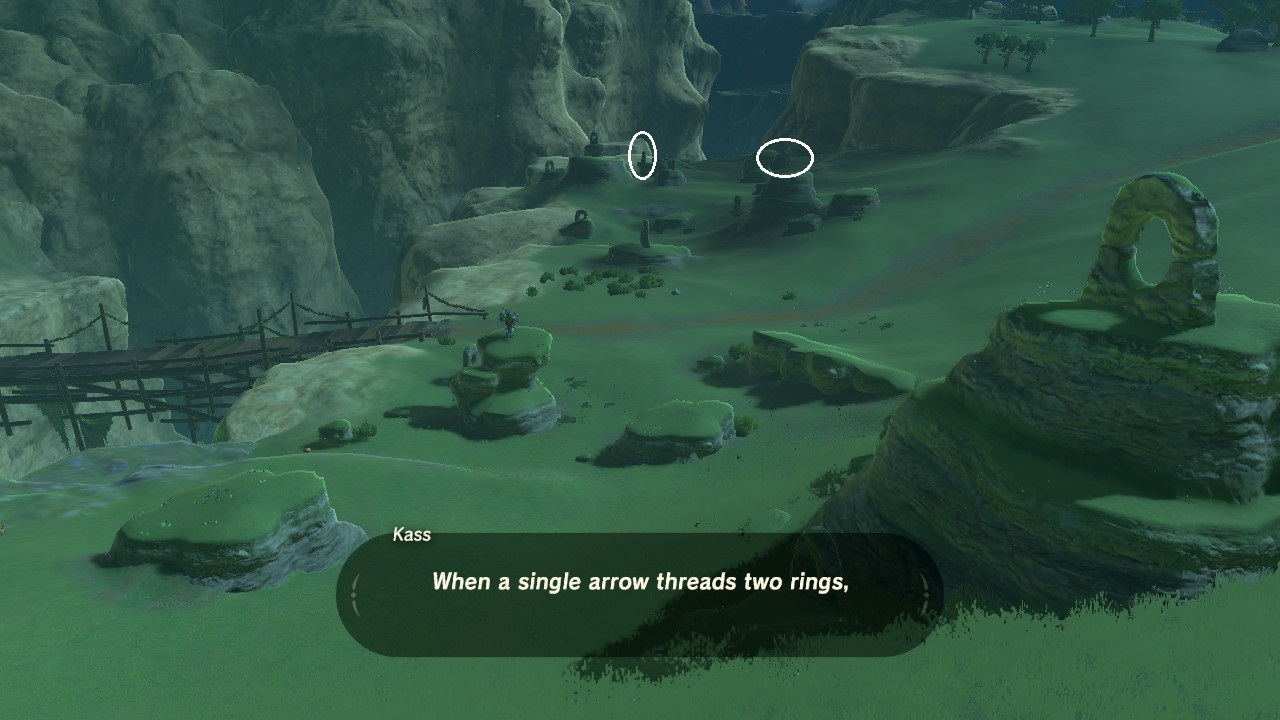
The one you want to aim from is on the opposite side of the rock formation to Kass (on the right in the picture above, obscured by a rock), and you're aiming for the one circled on the left.

Shoot an arrow through the holes to reveal the shrine.
Inside, stand on the left floor to tilt the platforms down to the right so that the orb roles into its pedestal.
To get the next orb into place, you need to step onto the right floor switch, and once the orb rolls off its starting platform, run to the left floor switch to tilt everything the other way.
When it rolls off the second platform, run back to the floor switch on the right to guide it to its pedestal.
Before you leave, glide down to the platform between the two pedestals to find a chest. The floor switch here will activate the moving platform to take you back up to the altar.
Jump to Section: