The Legend of Zelda: Twilight Princess - updated hands-on
With Midna in tow, we set out for the game's second dungeon
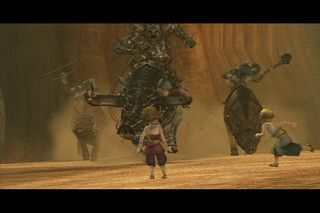
As with normal encounters, you use the remote to swing Link's sword, but now it matters whether you swing it left or right - the tubby monster guy's brought some backup, surrounding Link on all sides, so you'll have to whirl that sword like crazy to get them off your trail. Meanwhile, the main dude's riding off with your friend from Ordon - get to choppin'!
First you've got to knock the goblin thingies off their rides, then dismount and slice them to bits. It's kinda hard to duke it out with four enemies at once, especially when most of them are trying to run you down with their monstrous steeds. You can lock on to enemies while still riding, but with no bow and arrow yet, this specific brawl requires more up-close methods.

When the henchmen are done, their leader bursts through a roadblock onto a bridge - the same bridge that we've been seeing in trailers for more than two years now. He takes up one side, Link the other, and you race towards each other in a one-on-one duel. If you miss, you're sent flying off the bridge and it's back to square one. Riding to one side and slashing him took a little practice, but after a few precise hits, the horned menace goes careening into the abyss. But will he stay dead?
The little boy you saved ends up in recovery, but Link has to press on to Death Mountain and figure out what's got the Gorons all worked up. Along the way, it's expected that you'll find more ways to restore Hyrule.
Sign up to the GamesRadar+ Newsletter
Weekly digests, tales from the communities you love, and more
A fomer Executive Editor at GamesRadar, Brett also contributed content to many other Future gaming publications including Nintendo Power, PC Gamer and Official Xbox Magazine. Brett has worked at Capcom in several senior roles, is an experienced podcaster, and now works as a Senior Manager of Content Communications at PlayStation SIE.
Most Popular
