Transformers: War for Cybertron Emblem Guide
Roll out and collect every hidden Autobot and Decepticon emblem in the game
36. Checkpoint: Omega’s Holding Cell
Just after the start of the chapter a little ways, you will pop three locks on a door and then run into some cloakers. Kill them and then head to the left of the next door you see. In the corner, across from the ramp leading up, will be a doorway with bars across it. Smash through to find the first emblem inside.
37. Checkpoint: A Plague of Corruption

This emblem is a clever girl. When you encounter your first spaceslug, you will come to two batches of metal cables. Prime’s Fist icon will show up on both, so pull it out – your axe I mean – and smash through the left batch of cables. Simply head along the walkway, jumping over the gaps and the emblem will be awaiting your arrival at the end.
38: Checkpoint: Cybertron Slugs

After a large battle, another Slug will make its appearance known. After it does its thing, hop down the hole in the floor and drop all the way to the bottom. As you land, turn around to find another door that is covered by bars. Shoot the emblem through the bars and a cut scene will start.
39. Checkpoint: Sea of Corruption
Weekly digests, tales from the communities you love, and more

After the Slug has been saved on the bridge – you did save it, right? – head to the elevator and go for a ride down. Once at the bottom, follow the ramp down and make a right at the bottom. You will need to hop over some energon to the next rocky platform there. Once on it, look across to find the emblem in the back.
40. Checkpoint: Sea of Corruption

When you enter the area that is flooded with energon, you will need to shoot the rocks on the ceiling so that they fall and give you conveniently placed platforms. To find the emblem here, make your way to the center platform where the door is and then head to the right of it. Shoot the rocks for your path and you’ll find the emblem by a slug that is hanging out on the wall.
Chapter 9 %26ndash; Arial Assault
41. Checkpoint: Attack on the Relay Station

As you start the chapter, you will need to follow the beam through some rings and tunnels. The very first tunnel you enter will be all red and molten-ish. As you enter, look to the right/center for the emblem, where a metal plate comes loose. You can alternatively keep going straight as you enter the tunnel and go right through the emblem instead of hooking left as the other Autobots do.
42. Checkpoint: Coolant Chamber
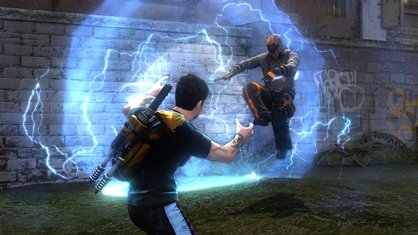
When you enter the cooling system, you will come to some sentries that are guarding a vent door that needs to be blown open, just past the control bubble. Before you shoot open the door, there is a door to the left that houses an emblem inside it. Give that opening a good barrage of bullets and collect your reward.
43: Checkpoint: The Nerve Center
Once you have made your way through the tunnels. You will come to a large room with turrets and the Pulse Regulator. Look up, way up, to the large tube that spans the ceiling and there will be an overshield and the next emblem on top of it.
44. Checkpoint: Approaching Trypticon

When you enter the large room with numerous turrets scattered about, a flood of Decepticons will enter. Clear out everyone and the Access Lift in the center of the room will rise with its orangey glow. To find the emblem, hop on top of the access lift and look to the left. Look for 2 boxes sitting on a ledge and the emblem will be cowering behind there.
45. Checkpoint: Inside Trypticon
Once you enter Trypticon – you’ll know because he never shuts up – you’ll be faced with another swarm of Decepticons. There will be tanks and Demolishers as well to make things more interesting. Once everyone has exploded into little itty bitty robo parts, head to the front of the room and take a look down into the first opening in the floor to find the emblem there.
Jeff McAllister is a freelance journalist who has contributed to GamesRadar+ over the years. You'll typically find his byline associated with deep-dive guides that are designed to help you scoop up collectibles and find hidden treasures in some of the biggest action and RPG games out there. Be sure to give Jeff a thanks in the comments while you're completing all of those tricky Achievements and Trophies.
